Reading time is around minutes.
The Layout -
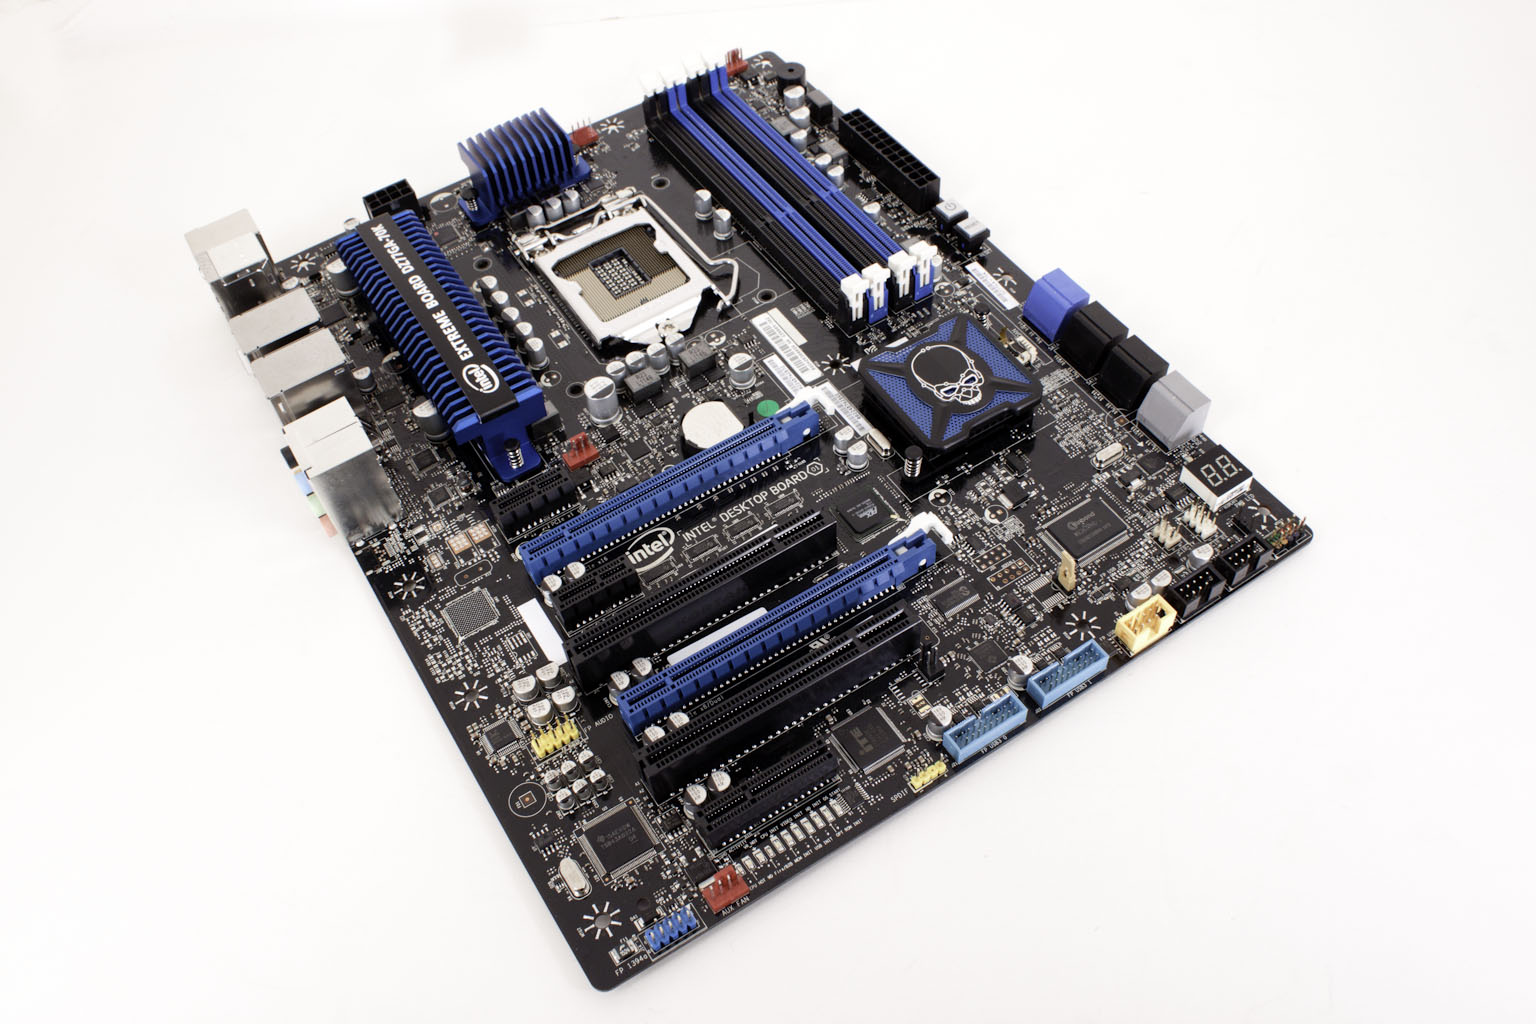
The layout of any motherboard is important. Even simple mistakes in component placement or the signal traces can cause major issued in performance and stability. With the ATX form factor we find that this is even truer; the devices we drop onto them demand more and cleaner power while the signal speeds push faster and faster No surprise here the DZ77GA-70K is an ATX style motherboard, but Intel has chosen to not pack it with too much. On many other standard ATX motherboards you can almost have too much going on which leads to instability and (at times) overheating. Here we find a clean layout which lends to a good looking board. Starting off at the top right of the board we find the typical RAM and power layout (24-pin ATX power, four RAM slots etc.). There are also power and reset buttons here for anyone that might want to use this on an open test bench (like us).
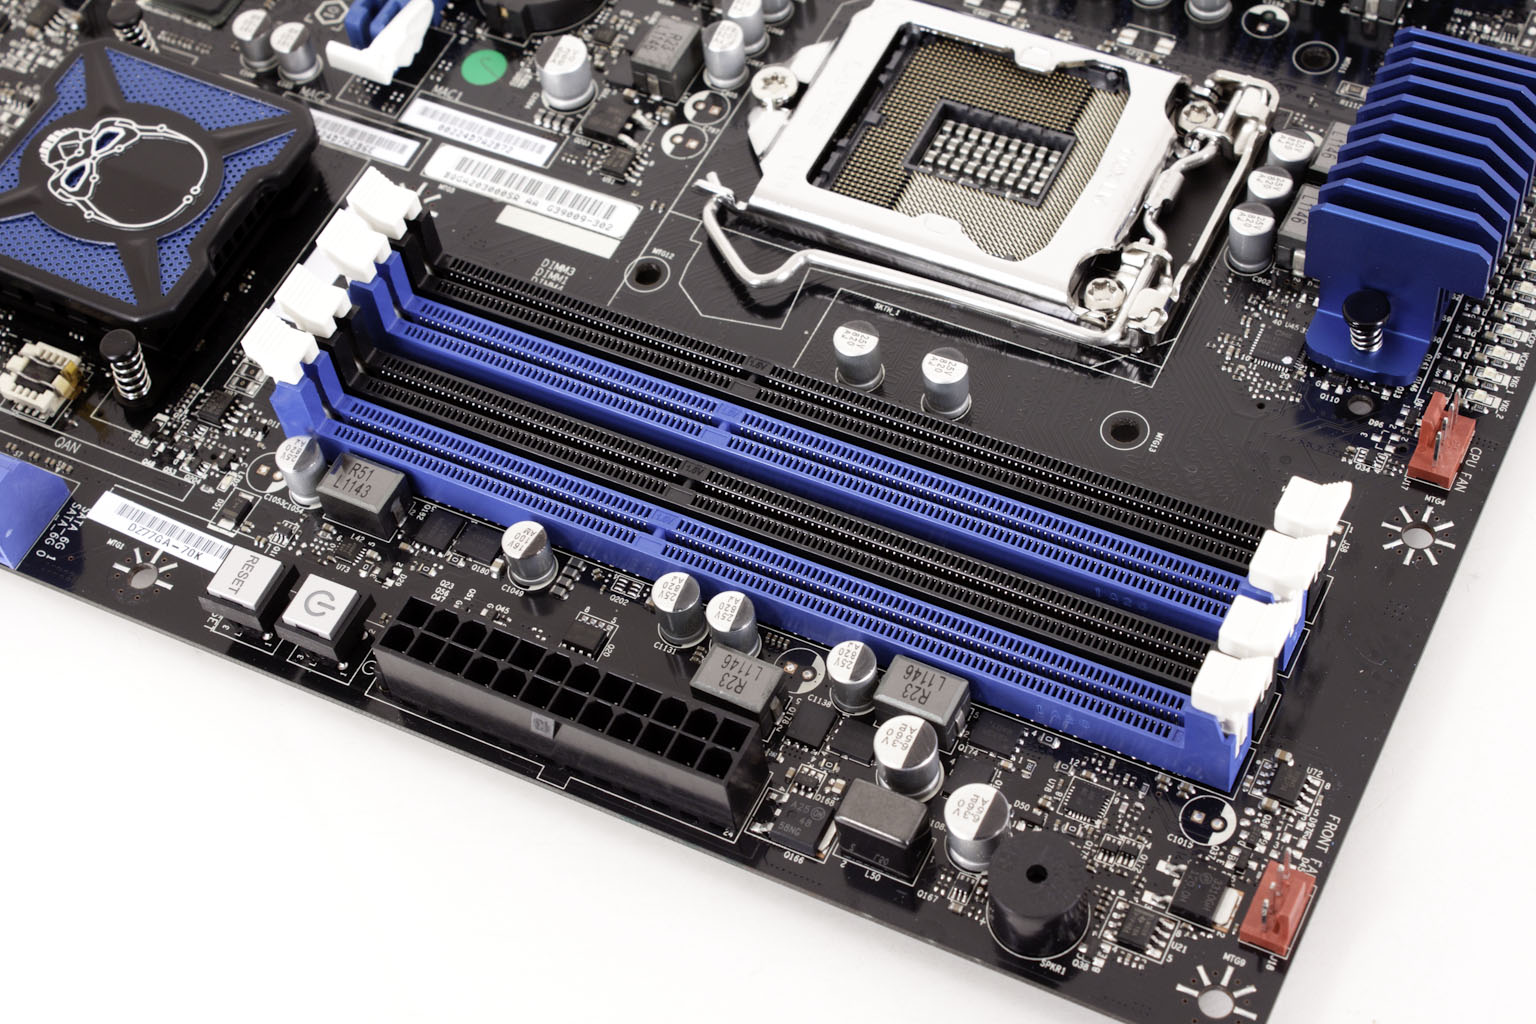
The CPU socket is of course an LGA 1155 socket so it will support both Sandy and Ivy Bridge CPUs. The cooling for the voltage regulation components looks like it might be a little small for any serious overclocking and without good airflow we would be concerned with pushing any kind of serious voltage through here. There are a couple of other items in this shot that we want to draw your attention to. If you look closely you can see the tracing layout from the CPU to the RAM slots, these are very well laid out and as we have mentioned in the past can make all the difference between stability and a ton of BIOS revisions. Beyond that you can see that the 8-pin Aux ATX power port has a little more room than on many motherboards (although we always recommend using an adapter cable) and Intel has dropped in a row of LEDs to indicate the power draw on the board. This last one is a nice touch as we know how much geeks love blinking green lights.
 |
 |
For peripheral expansion you have two PCIe x16 mechanical slots both of which are x16 electrical as well. This does not mean you are going to get dual x16 with SLI or crossfire though (you will only get x8 at that point), but it is nice that you can use either one for full x16 single card performance. There are also two PCI 2.1 slots here which is interesting as the Z77 does not have any support for PCI. To get this you have to use a PCI controller chip (which is one of the reasons why there is a PLX bridge on the board as well). At the bottom of the board is an open ended PCIe x4 mechanical slot. This slot allows you to use a longer card in it, but you will only be able to use 1 PCIe lane for it. There are many cards that can support this, but you will want to make sure before you try it. Below this slot there is a series of LEDs that indicate when certain functions are active (again with the binky lights).
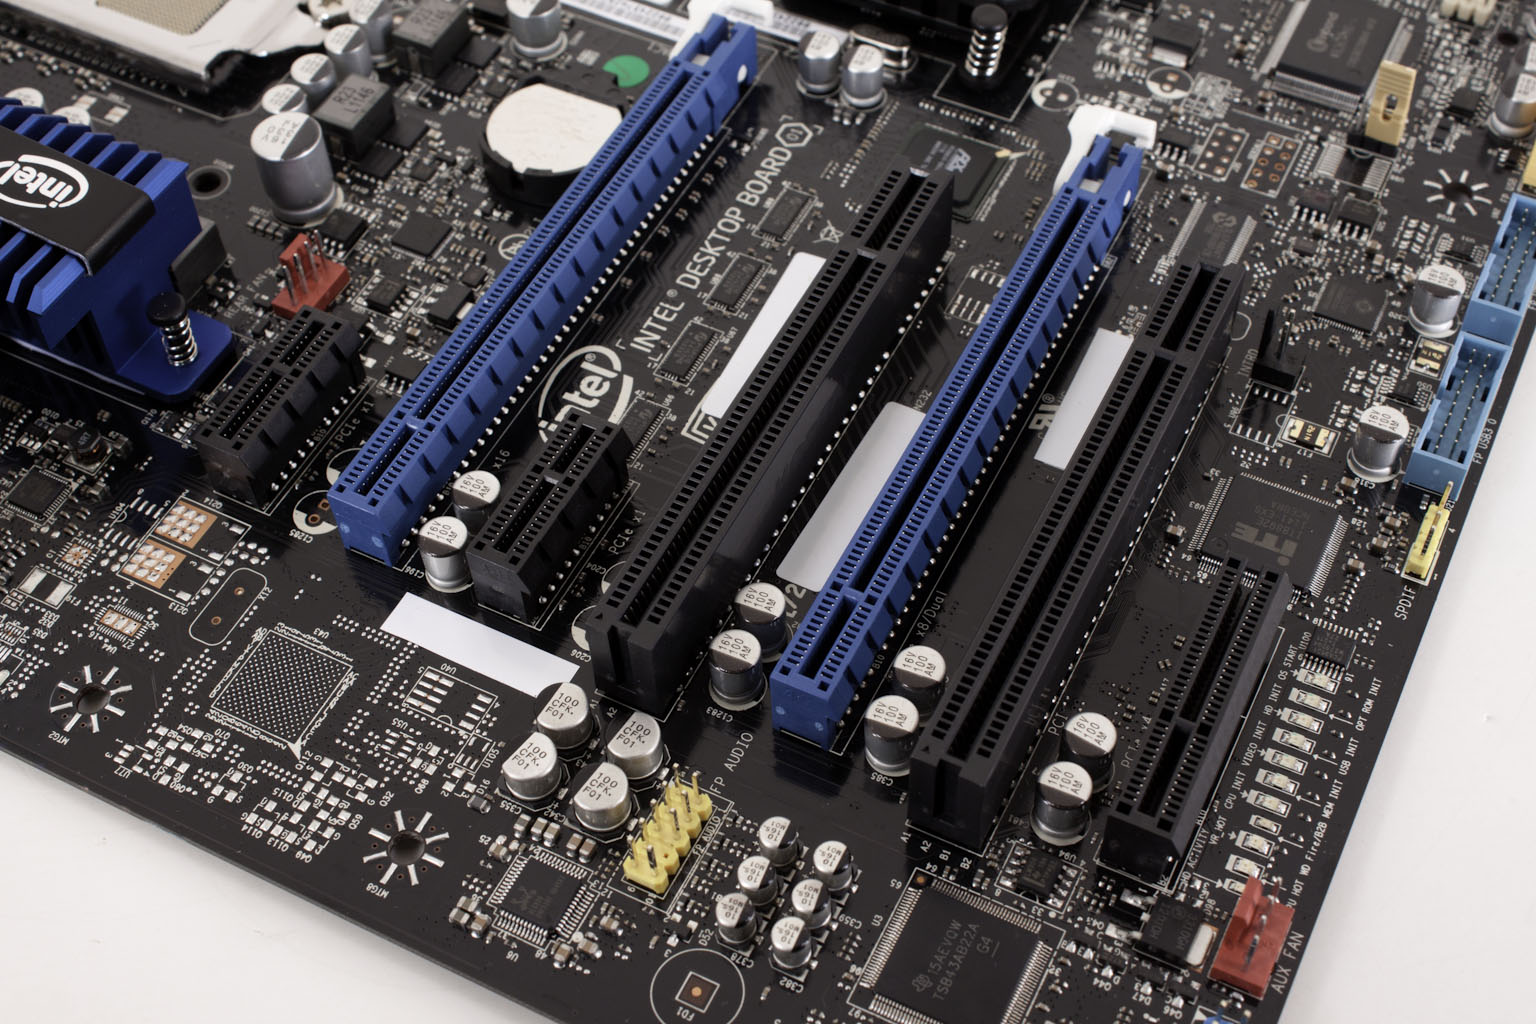
Along the front of the board you can see eight SATA ports. These break down into; two SATA 3.0 from a Marvel 88SE1972 controller (grey), four SATA 2.0 from the Z77 PCH (black) and two SATA 3.0 from the Z77 PCH (blue). There is also a Marvel 88SE1972 for the eSATA port on the i/O panel. This SATA 3.0 controller is another item that runs off of that PLX bridge that we pointed out earlier. The Z77 itself is under a small but fairly cool looking heatsink with the same electric skull icon that is on the box. With the size of this heatsink we are a little concerned about cooling at this point to be honest.
 |
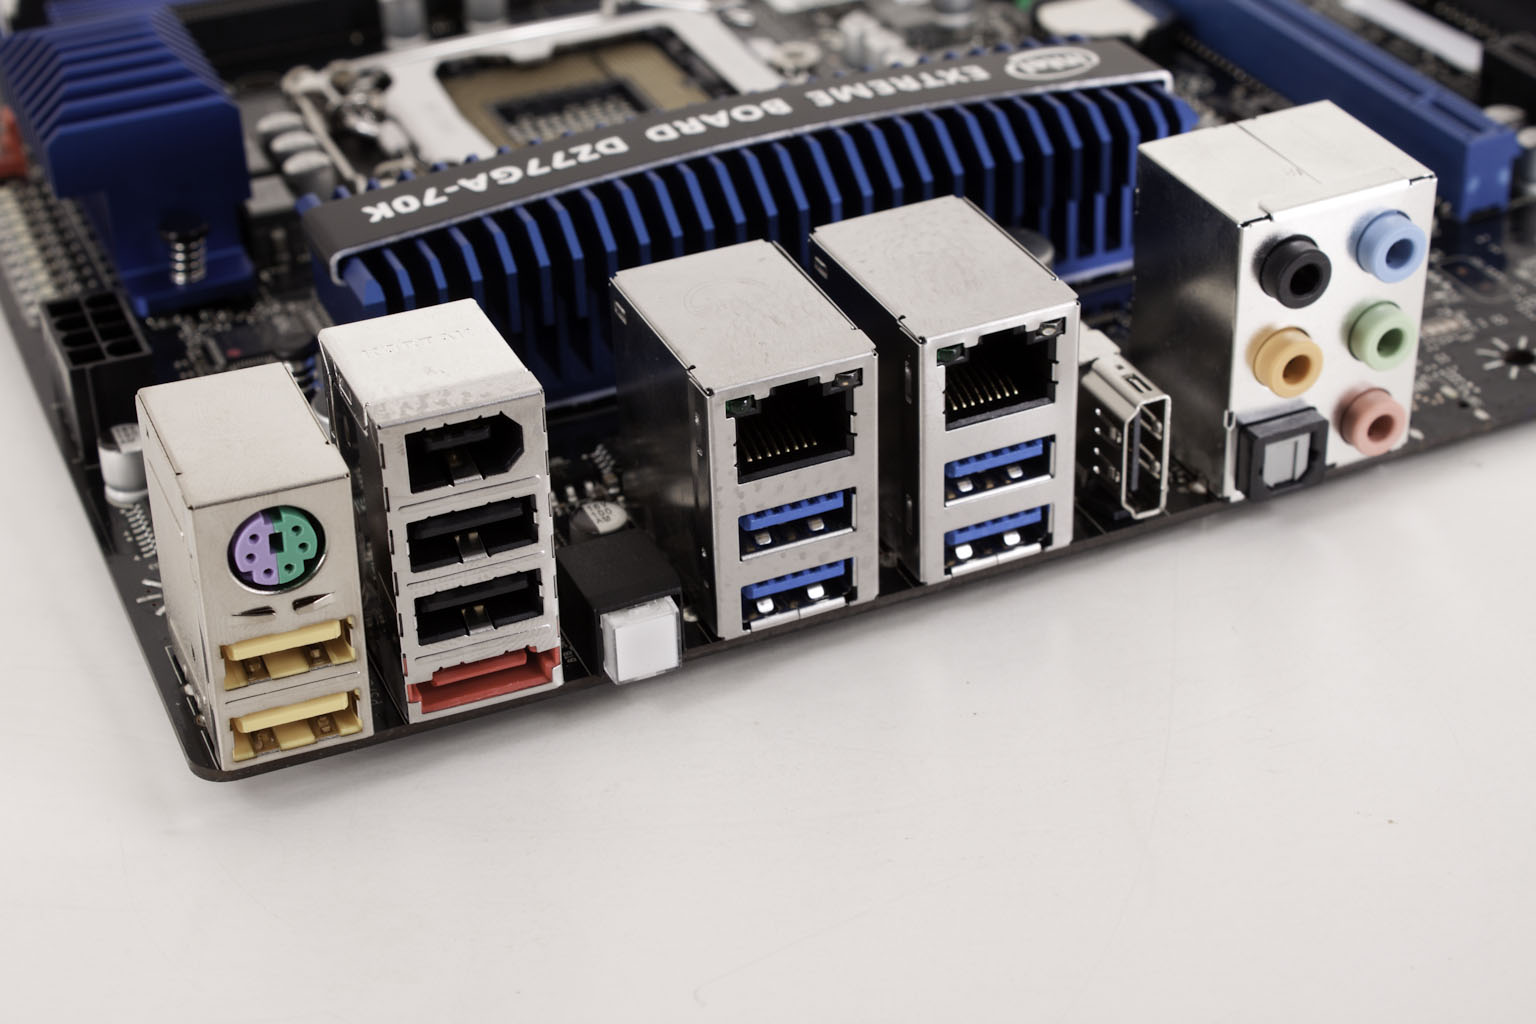 |
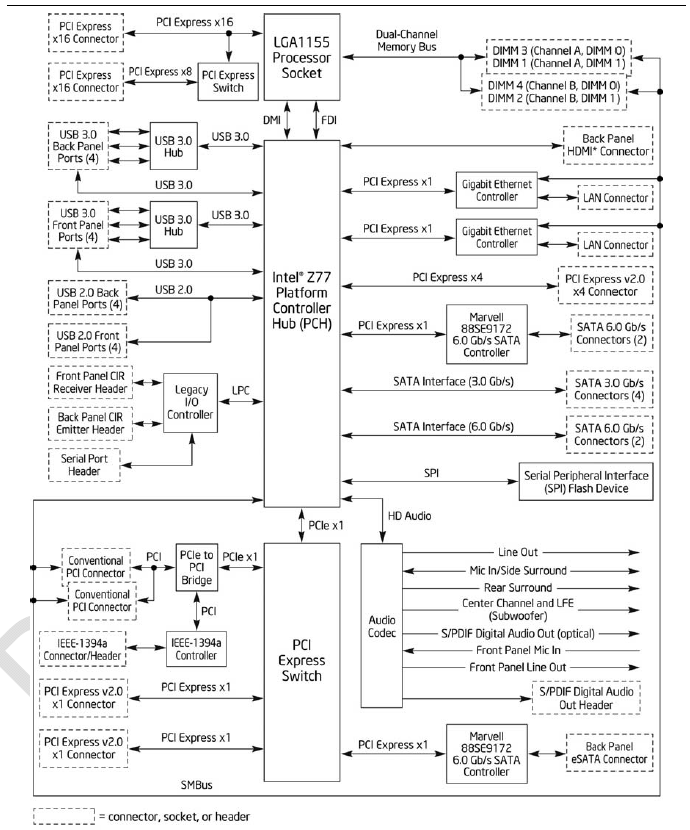
Flipping things around to look at the I/O panel we find a fairly typical layout (for modern boards) there are multiple USB 2.0 ports, multiple USB 3.0 ports (there are also two USB 3.0 headers on the board) All of the USB 3.0 ports are run from the XHCI controller inside the Z77 from there they run out to USB3.0 Hub chips to give you the maximum amount of USB 3.0 ports. For video output Intel has provided a single HDMI port. To round things out you get two LAN ports, a fairly typical audio out block and a “back to BIOS button”. For more information about the electrical layout of the DZ77GA-70K check out the block diagram bellow.