NETGEAR has come up with a solution to that annoying issue. They call is Ensemble and it allows up to 10 WAPs to act as a single unit without the extra cost of a controller. They are pushing this new feature out with their WAP720 and 730 wireless access points. These are 802.11ac wireless with 1.2Gb/s and 1.7Gb/s combined data rates respectively. We have had a couple of the WAP720s in the lab and are ready to tell you how they work.
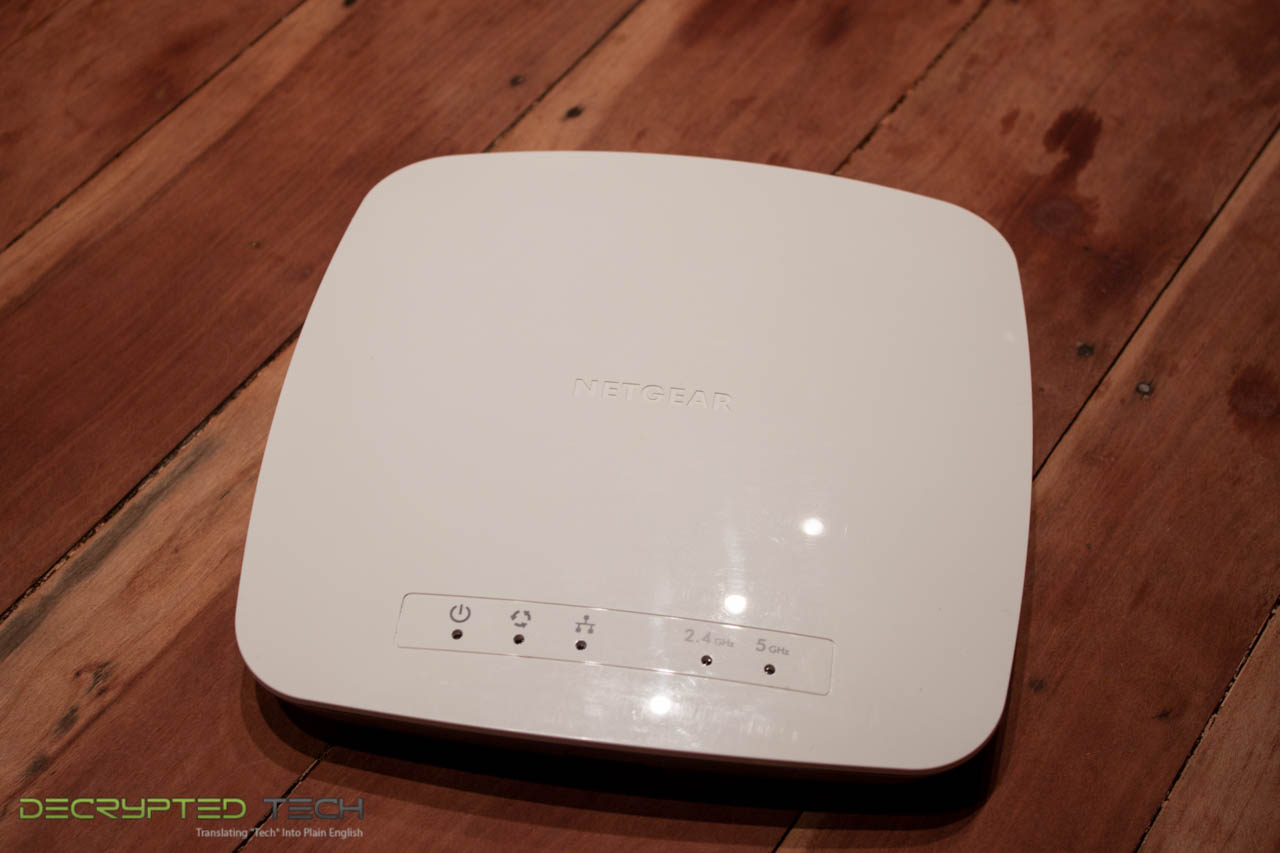
The NETGEAR WAP720 -
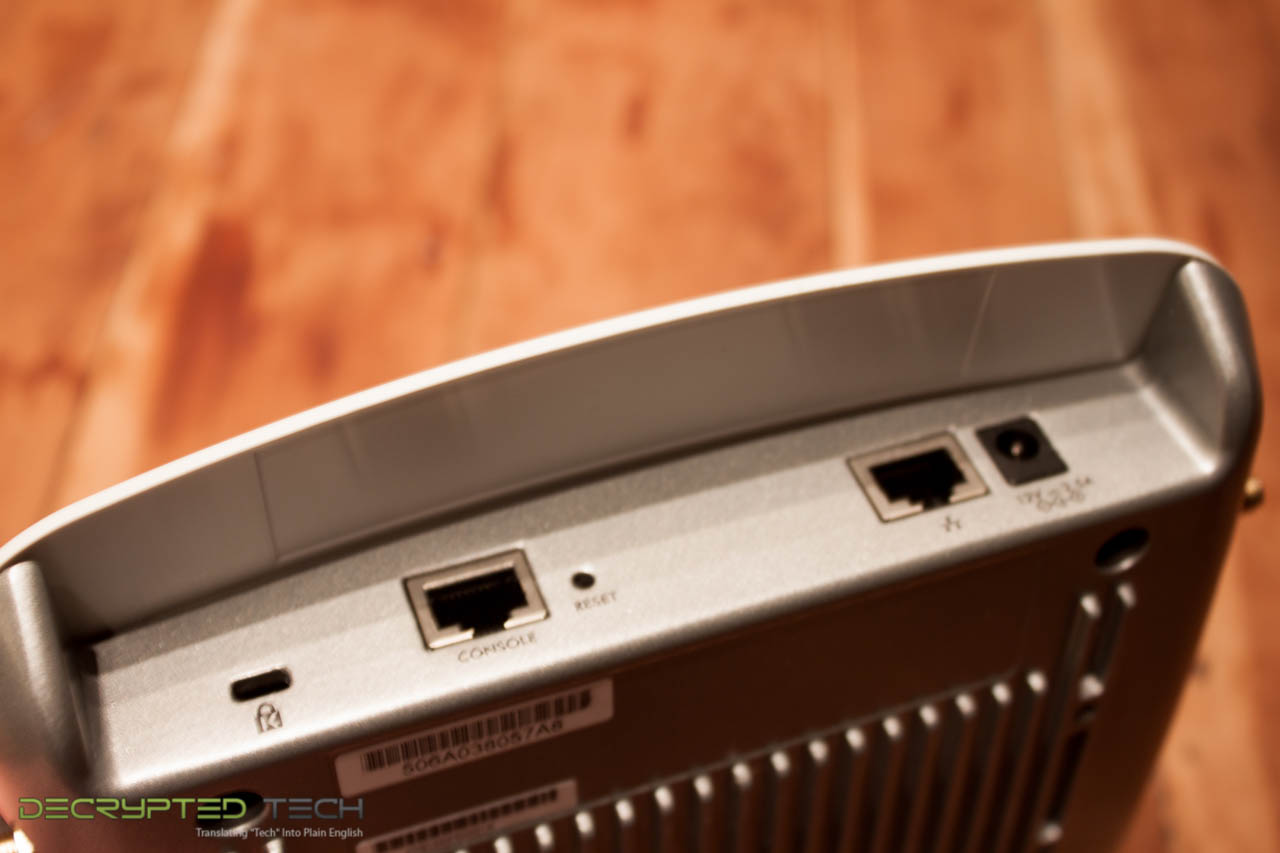
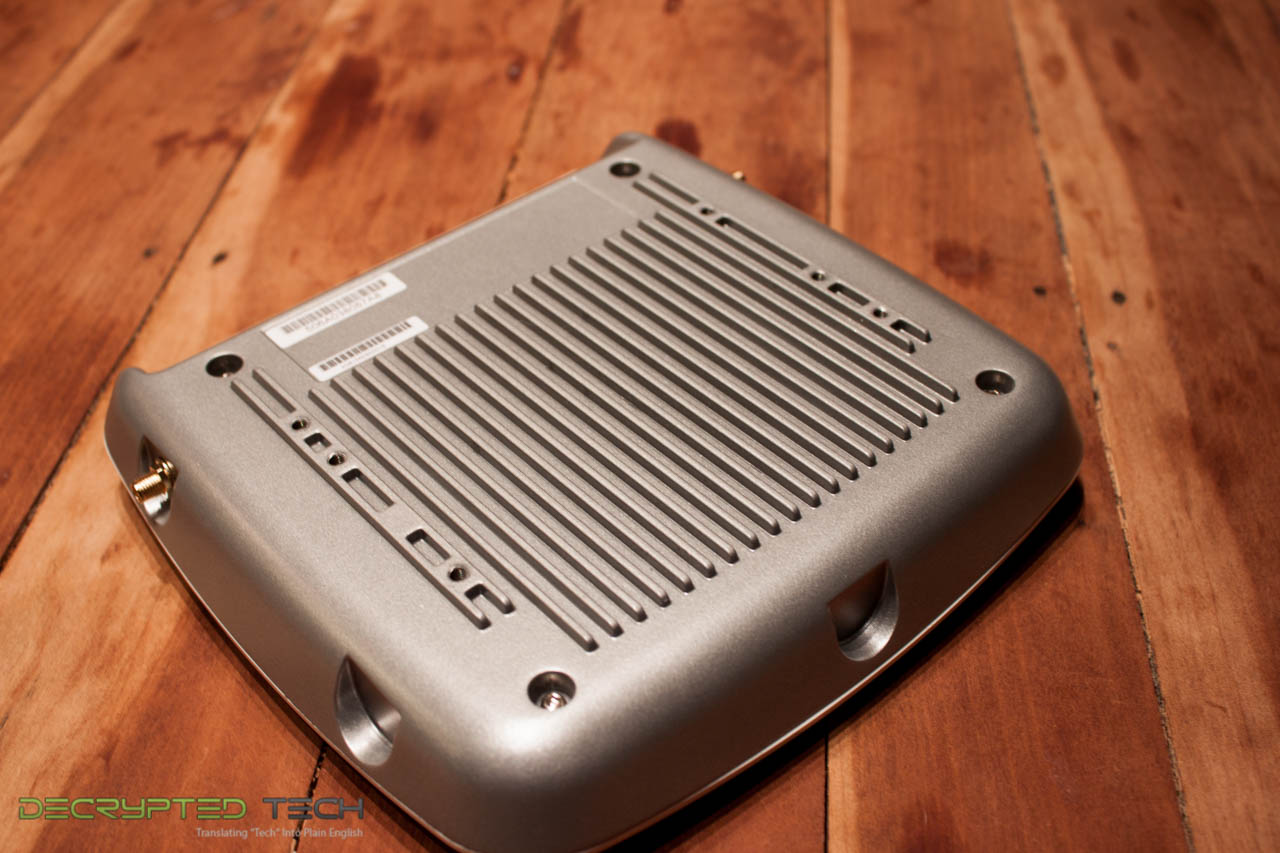
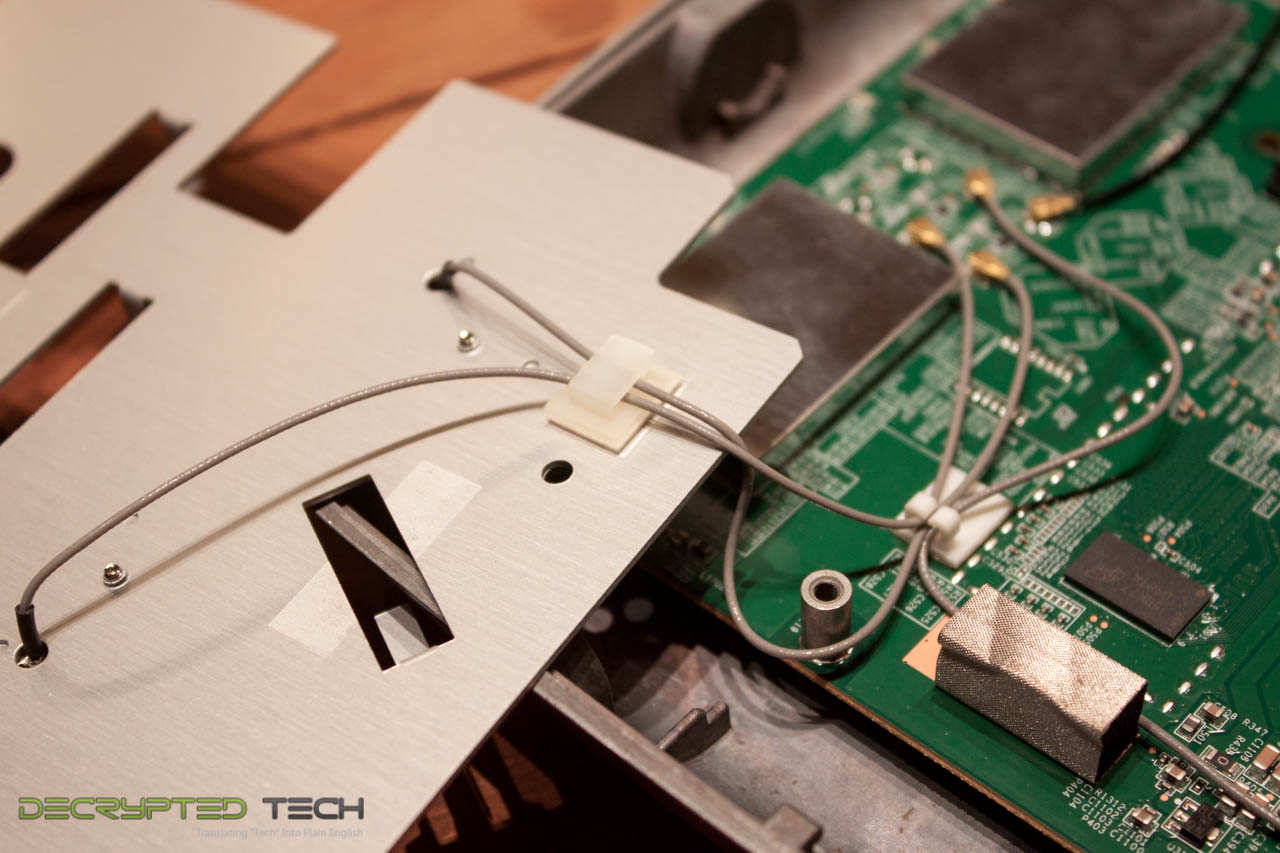
The WAP720 and 730 are the standard turtle style access point. They are intended to be installed on a ceiling or high up on a wall and be unobtrusive. As with most WAPs you get some of the same connection options. A 1Gps PoE Ethernet port (supports 802.3af), a standard power port (this power adapter is not included), a console port and a Kensington lock port. One thing that is unusual in the price class that the WAp720 and 730 are in is the dual external antenna connections. Not only do you get internal antenna, but you can set the configuration to use external antenna as well. Having this option is nice when you consider the market these are aimed at. NETGEAR also includes a mount in the box so you will not have to spend extra to get that.
 |
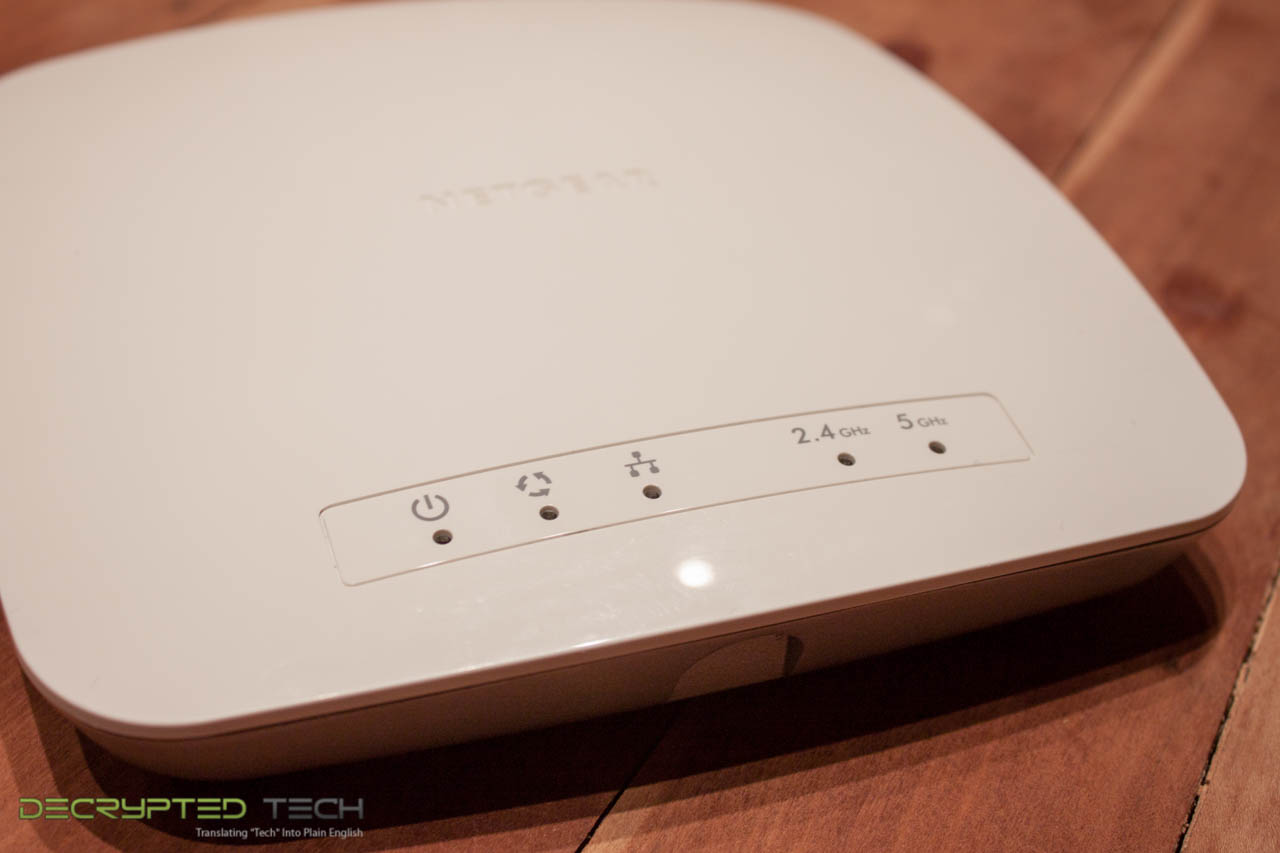 |
On the top of the WAP you have the standard lights to let you know things are going on. Power, activity, Ethernet, and then a light for each type of radio that is operational; 2.4GHz or 5GHz.
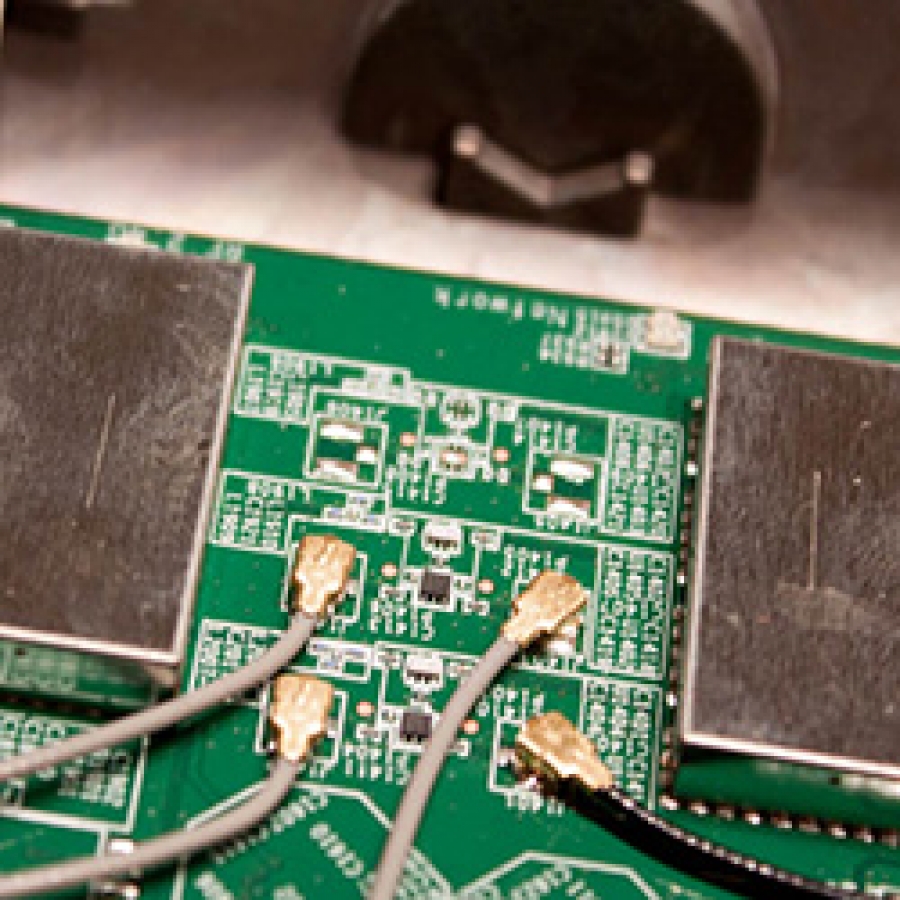
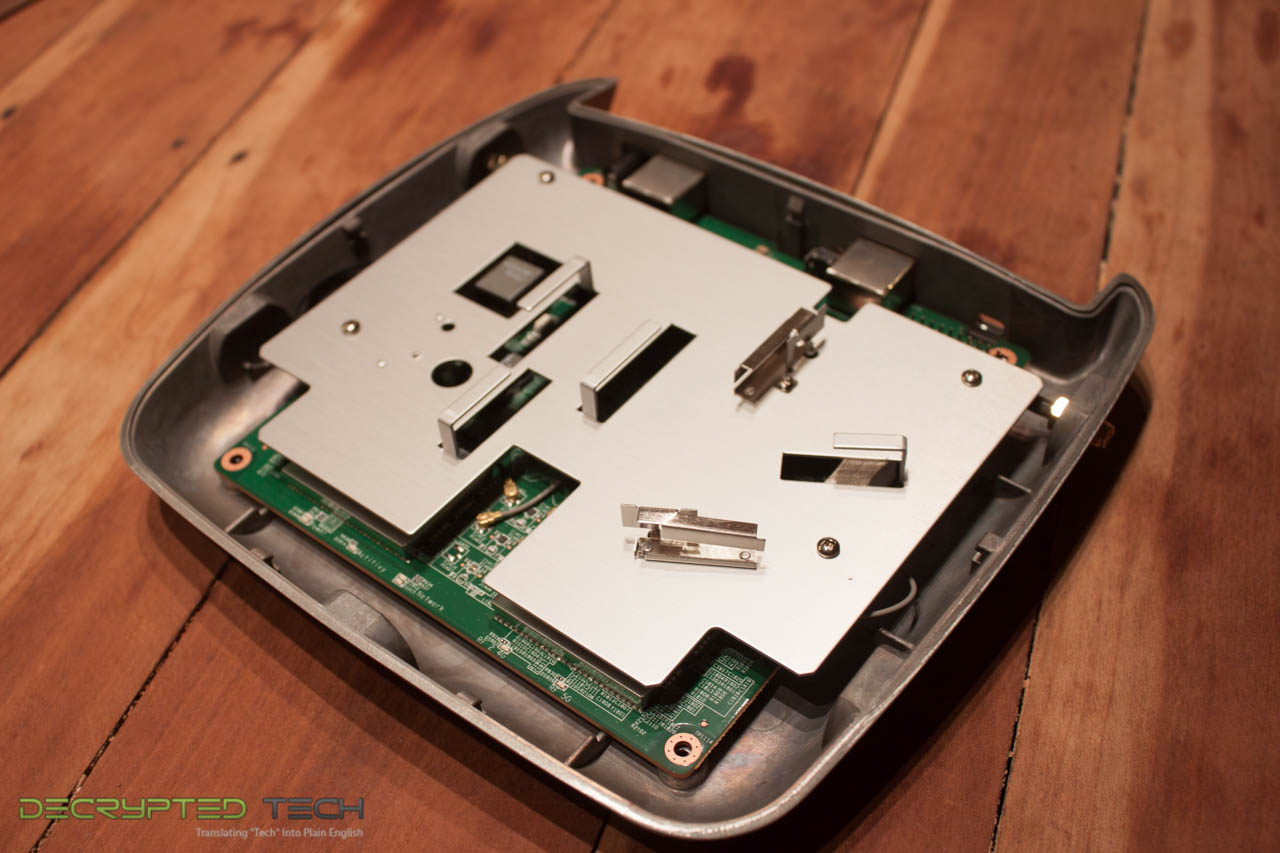
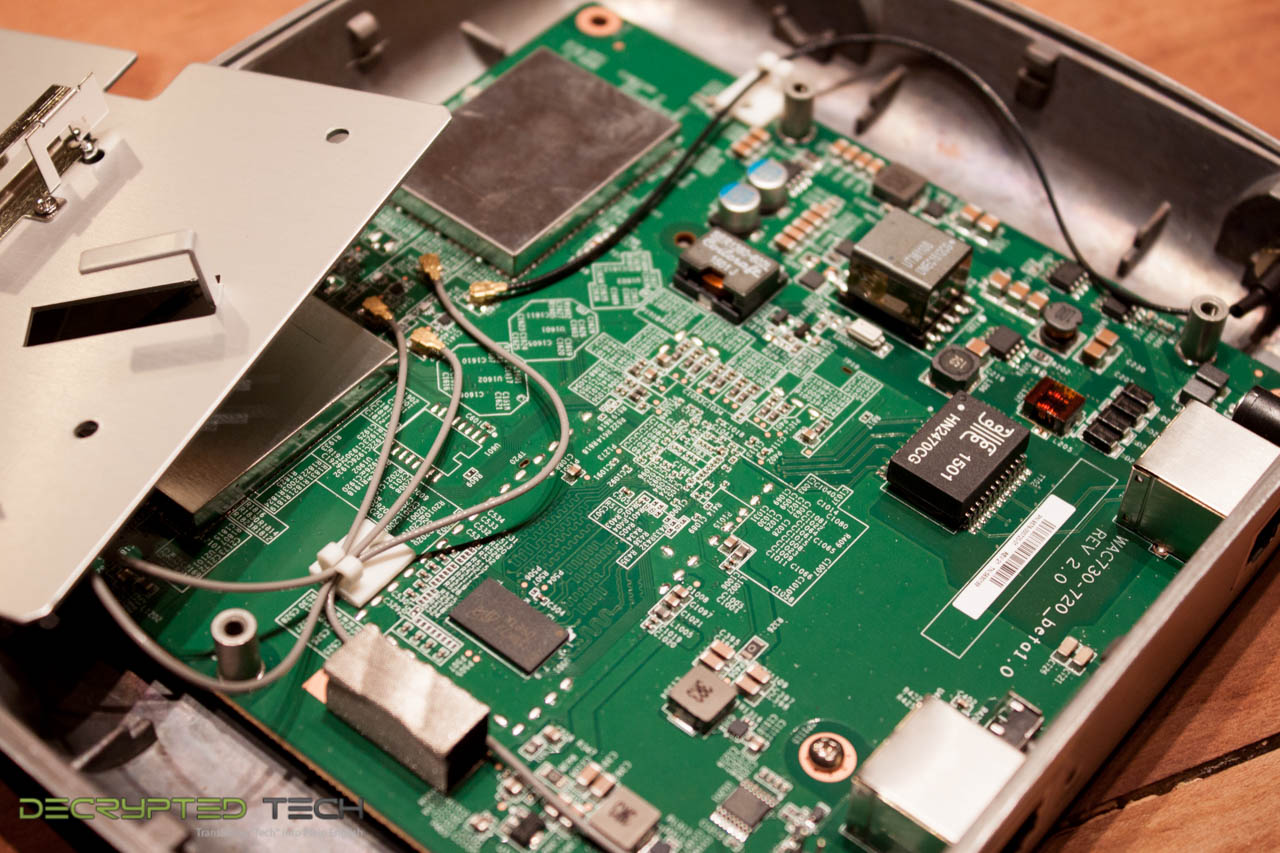
The size of the WAP720 and 730 is much smaller than the older series of WAPs from NETGEAR. They have reduced the size of the WAP by about 40%. Under the hood things have also changed for the better. In the WAP720 you get two 2x2 radios one 5GHz and one 2.4GHz. These two radios have a potential bandwidth of 300 and 867Mb/s respectively (which combined is 1167Mbps). In the 730 this changes to 3x3 for 450Mb/s and 1.3Gb/s potential speeds. Sadly these are still wave one WAPs so they do not have Multi-User MIMO yet.
 |
 |
Both WAPs support beamforming. Beamforming has been used for a while in cellular communication and has been moving into wireless over the past couple of years. It is a technique that improves over the more traditional omnidirectional antenna (which sends out the signal in all directions regardless of where the user is). Beamforming can help overcome limitations in lower power mobile devices by appearing to establish a directional link with the device. It can also help get around orientation issues with tablets. If you are not familiar with this fun issue it happens when someone moves a tablet from horizontal to vertical. The change in orientation changes the layout of the antenna and can cause signal interference. By using beam forming this issue is less of a problem. This is a massively over-simplified version of beanforming and does not even touch on the multiple number of ways you can do this, but you get the point.
 |
 |
 |
 |
 |
 |
NETGEAR looks to have put some thought into the design of the WAP720 so let’s see if they can live up to their claims of simplicity and ease of management.
The WebUI, Monitoring -
Connecting the WAP720 to your network is fairly simple as these APs support DHCP. You plug them into a PoE switch (making sure that the port is configured on a VLan that points to the DHCP server you want to use) and it will power on and get an IP. Now after that NETGEAR typically has a tool that will find the APs or switches by MAC address. Unfortunately the WAPs that we received did not have this, but that really did not matter as the DHCP pool we used was built specifically for this test. As soon as we saw the two new IPs we could connect and get started.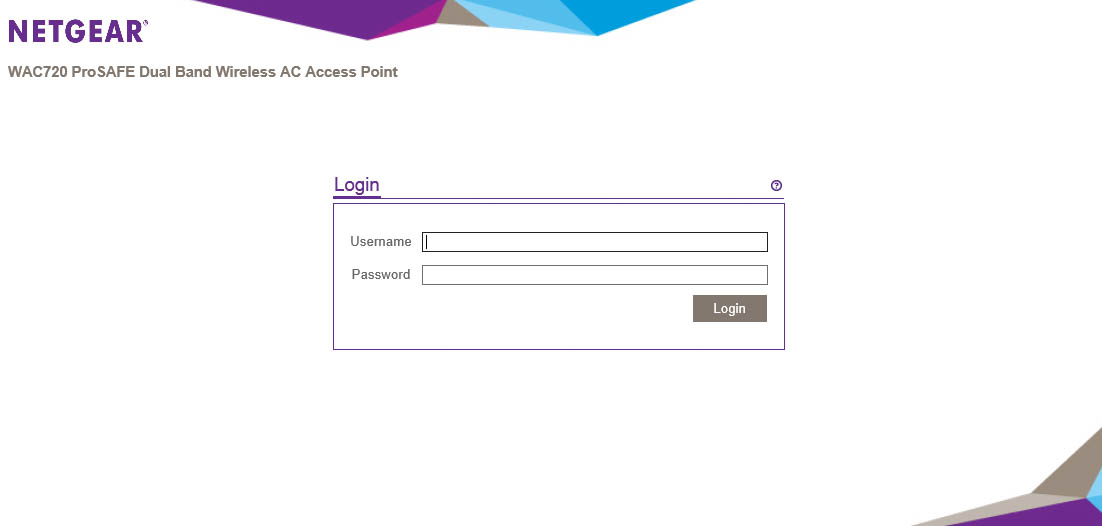
To connect to the WAP you just type in the IP address of the WAP in your browser of choice. This will present you with a login prompt.
 |
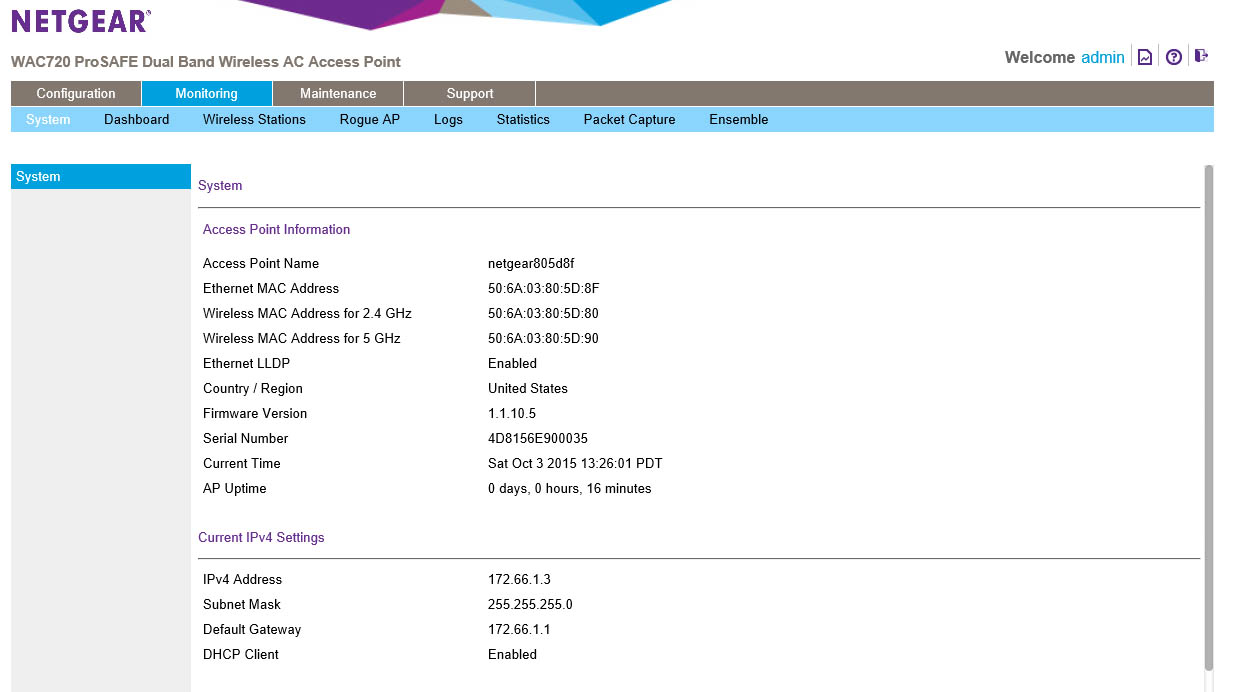 |
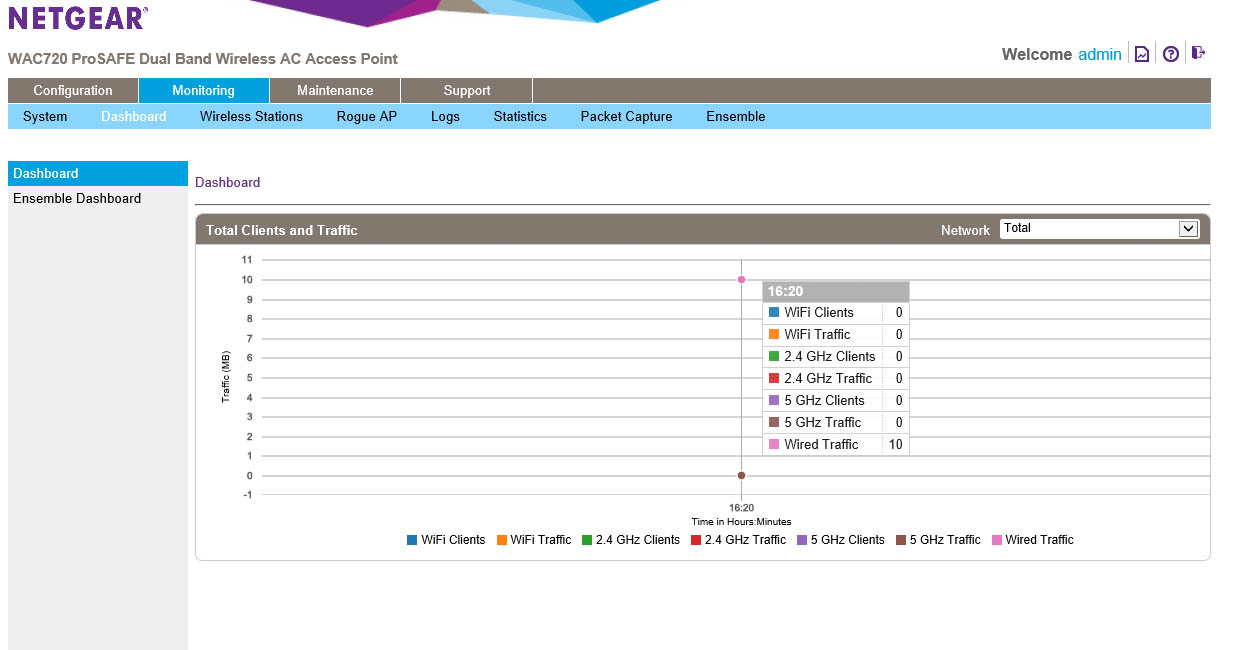
After you type in your user name you are dropped in on the dashboard. Under the dashboard you have two options. You can view the individual WAP or you can dive into the Ensemble dashboard that lets you see what is going on with all of the WAPs in a group. Here you can see the number of clients connected to and the amount of traffic for each type of wireless you offer. There is even a handy little legend that lets you know which is which. Moving back to the left we find the system information. The data here is very self-explanatory.
 |
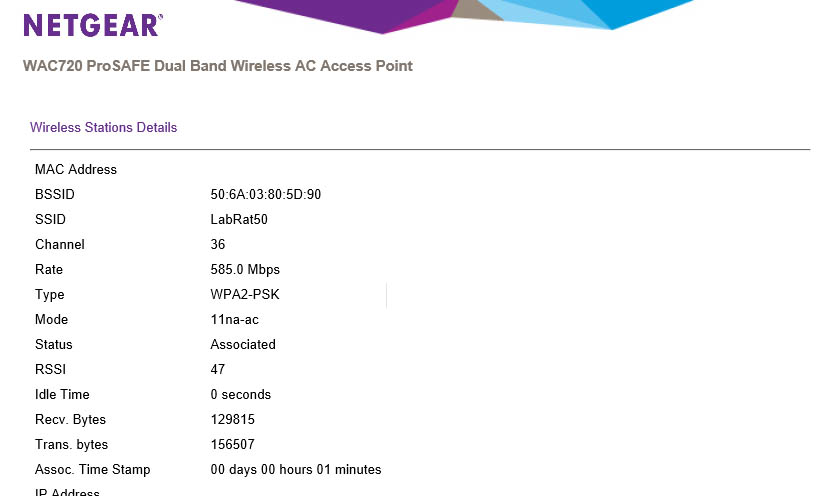 |
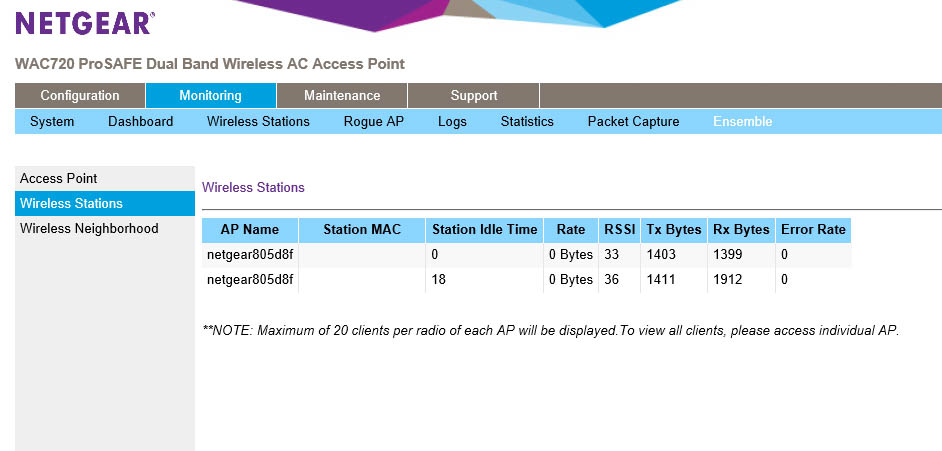
Taking a jump from the system screen to the Wireless Stations link you will find all of the information on active SSIDs. If someone is connected to an SSID you will see if listed as “associated” with a particular device. You will be able to see the MAC Address of the device, but not the IP. This later is a little disappointing as you can see that in the details for a client, but it would have been nice to have it here in the group listing. You do get a list of all of the services available on the SSID listed in the state area. If you click on a client and chose details you get more information about that client, including the IP address that it is using.
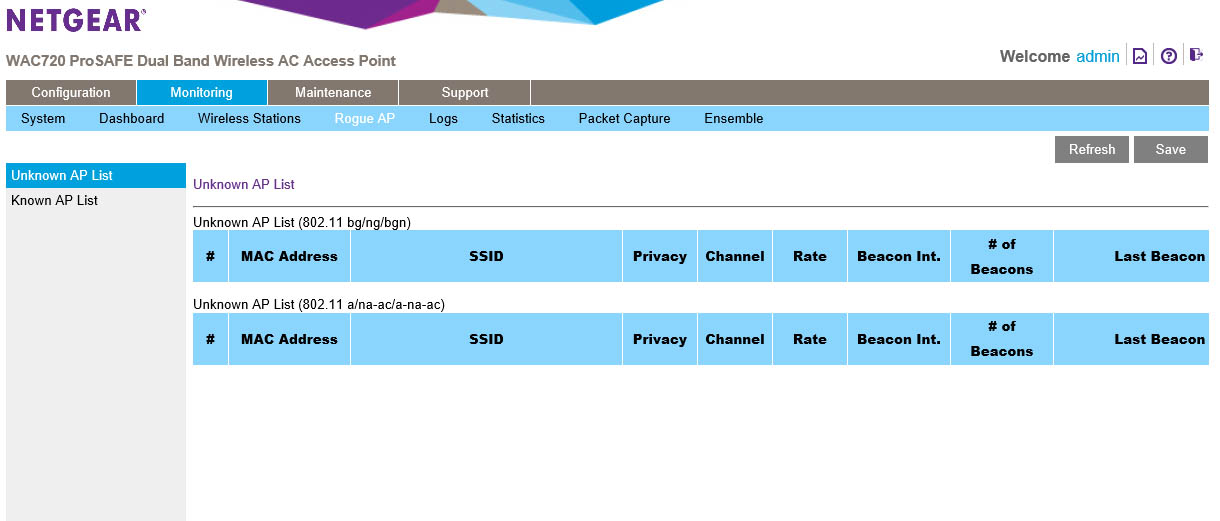
The Rouge AP link does just what it says. When you when enable rouge AP detection this screen will show any broadcasting APs (SSIDs). You can look at the list in two forms; known and unknown. You can guess what these mean.
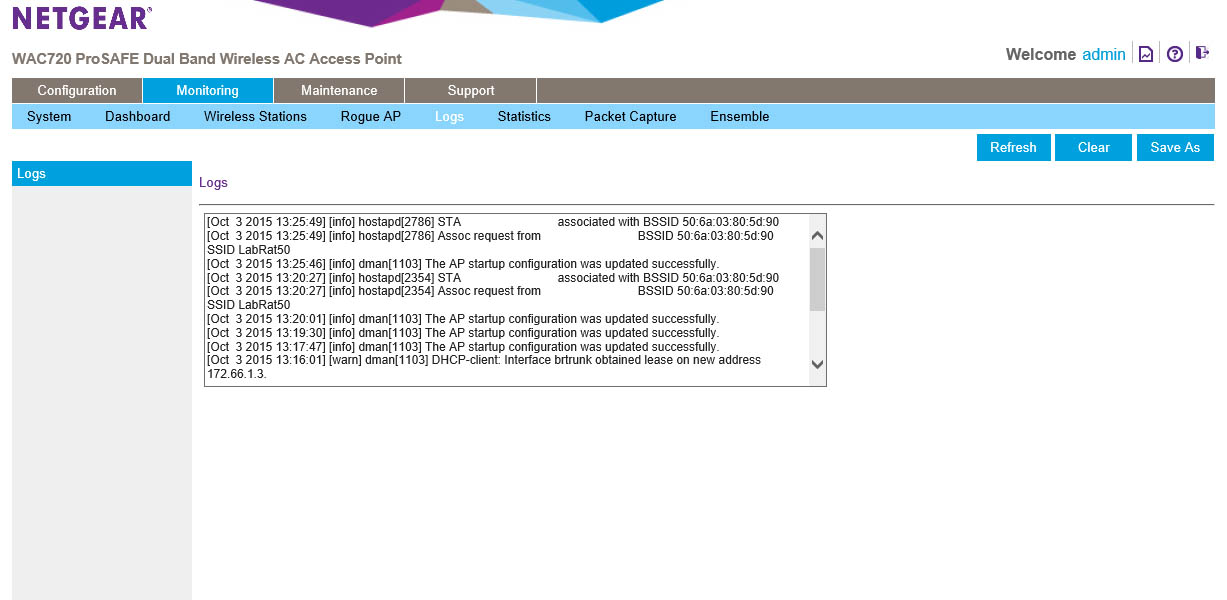
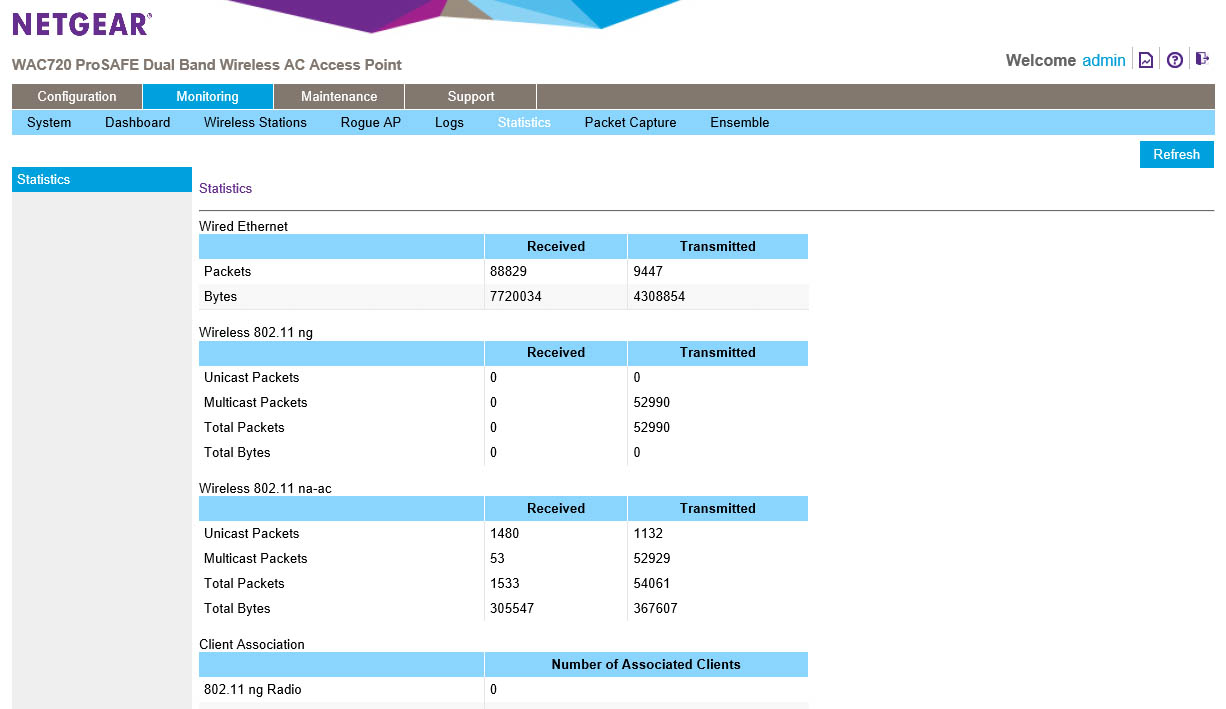
Logs and Statistics… you can guess what those show. If not we included some pictures for you.
 |
 |
NETGEAR also threw in the ability to run a packet capture on the network. This is just in case you want to see what might be happening on your network. You can chose the interface you want to capture the traffic on and also put it in promiscuous mode (which means it will talk to anyone). To make things a little more clear you can also filter by a client MAC address.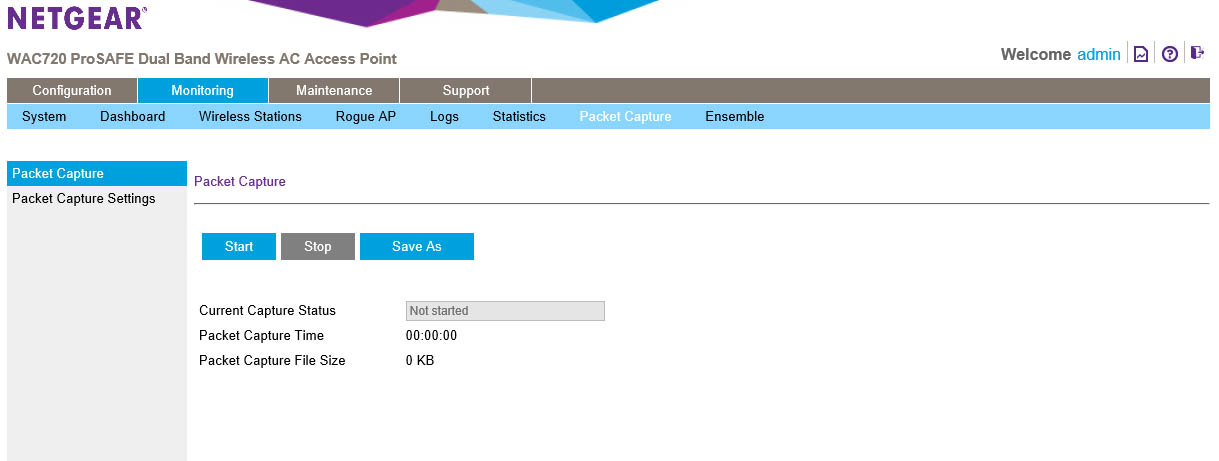
We will talk about ensemble monitoring later after we walk you through how to set up an ensemble group.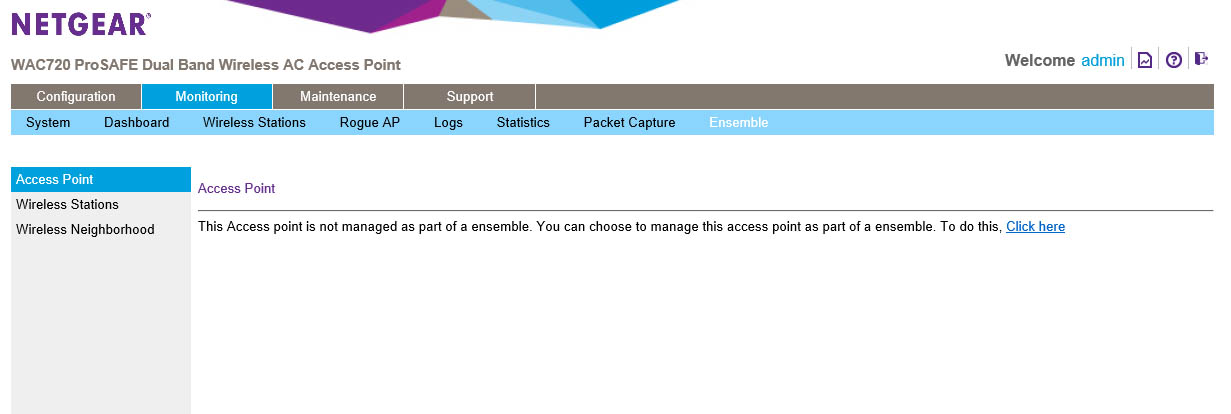
Configuration -
The WAP720/730s can be configured independently or as a group when they are connected in an Ensemble. Both look very similar so the screen shots we will include here are representative of what you will see once a group is set up.
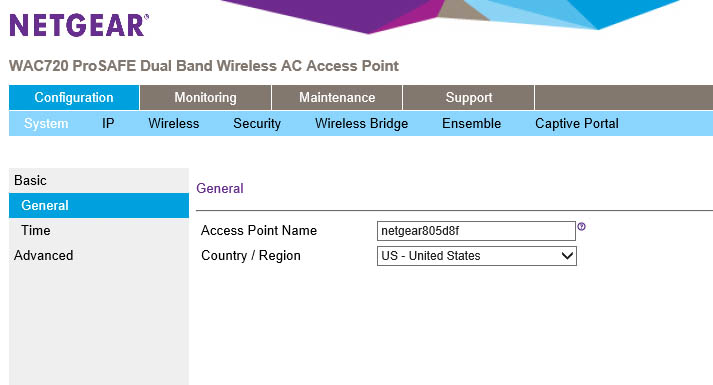
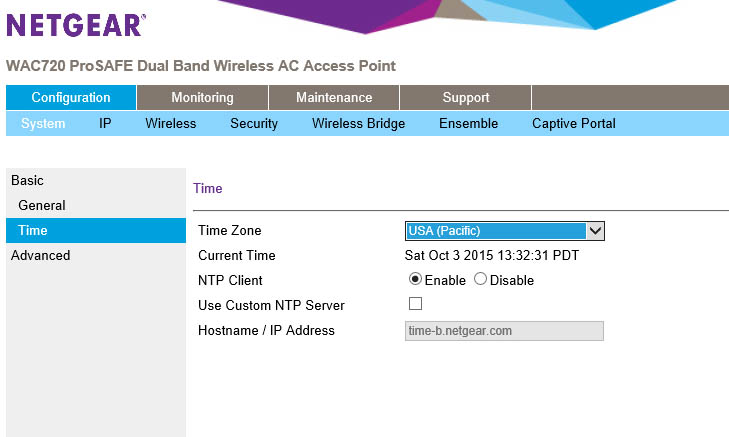
The System area lets you configure things such as the name, time and also a few advanced elements to the AP.
 |
 |
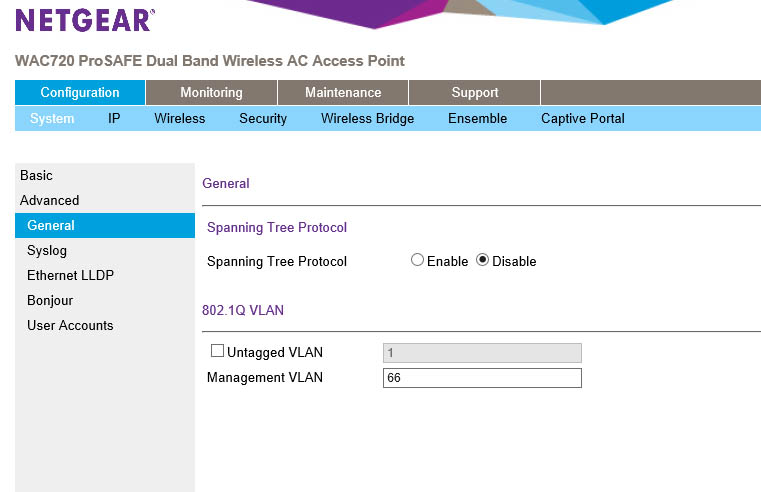 |
Under advanced you can enable STP (spanning tree protocol) as well as identify the management Vlan that the actual AP will run on. The option for a single “untagged” Vlan is there so that you can push a native Vlan on a trunk in certain environments. For us we did not need to use this as all of our test Vlans were tagged at the access switch ports.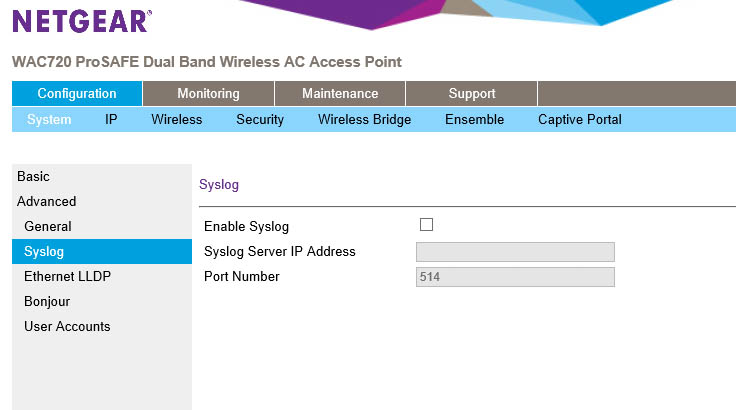
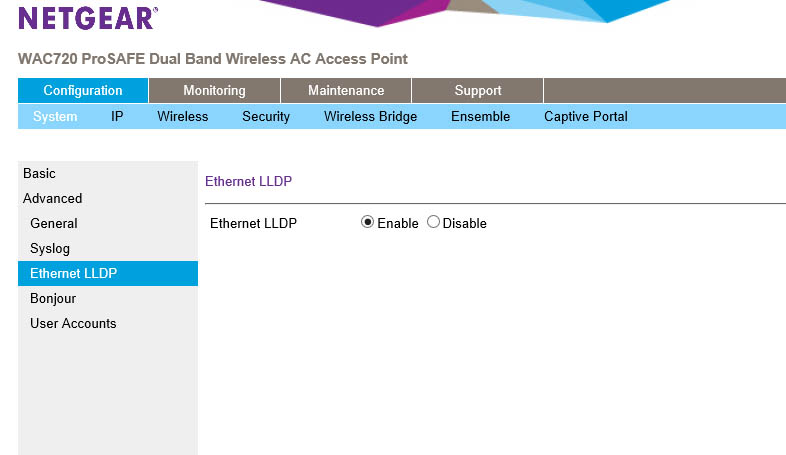
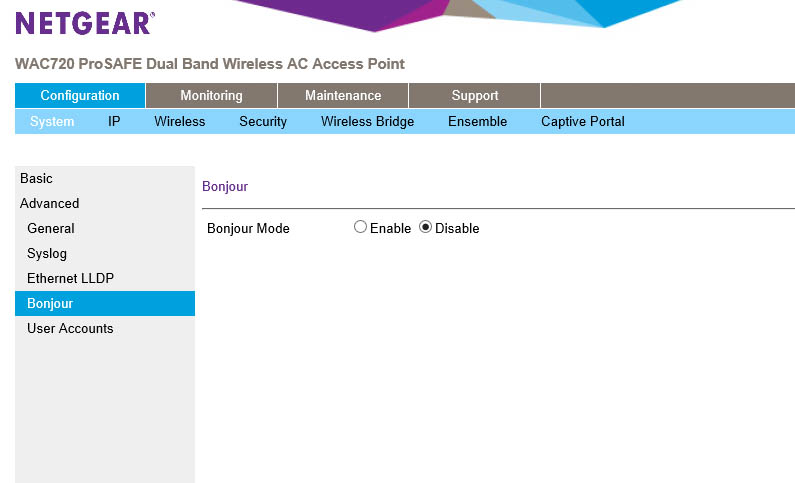
You can also ship logs to a syslog server, setup up LLDP (link Layer Discovery Protocol), configure Bonjour and setup local users for the AP.
 |
 |
 |
The IP configuration tab is pretty much what you would expect.
The Wireless tab has a lot more to configure although for most companies you are going to leave a lot of this at default. Notable exceptions would be the Wireless Mode. We highly recommend using 11ng for 2.4GHz and 11na-ac for 5GHz. Allowing a or b modes into your network can create slowdowns if someone actually connects to an AP using that mode.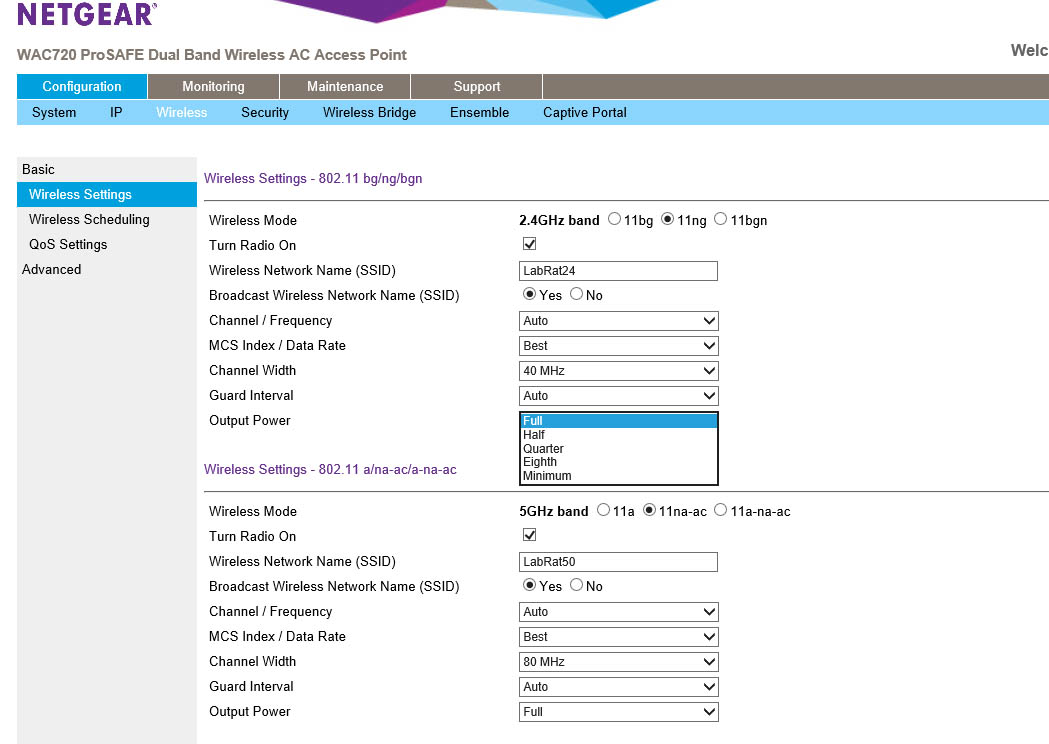
You can also configure the broadcast power. This is handy if you have a smaller area to push the signal out to or you know that APs are going to be close to each other.
 |
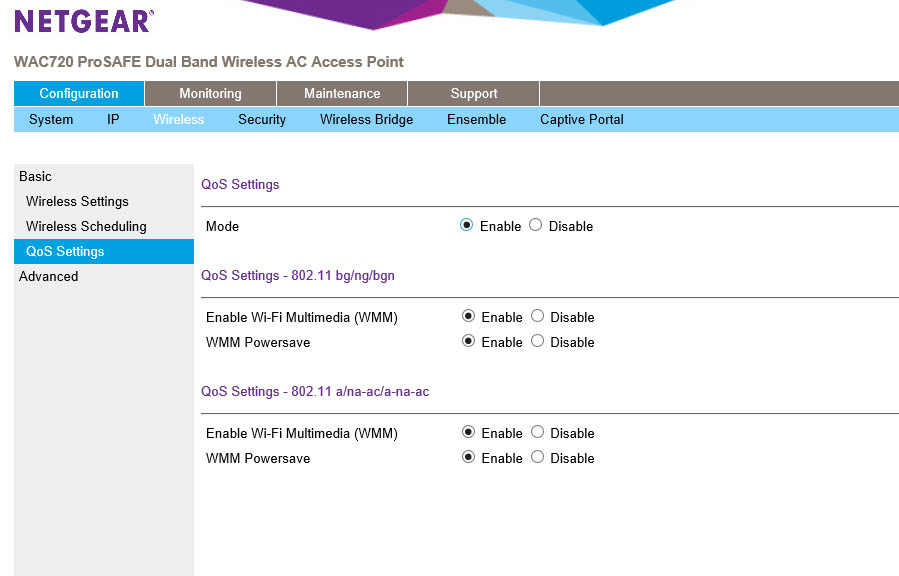 |
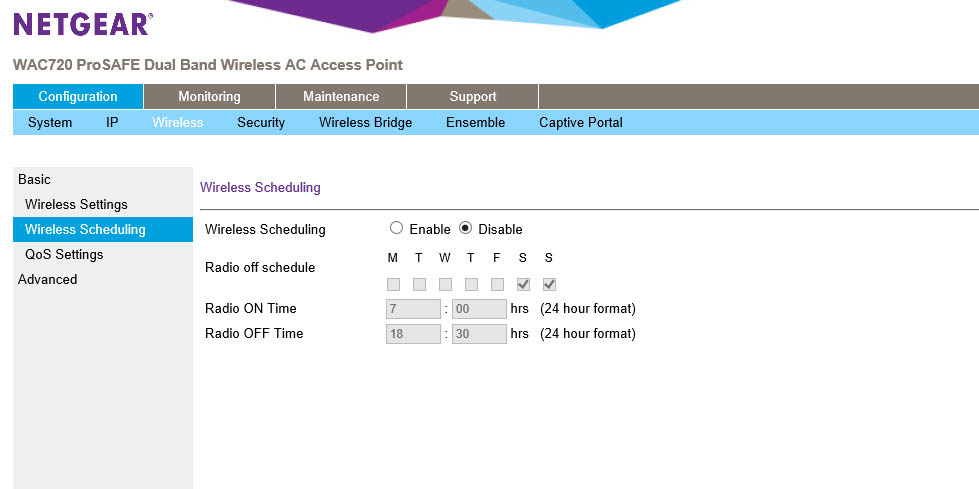
Scheduling and QoS are pretty easy to understand.
Under Advance you get, as you guessed, more advanced options. Here you change the antenna type as well as enable Frame Burst and limit broadcast and multicast traffic pushing through the AP. This can be very helpful if you have a flat network where a broadcast storm could bring down your whole organization. The limits that you can set for multicast traffic run from auto to 54Mbps. Your default number of clients that can connect to a WAP720 is 200, but we would also recommend you drop that down to 50-100.
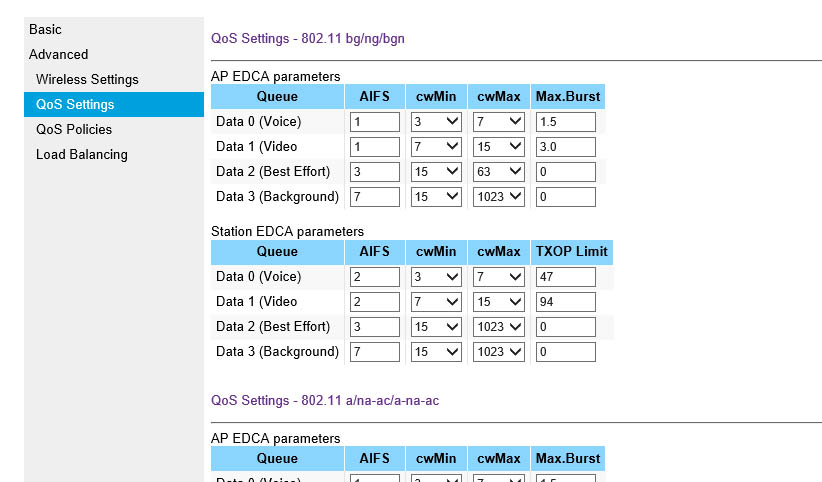
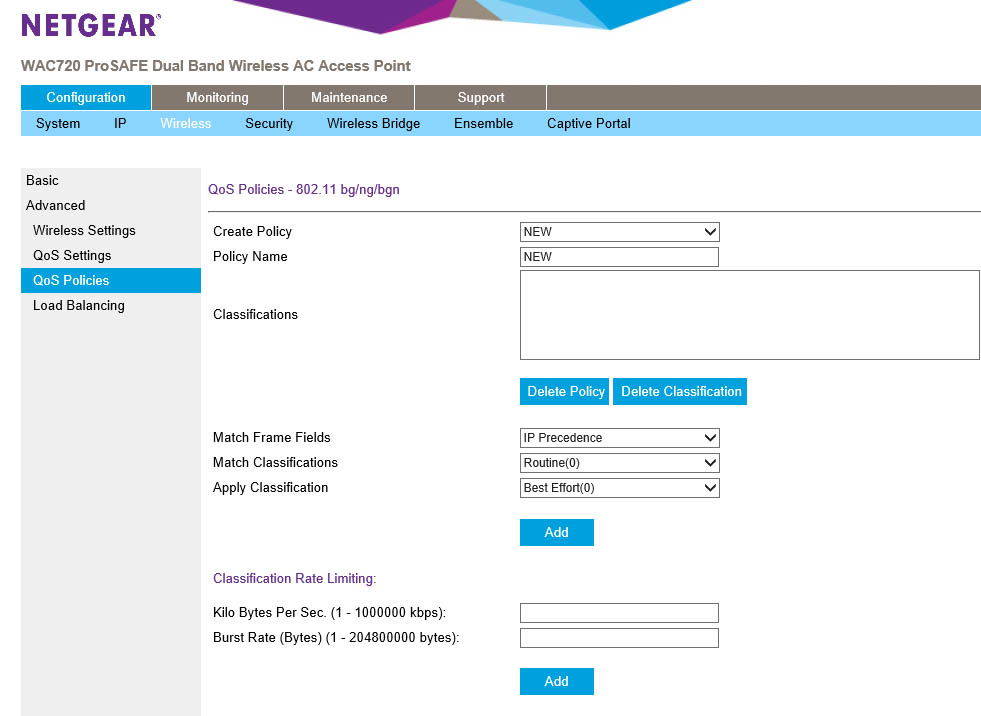
The QoS settings are fairly straight forward and should be left as is unless you have specific needs for a particular band. You can also build your own policy using a combination of the reference settings and your own information. These are applied to the individual SSIDs to make sure each one uses the bandwidth you want them to.
 |
 |
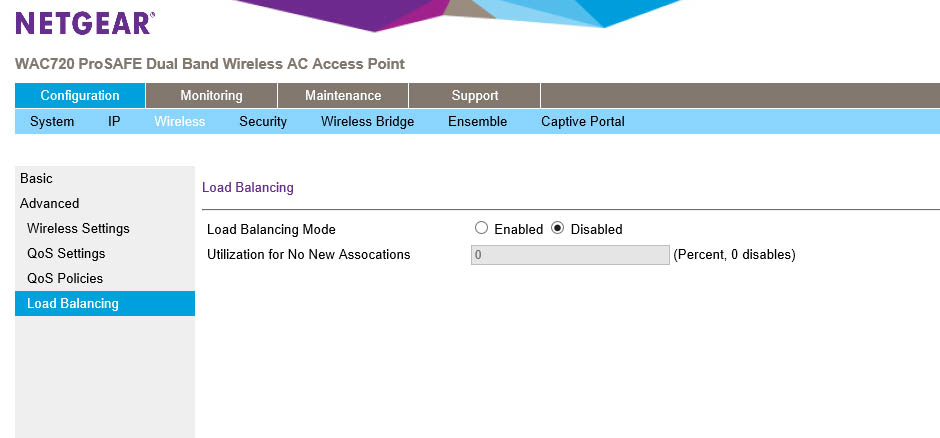 |
Last up is the load balancing page. This page only applies if you have more than one AP in an ensemble group. Here you can set up a limit of the number of associations for an AP. This is based on a percentage of the max connections you set earlier. If you have max connections set to 100 and you want to start shipping people before you hit that you could set this to 80% and it would force the users to connect to another AP after 80 associations.
Under the Security Tab you have quite a few options. The profiles page shows you the number of available profiles for the AP or group. You can set up seven per radio. These can (and should) run on their own independent Vlans for best separation.
 |
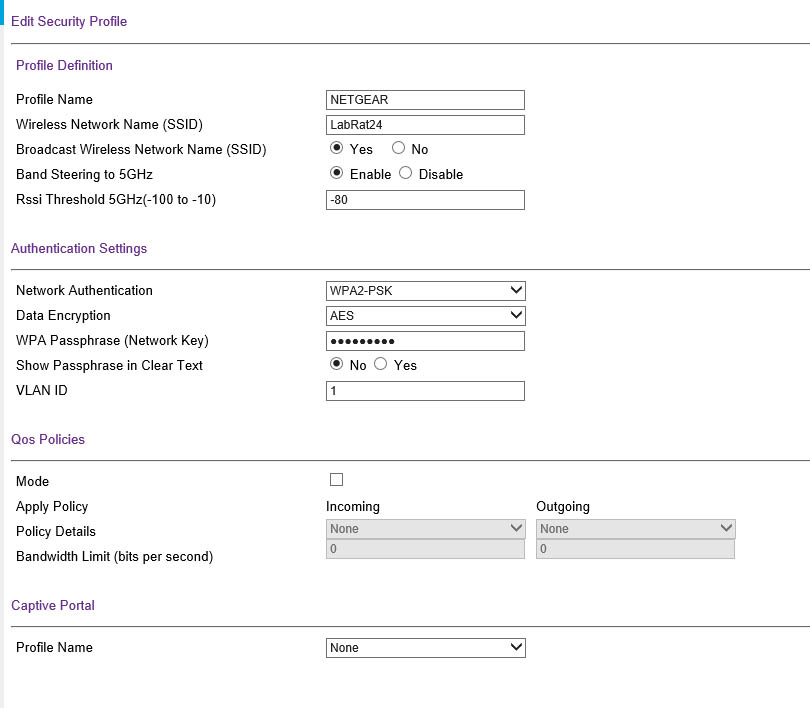 |
Digging down into the individual SSID you can see some options that relate directly to them. This is the SSID name, if you want to broadcast the name or not and also if you want to push people to the 5GHz band. Here you have to set the RSSI (Received Signal Strength Indication) threshold you want this push to happen at. If the user is above a certain power level, then it is safe to push them to 5GHz on the SSID. The default is -70 which is fairly low in terms of signal strength meaning that you can have a relatively weak signal coming from a client and still push them to 5GHz. On this page you can set up the authentication method as well as the Vlan used and any QoS policies you want to implement. The Captive Portal option is if you want to set up an acceptance page or other page that requires someone to click to get out to the internet or on the network.
 |
 |
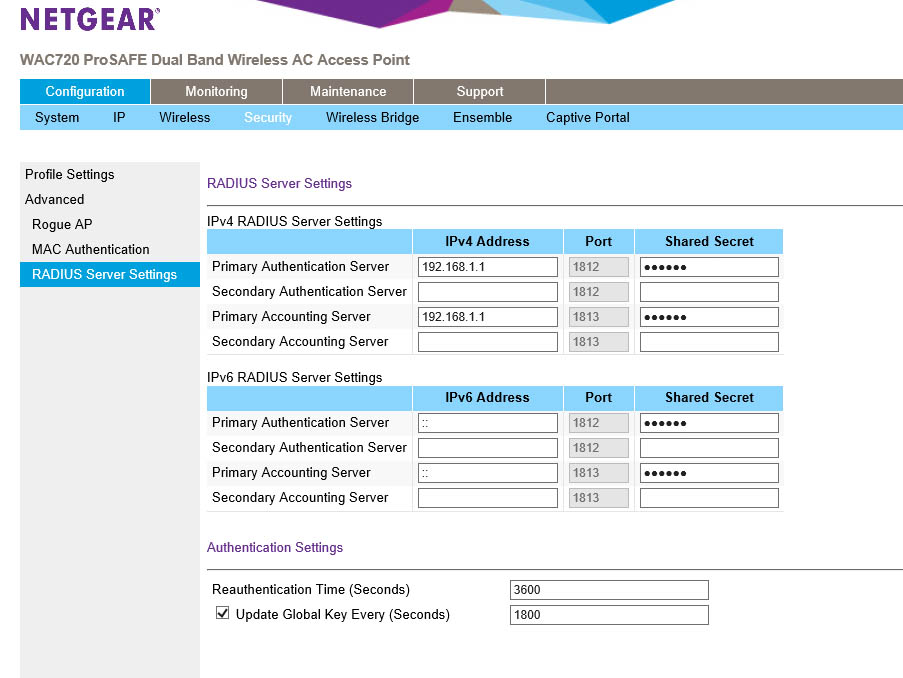 |
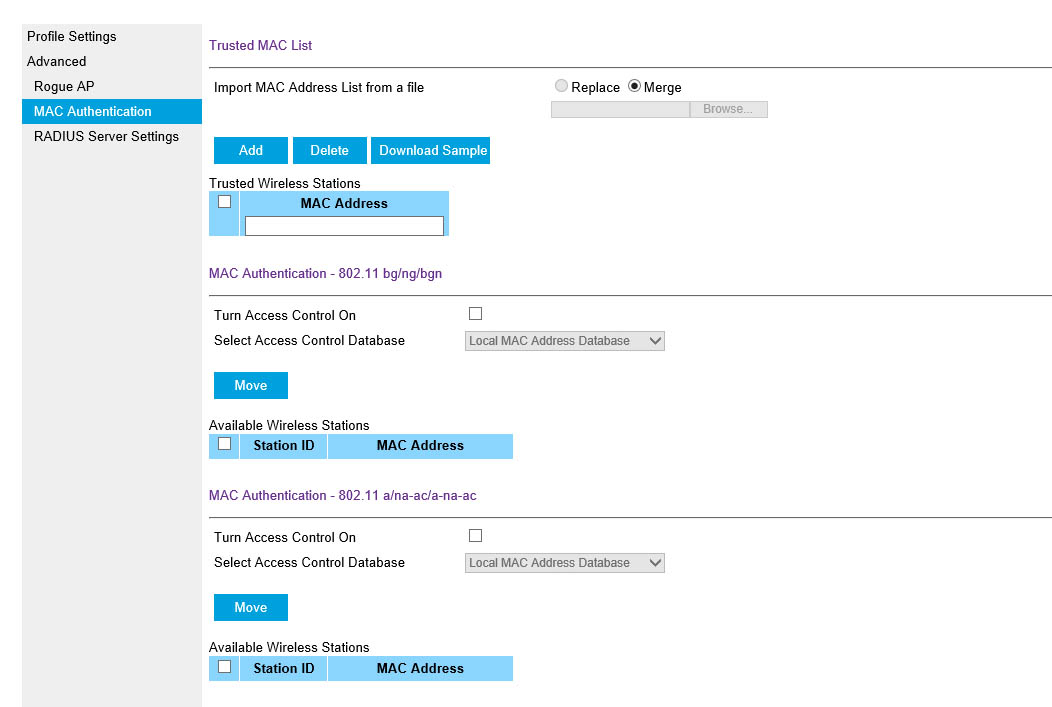
Moving into the advanced settings for the individual SSIDs you can also enable rouge AP detection on each SSID. This covers both frequencies even if the SSID you are working on is only 2.4GHz. MAC and RADIUS authentication for each individual SSID is also set up here. 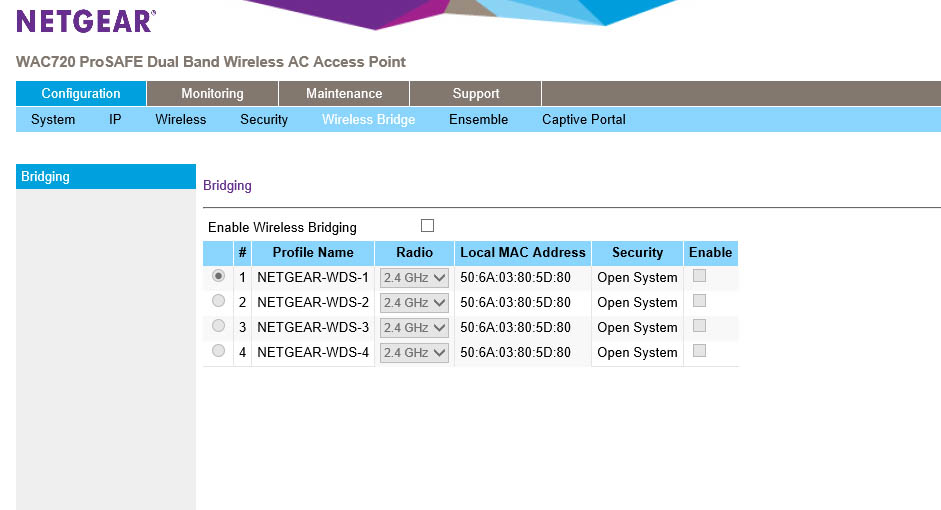 The Wireless Bridge tab is easy to figure out and allows you to setup WDS (Wireless Distribution System) with up to four other APs.
Ensemble -
Here we have a feature that we have not seen on other WAPs just yet, NETGEAR’s Ensemble. As we mentioned earlier this feature allows you to connect up to 10 WAPs into a single group and control them from a single pane. It is pretty simple to set up and get operational. You just need to enable Ensemble mode on the APs you want in the group and then establish a priority for them. This is all done from the first screen where you add in the AP name and the Ensemble group name.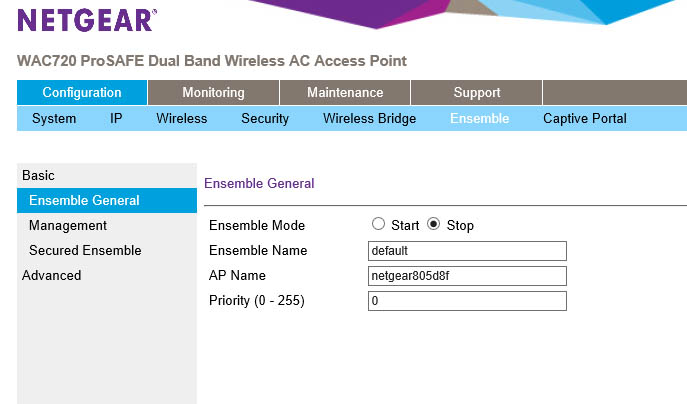
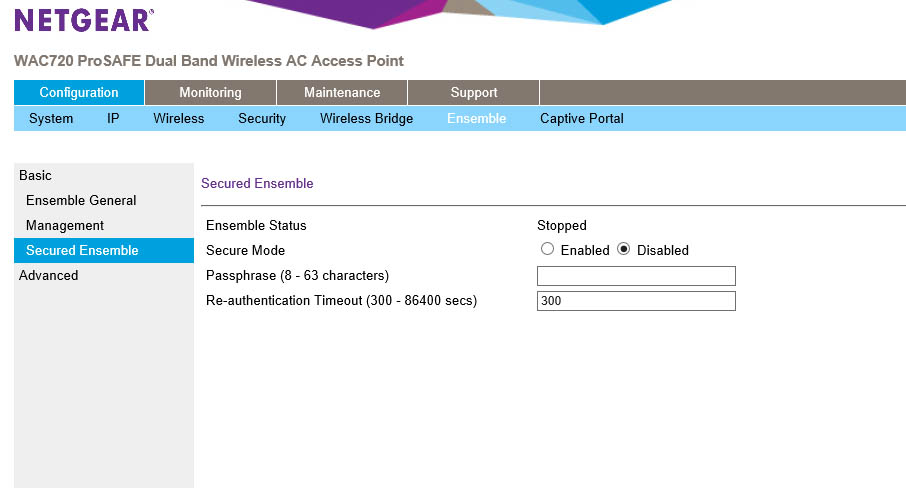
When you first set up the Ensemble group you do need to do a little more though. After turning on the service and then coming up with a clever name you need to establish an IP in the same subnet that you want to use to manage the group. You can also setup up a password so that all of the APs can identify themselves and to make the group more secure. We highly recommend doing this when you first setup the group.
 |
 |
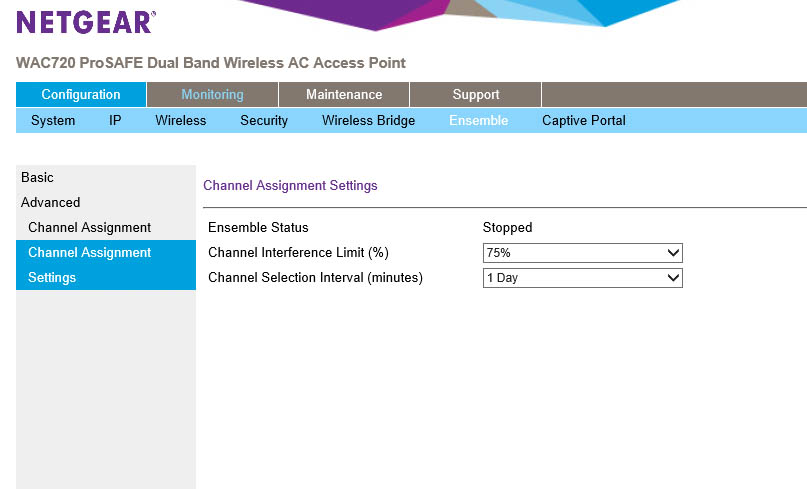
Under the advanced tab are some of the settings that you usually only get with a wireless controller. Here you can setup a channel plan and how to apply it. You can set the channels to be automatically assigned or statically. The trigger that changes the channel is through interference detection on the AP. When it hits a threshold it switches to another channel in the range so that there is no overlap that would affect the network.
 |
 |
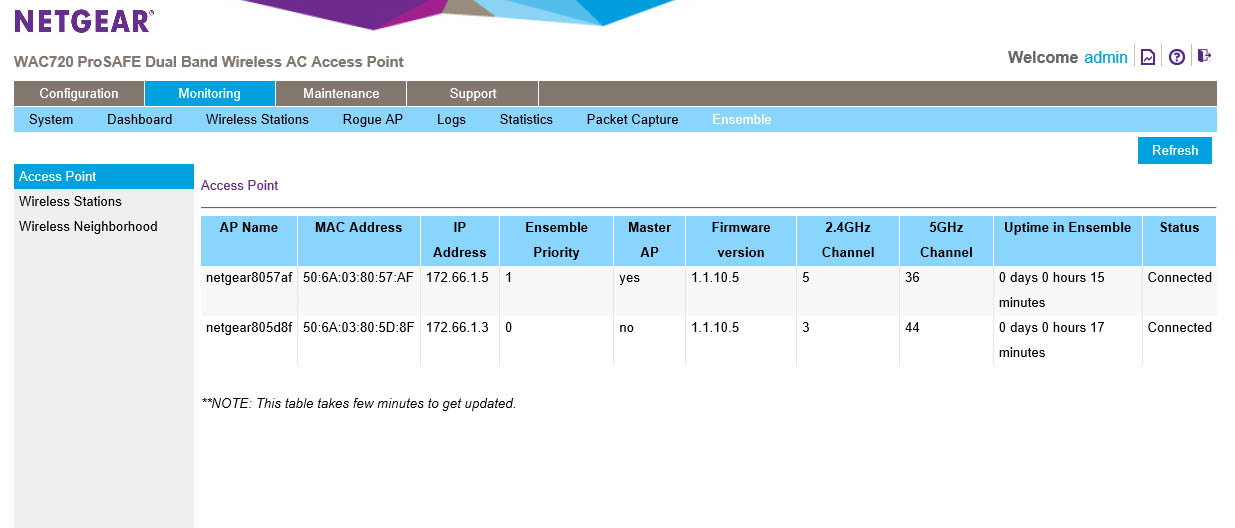
Now once Ensemble is turned on you get some new information available to you on the dashboard. Some of the data is pretty cool and is very helpful in maintaining your wireless network.
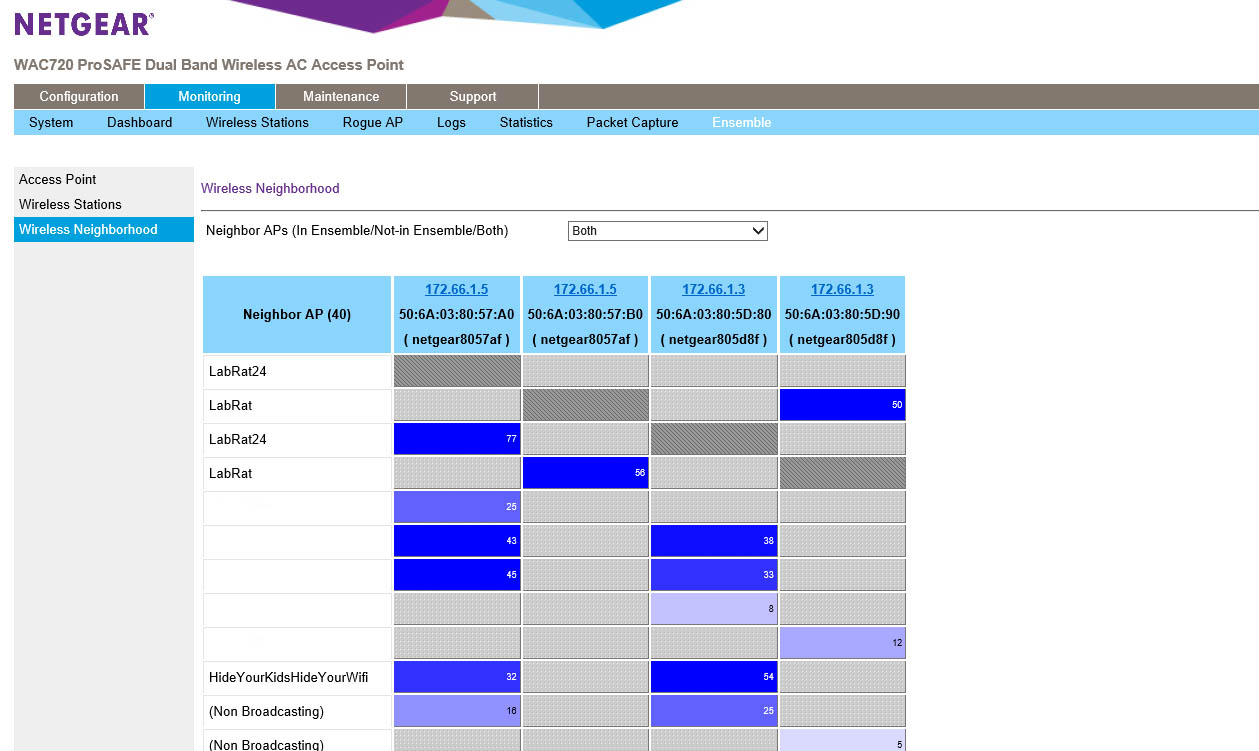
You can see the APs in the group, the SSIDs and who is associated with them as well as any nearby wireless stations broadcasting. On the screen that shows your wireless neighbors it also shows the channels they are pushing their signal out on and which AP (and frequency) they are impacting the most. The numbers listed are the RSSI for each broadcast.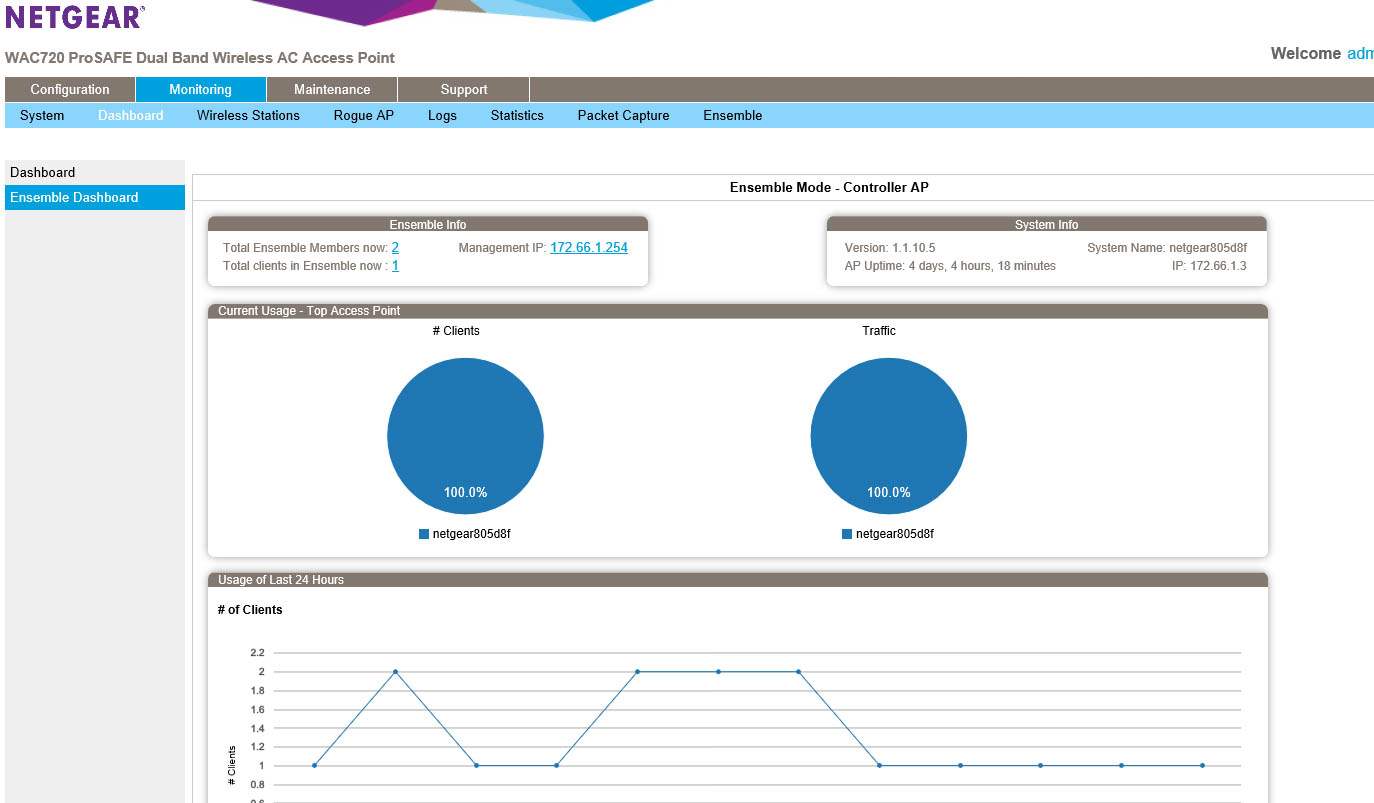
 |
 |
 |
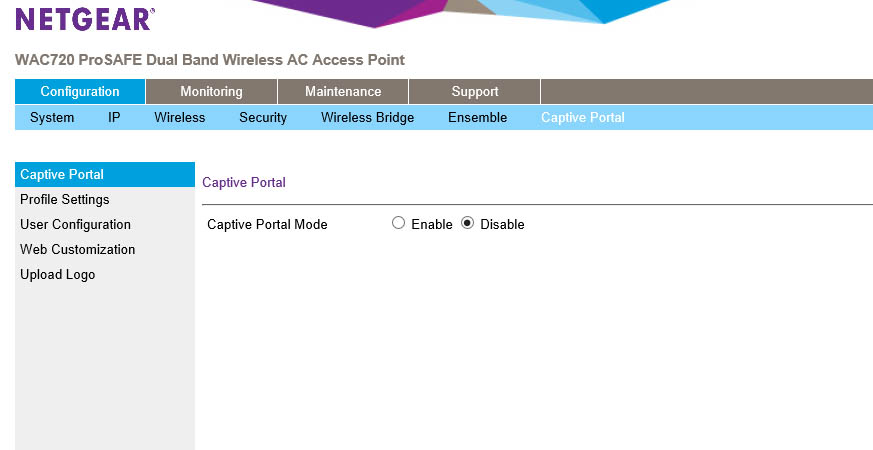
The last item on our list is the Captive Portal. This is the same item that you see when you use most hotel or public wireless systems. It is a web page that is designed to show terms and conditions of use, but also to show your users what you might be doing to their traffic. If you use any sort of packet inspection, IDS, IPS etc. then you should be listing that here and requiring that the use acknowledges it before allowing them access.
 |
 |
 |
You can apply a captive portal to different wireless profiles (after you configure them) when they are in admin mode the portal is should be shown. When you select a profile you can the edit the settings including redirecting a user to a certain page after login. You can also choose a few authentication methods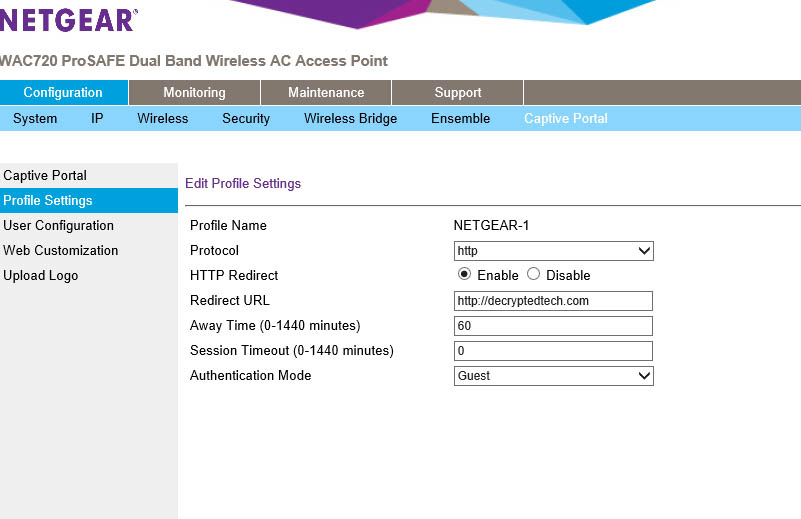
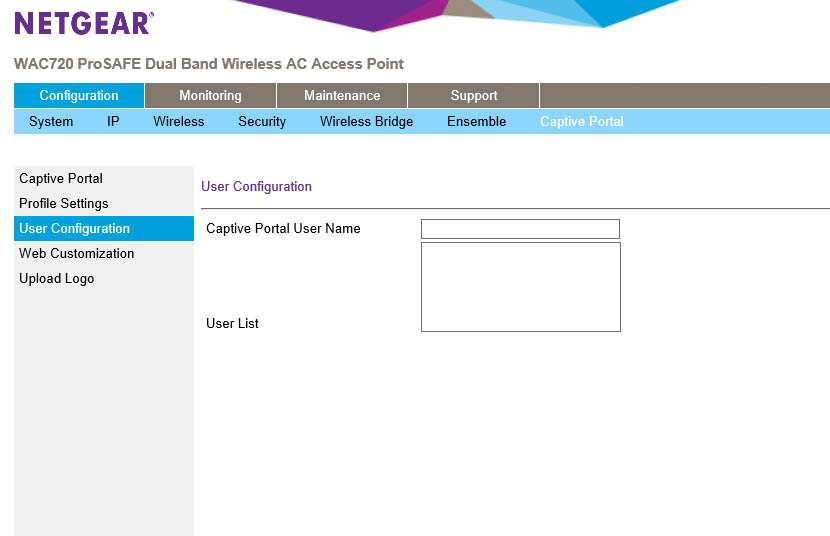
The rest of the screens are designed to allow you to create your own captive portal and add users to the local database for the system to use for authentication.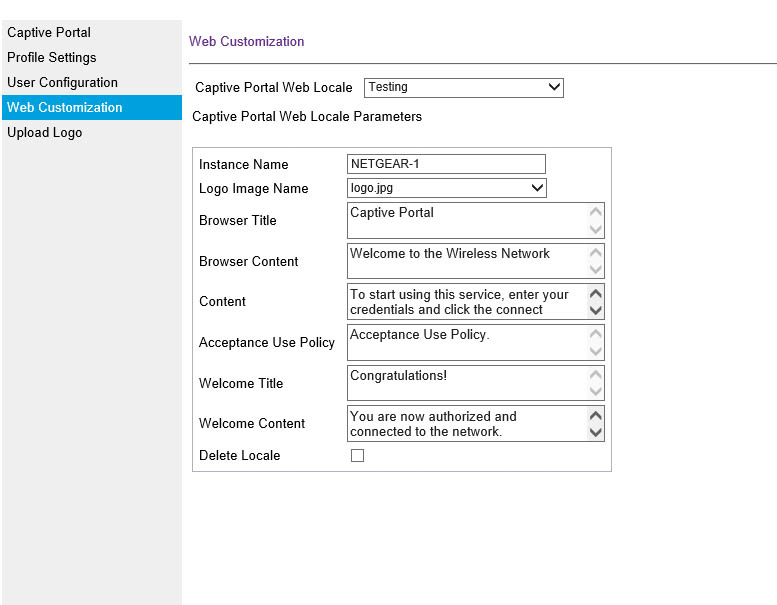 Unfortunately we were not able to get the captive portal function before the deadline on this review, but we are actively working with NETGEAR to identify the issue and resolve it.
There are only two more tabs left to cover and one of maintenance and support.
On the maintenance page the only thing of note is the ensemble upgrade. This handy little feature allows you to push out code updates to all APs in an ensemble group meaning you do not have to update WAPs one at a time.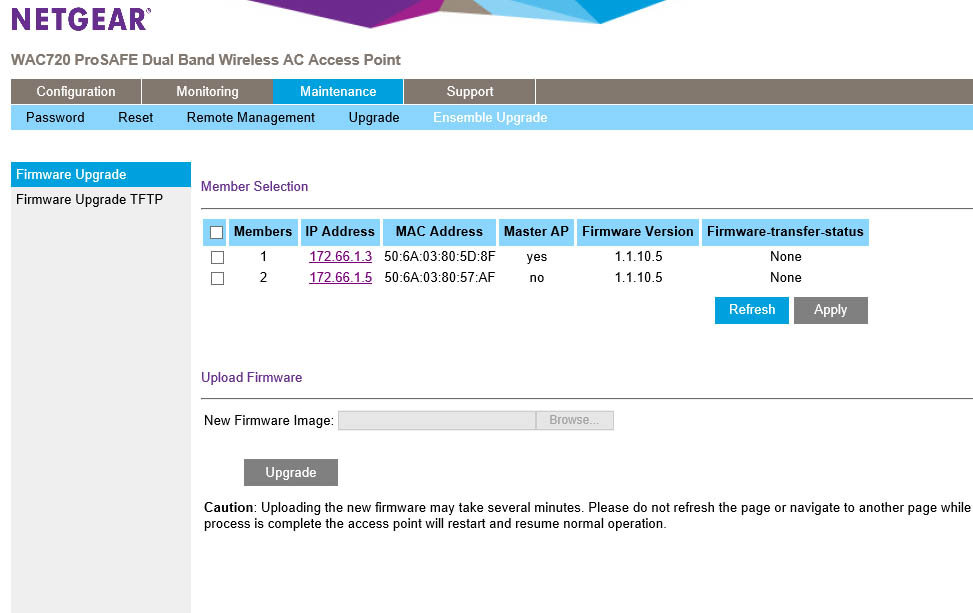
All in all, the NETGEAR WAP720/730 looks to have a number of features that should appeal to a lot of small businesses. Now let’s see just how well they performed.
Performance -
The performance of a WAP or group of WAPs is not just about the speeds you get. In many cases, the speed of the WAP will exceed the speed of the internet connection that people are trying to get to through the WAP. However, speed cannot be counted out just because you only have a 5Mb connection from your ISP. Three will be people trying to connect for internal use etc. To make sure we covered this in our testing of the WAP720s we had in the lab we made some unusual changes. We build an “admin” vlan connection out to the internet that was set via QoS to run at 100Mbps and two additional connections set at 3Mbps and 10Mbps to simulate a guest and vendor network. The admin network had both Internet and internal share access while the other two, guest and vendor, were routed directly to the internet. We also set the max number of connections down to six on each AP to test mobility and then set the threshold to 80%. This would allow the 10 devices we had to move back and forth between the two APs as needed.
Our devices were multiple phones (Android and iPhone), two media players (on realtek based and one Windows based), and three laptops using various n and ac wireless adapters. The media players were set to run Netflix on the guest and vendor networks (realtek and Windows respectively), the phones were spread evenly across all three networks, while all three laptops were on the admin network.
Performance across the board was more than satisfactory and we did not detect any issues when clients were moved between APs in the Ensemble group. The fastest transfer rate we saw was from our Asus UX303LN laptop with Intel ac adapter and it was just over 90MB/s during a 4.2GB .iso transfer. This is an impressive speed when you consider the fact that both media servers were actively streaming Netflix and we have 9 other systems actively working on over the same AP group.
Overall, the data performance of the AP group we built was very solid. The user experience was clean with no reported connectivity issues (other than the one we noted about the captive portal above). This is what you want in a business class AP especially when you lump them into a group.
Range was better than what we have seen from APs without the addition of beamforming, but was not something you are going to jump up and down about. In an open area you are sure to get a significant increase in range, but indoors or a closed in office area the increase in range and recention is only marginal. It is still good, but just nothing amazing. We will see truly impoved range in the wave 2 generation of 802.aaac products.
From the admin side the performance was very solid. We had very few issues getting the APs setup and the Ensemble group built. Pushing out the configuration was seamless. There was nothing needed other than click the apply button and all APs picked up the configuration. This is very similar to the behavior you would see with a dedicated wireless controller.
Value -
As of this writing NETGEAR says that the 2 x 2 WAP720 should retail for $499 and the 3 x 3 WAP730 will hit the streets at around $699. These prices are not too bad when you consider the flexibility they offer. In comparison, other APs with the same basic features are in the upper $700 to $800 range and some are in the extremes of $1200 for just the hardware. License and support are extra for some of these as well.
Conclusion -
As we mentioned when we kicked things off, wireless is something that is just expected in the workplace and even in the places we visit as customers. As a business, you need to have it in place. The down side is that building a correct wireless network is not always the simplest or cheapest thing to do. Typically, you are torn between stand-alone access points or buying a controller. The NETGEAR WAP720/730 offers an alternative to this with their Ensemble mode. With either of these two WAPs you are getting solid wireless performance at a good price point. When you add in the ability to function as a group you are getting that little extra that makes them more than the rest of the herd. The setup and UI is very simple and straight forward, which makes administrating them easier as well. NETGEAR is also adding in the ability to grow with the WAP720 and 730. They are planning to roll in the ability to control both of these with their cloud based control system and their in premises wireless controllers. This means you can continue to grow your environment and maintain the same hardware you have in place, including your PoE switches. NETGEAR’s WAP720 and 730 use standard 802.3af so there is no need to buy new switches if you can already support this. Aside from a few minor issues we were very impressed with the NETGEAR WAP720s we had in the lab and can recommend them to anyone looking to build out a wireless network, or that wants to upgrade their existing network to 802.11ac, but is not quite ready to shell out the cash for a wireless controller.
With their combination of flexibility, performance, ease of use and price we are happy to award the NETGEAR WAP720 our Gold Key award.
 |
