Reading time is around minutes.
System -
The system options are just that. From left to right you have your entire network configuration including basic IP settings, teaming (including 802.3ad) and even an option to allow for IPV6 tunneling. The DS1513+ has a few extra options here. Not only do you have four ports you can setup under 802.3ad you also have the ability to setup an HA (High Availability) cluster with another DS1513+ which gives you failover between the two units (we will talk about this setup a little later).
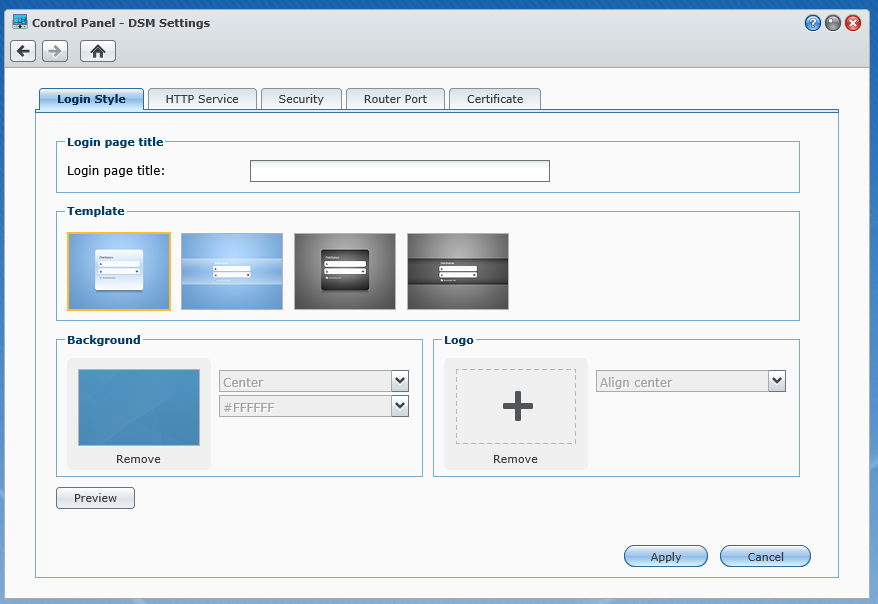
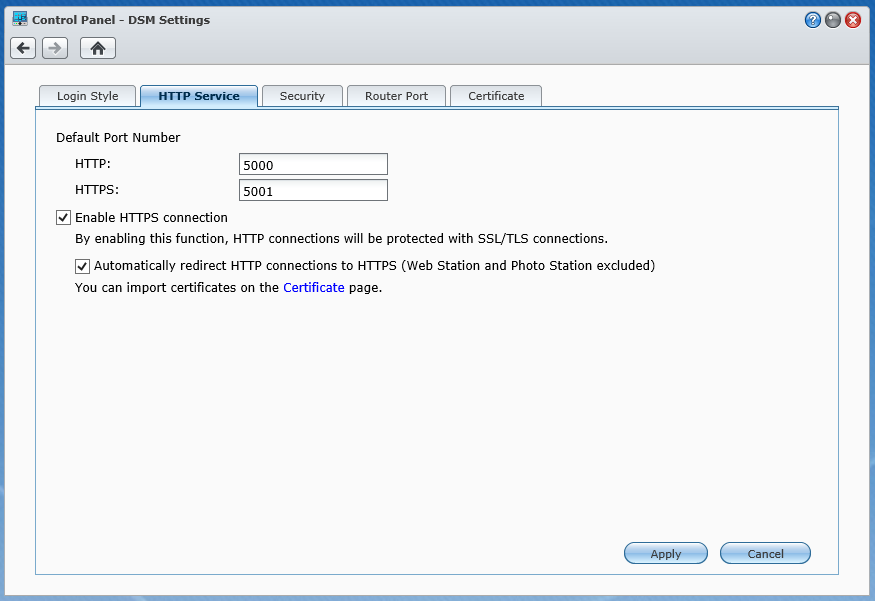
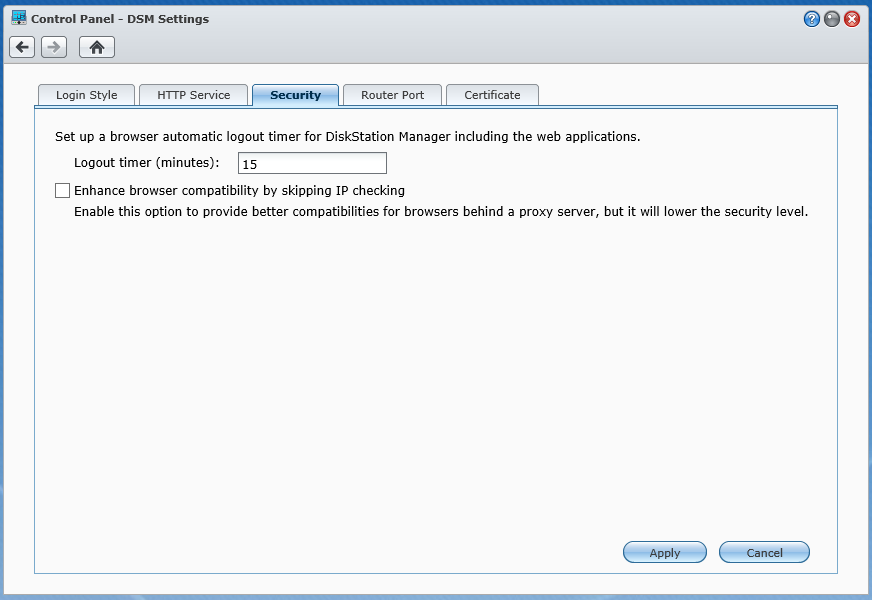
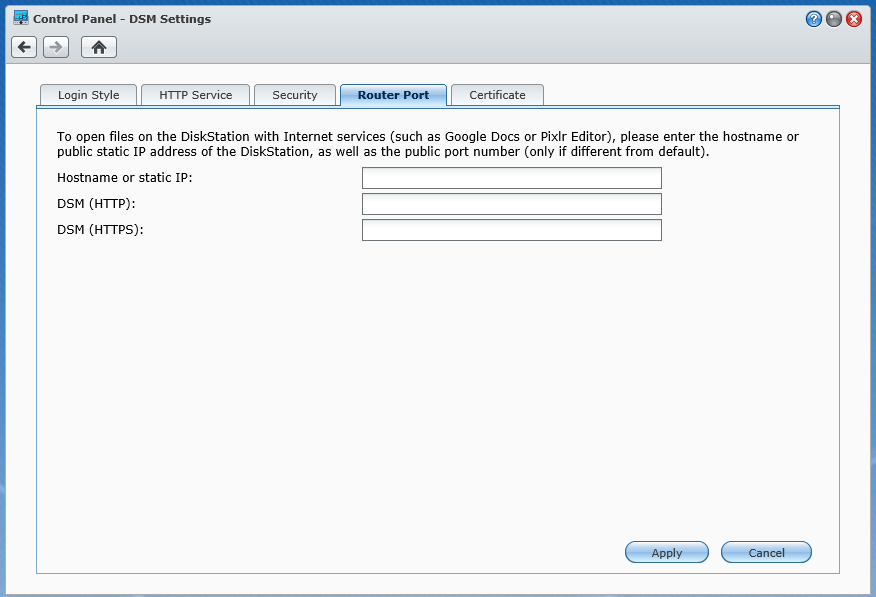
Next up is the base settings for the DSM software including the style of the login screen, HTTP and HTTPS connection settings, the inactivity timeout and the port that you will use to access shared files through your router.
Regional settings and notification are again easy to understand, we will add that Synology allows you to setup email, SMS, and direct push notifications which is a very nice touch.
You can pretty much guess what is in power settings, you can control wake on LAN, HDD hibernation what to do after a power failure and even set times for the DS1513+ to power on and off.
External Devices is just that, it will show you any external devices that are plugged into your DiskStation. I our case we plugged in a Seagate Black Armor eSATA disk to see how it would work. We had no issues with this or any other external drive we plugged in including a USB 3.0 HDD dock From Thermaltake.
Restore Defaults and DSM update also do not need explanation.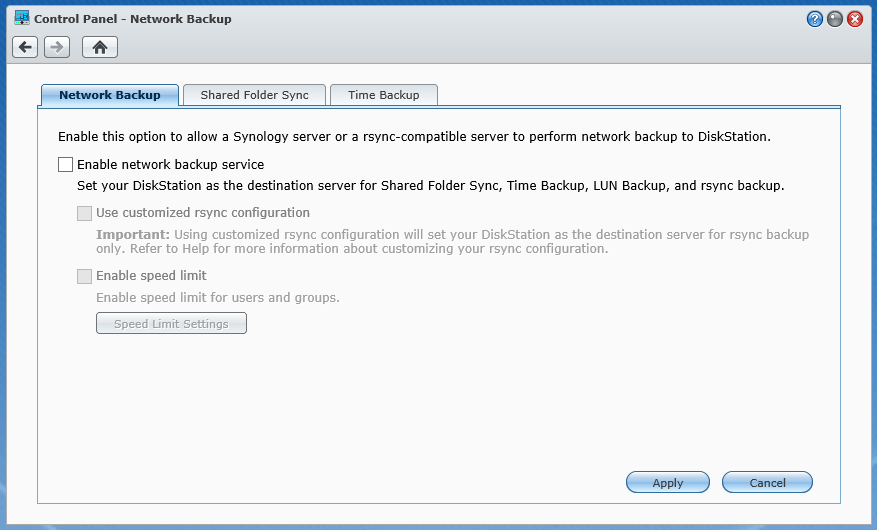
The last item under networking is the backup system. Here you can enable your Synology DiskStation to be the target for backing up other DiskStations or any other rsync-compatible server. With the time backup package you can perform timed “snapshots” of your data so you can go back to various points in time to see different version of a file. If you are worried more about the data on your desktop/laptop do not worry there is an app for that too. Synology has their free Data Replicator 3 software that allows you to setup a very granular backup plan for those too. For Macs you will be happy to know that your DiskStation has native support for Time Machine. You can turn this on when you enable the Mac File Service.
Application Settings -
Synology has worked very hard to make sure that their products are not stuck in a rut. There is nothing exciting about storage to most people. However, if you make the device capable of working with multiple systems and give it the ability to add additional functionality then it becomes much more interesting to anyone looking at it.
 |
 |
To make sure things are still secure you can setup different access for different people, if you do not want a user to have access to a certain application you can deny that right from the DSM. This includes both local and Windows Users and groups.
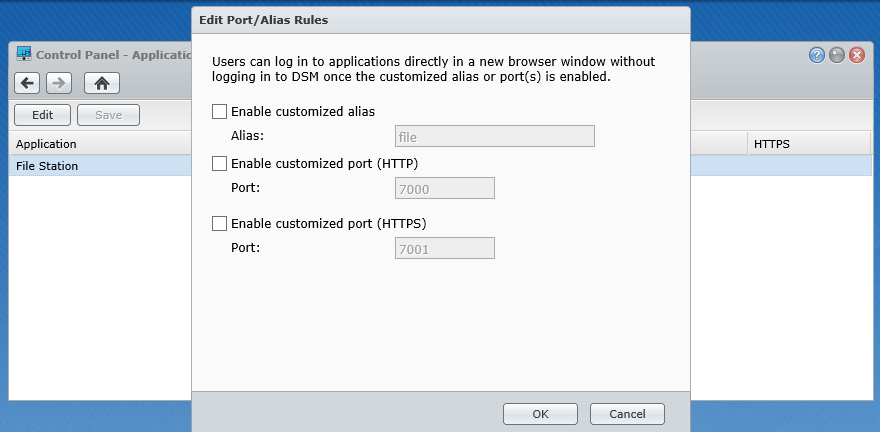
The Application portal shows you the currently installed applications that are accessible to users directly (they do not have to log into the DiskStation Manager to get to it) the default is File Station, but you can add others. To get this working you will need to setup an alias and a port (either HTTP or HTTPS).
Syslog is what it says, but you will need a syslog server to send these logs to. Luckily there is a package for that in the package center which we will talk about in just a minute.
The VPN option allows you to create a VPN tunnel between the DS1513+ and another site. This is great for offsite backups to another server. You can have a secure tunnel over the internet while your data is transmitted.
Media Indexing is, again, self-explanatory, but in this case there are some options that you would not normally find under Media Indexing. One of these is the conversion settings. You can set the quality of the thumbnails for pictures and also enable videos to show up in the photo Station when using a mobile device. You can also create indexed folders straight from this menu and list them under a different name for the Photo Station.
 |
 |
 |
 |
Package Center –
One of the advantages of the Synology System is that they have quite a few default packages available for you to install to your DiskStation. In addition to ones written and offered by Synology there is a pretty good third party eco system that you can extend the functionality of your DiskStation even farther including having your own CRM (Customer Relations Manager) software and even a WordPress Blog. Each of the applications keeps a log so you can see if there are any issue with them and quickly resolve them if there are, or forward the information to Synology Tech Support to address any issues that are too complex. For our testing we had the Antivirus Essential, Photo Station, Media Server, Time Backup, Python, HA, and The Cloud Station Installed. 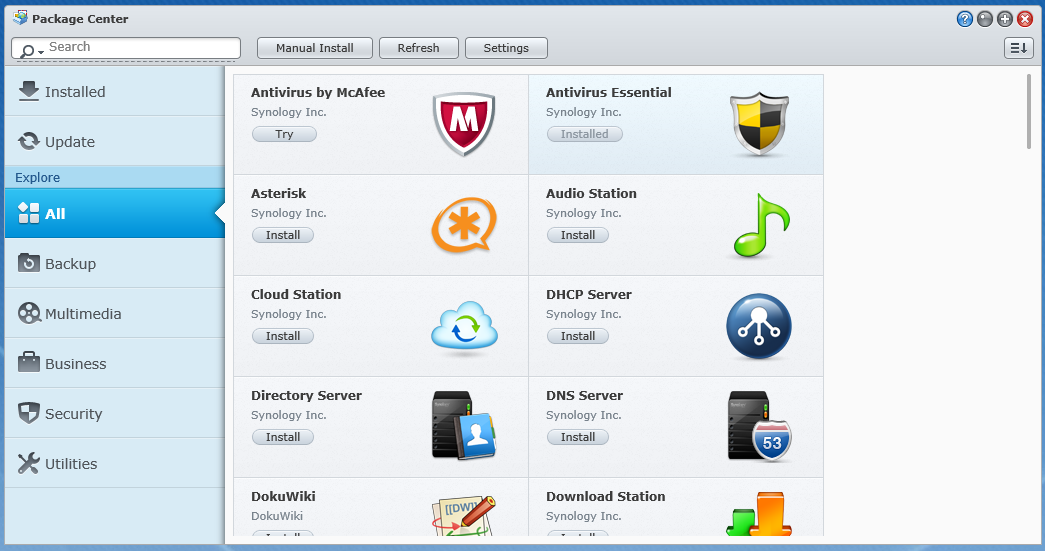
A few other nice features -
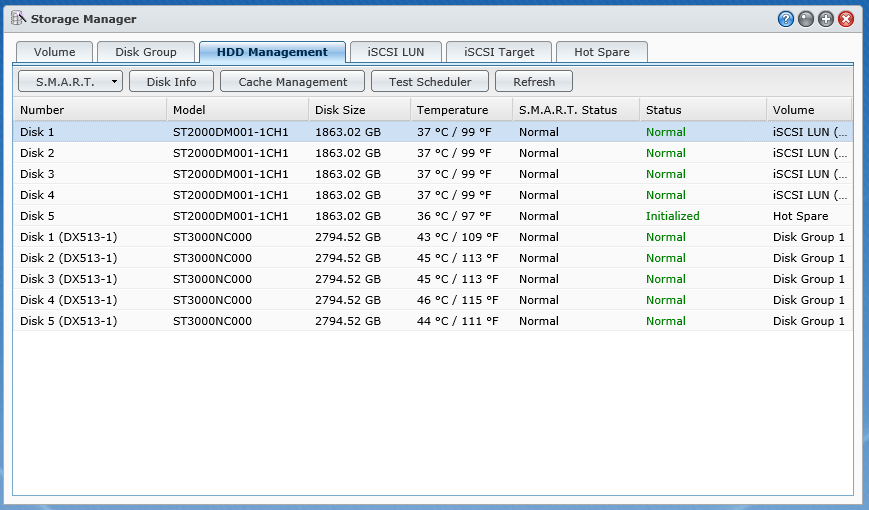
The Storage Manager is the root of the show. Without this piece of the puzzle there would be no need for anything else. Here you can create and build volumes to share as well as check on the status of your disk drives. When we received our DS1513+ it arrived with 5 1TB Seagate drives for use in testing, as you can see in the HDD Management Window all are running as they should, with one drive running a little hotter than the rest.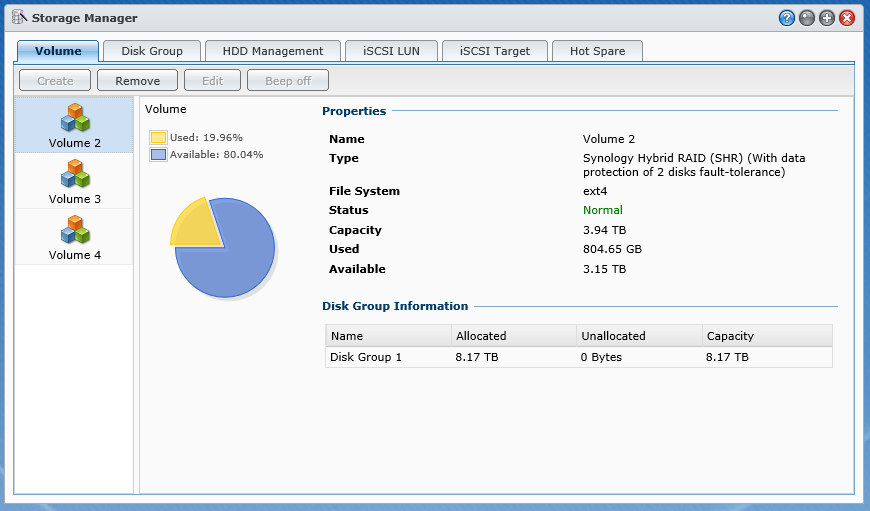
The default volume structure is Synology’s SHR (Synology Hybrid RAID) with a single drive for fault tolerance. You can change this easily and have options for RIAD 1, 0, 5, 10 as well as drive spanning and JBOD (Just a Bunch of Drives) The SHR can also be configured to use two drives for fault tolerance if you are concerned about data redundancy.
 |
 |
For those that are looking to get into virtualization you have full iSCSI support on the DS1513+ as well as (as we have already mentioned) NFS support. This will allow you multiple options for connecting your DS1513+ to your virtualization environment.
For iSCSI connections you have some additional options for security and data integrity after you make your LUN (logical Unit Number). You can change the name of the target, the IQN (although we do not recommend that) and enable authentication through CHAP or Mutual CHAP. In CHAP (Challenge-Handshake Authentication Protocol) the connecting device authenticates with the target; in Mutual CHAP both authenticate each other, this is the most secure form of connection, but can also be a huge pain to manage.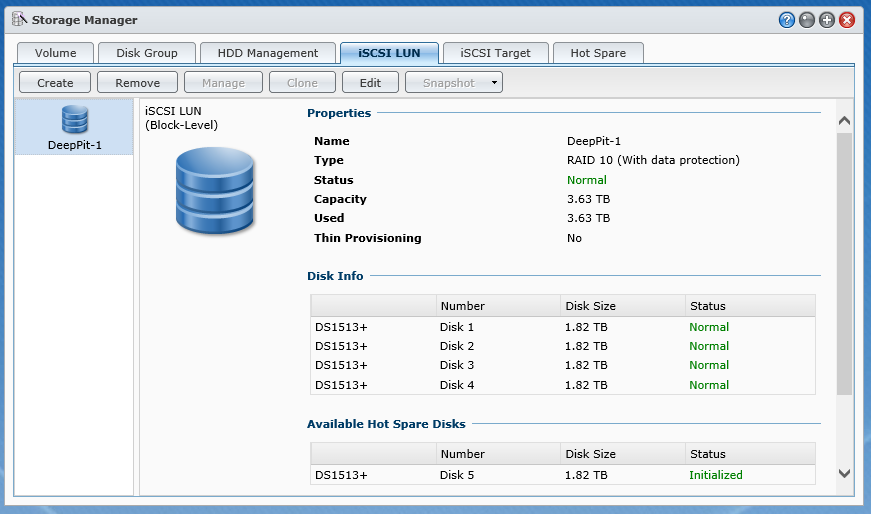
For added data security you can also enable the header and data digest CRC Checksums which will give you more assurance that your data is not being spoofed, but can also slowdown your system.
Mapping and masking are simple; mapping maps the iSCSI target to an existing LUN or LUNs and Masking is the base permission level assigned to the target.
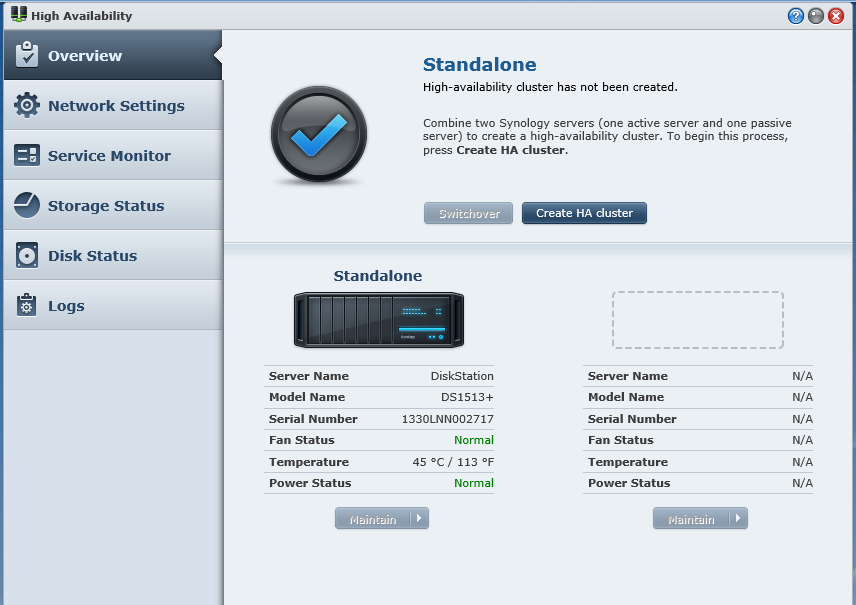
High Availability -
HA is not actually a built-in feature of the DS1513+. Instead it is an application that you need to download and install before you can use it. The HA Application has a prerequisite though. You have to install Python before you can setup the HA App. After getting all of that taken care of we can get HA setup and running.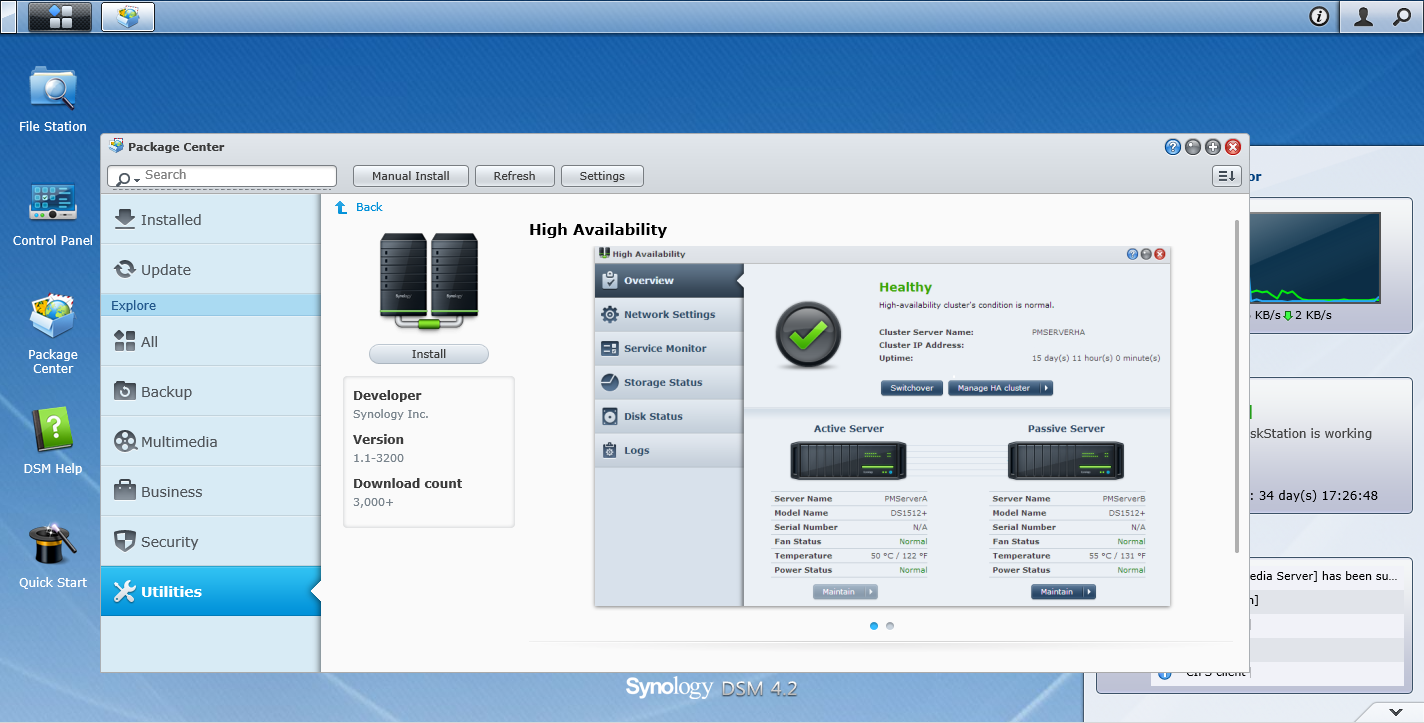
The setup for HA is quite simple, but once again you need to do a few things beforehand. As with most clusters you need to connect the two boxes either directly or to a switch that has a reserved vLan just for the two DS1513+s. This connection gives them a heartbeat connection that is outside of normal network traffic. For our testing we used a direct connection and used an out of band IP address (something not used in any other areas of our network). The subnet mask used was also limited to the two IP addresses used (255.255.255.252 or /30) to keep things straight.
 |
 |
One downside to creating an HA Cluster is that you cannot make use of all of the network connections available. For your main connections to your network you only get to use one LAN port on each unit. Synology has said they will be changing this in the next version of DiskStation Manager, but as of the time of this writing it is only a beta so we will not be covering it. It is also important to note that HA does not work with Synology’s Hybrid RAID, you can only use RAID 5, 6 or 10 with this configuration.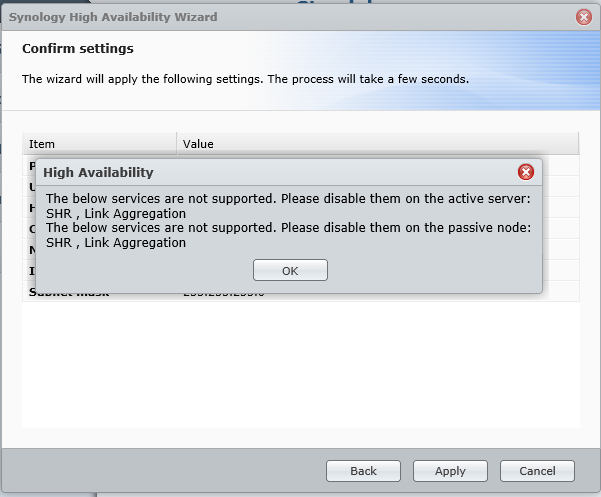
 |
 |
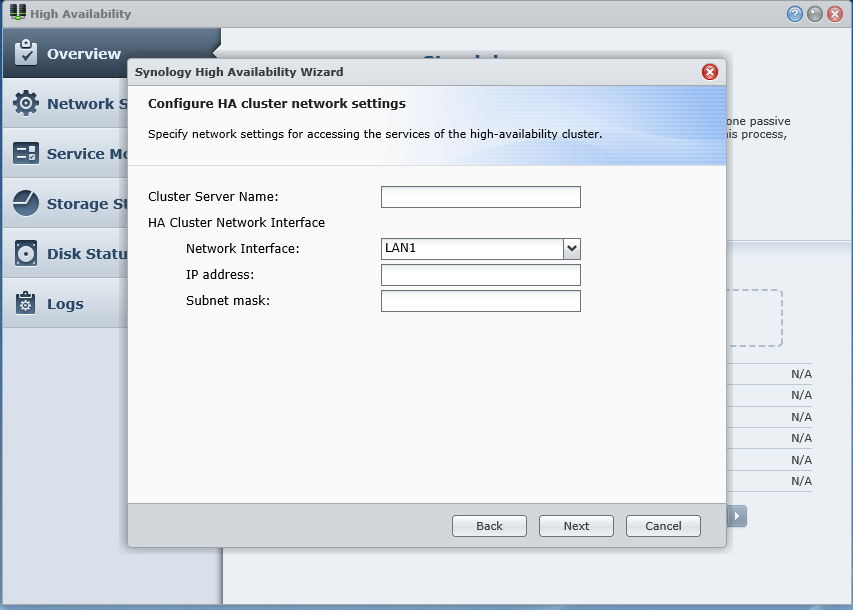 |
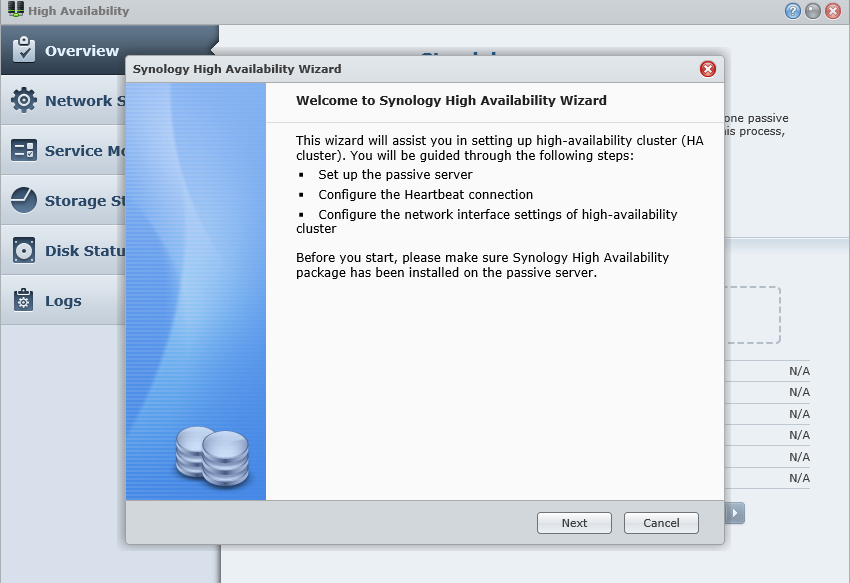
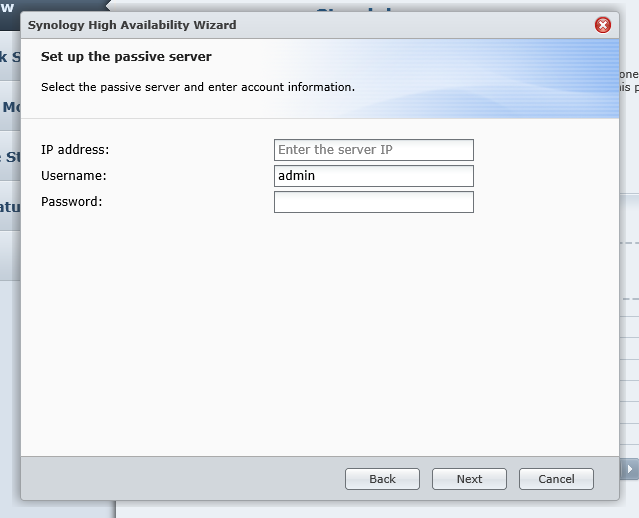
After you setup your Admin and Heartbeat networks you can launch the setup wizard. The first real step is to enter the admin network IP address (plus the admin username and password) of the device you want to use as your passive server. If you are building a new HA cluster from the group up the IP you use does not matter, but if you are adding a DS1513+ to an existing network then the IP address must be the new DS1513+ as the software will copy everything from the active node to the passive node and overwrite all settings (including data). The next step is to setup the heartbeat network. As you can see Synology recommends are direct connection, but you can use a private VLan with tagged traffic for this as well.
After you establish the role of the two nodes and your heartbeat network you need to establish the virtual IP for the cluster. This IP is shared between the two nodes, but is only owned by one at a time. The nodes will pass ownership any time there is a failover so that data continues to flow. All clients will connect to this IP address instead of directly to the node that owns the IP.
After you complete these steps the application will begin the synchronization of data between the two nodes. This can take a little while to complete, but once done the systems will maintain sync between themselves using the Heartbeat network moving forward. This differs from a traditional cluster in that there is no shared quorum. Instead it is an active/passive data copy cluster which has some drawbacks compared to traditional quorum based clusters.
Because of the time it takes for the nodes to take ownership of the IP address and cluster name we found that the HA mode Synology is currently using is not sufficient for any High I/O data. Streaming video, audio, SQL databases, etc. will lose connectivity during the failover. We found that the fastest transfer time between nodes was around 5 seconds. This prevented the system from maintaining a good connection to our SQL databases used for testing. The clients all errors out and had to restart to gain access again. The same is true for streaming audio and video the media players lost connection to the source for long enough that at restart of the media player was required to restore the flow of data.
The best thing we can say about the type of HA used by Synology is that you will not be down for long in the event of a hardware failure of a single node. You will have a few seconds of downtime, but it will not put you out of business. Still in the price range that the DS1513+ is in, there is almost no competition for this level of availability.
