Synology Assistant -
There are a couple of ways you can connect to any Synology device; one is to simply head to the IP address of the device and login to the WebUI (remembering to add in the port 5000). If that is too straight forward you can use the Synology Assistant. This software will find any Synology devices on the network and allow you to connect with them through this interface even though you will still have a webUI to work with. The Synology Assistant has more functions that just being able to access your DiskStation though. Recently Synology has stopped putting a CD-ROM into the packaging. This means you will need to download the latest version from their website to get things going (which is not a bad thing).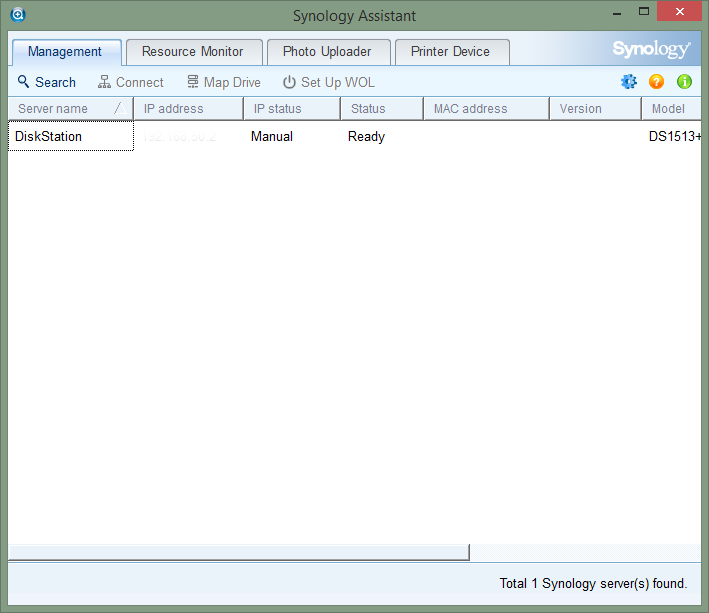
You can setup remote monitoring from your desktop and keep an eye on the health of your DiskStation very easily. Here you can see the CPU, Memory, network and volume performance at a glance.
 |
 |
 |
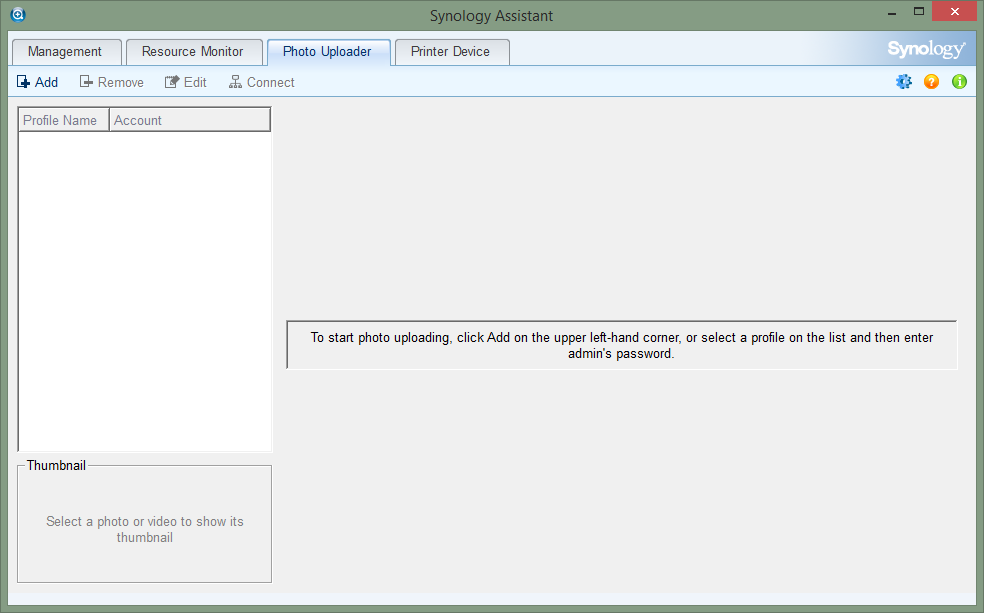
Synology also included a very simple photo uploader which can allow you to bulk upload images on your PC to the PhotoStation utility or to a pre-designated folder on your DiskStation.
Synology has also included a nice utility that allows you to connect a USB printer to your DiskStation and use that like a Print Server. It is a pretty cool utility.
Disk Station Manager -
One of the biggest things that sets NAS devices apart from each other is the WebUI and connectivity tools that are used to configure, secure and also monitor the device. Synology has been perfecting their DiskStation software for some time now and have gotten things dialed in quite well. We have worked with multiple NAS devices and SANs (Storage Area Network) and out of them all Synology has one of the best WebUIs out. It is one of the more intuitive and fast webUIs we have tested.
Once you are logged in the layout of the DiskStation WebUI (DiskStation Manager 4.2) looks a lot like a desktop with a wallpaper background, icons, and even a taskbar at the top. Starting off at the taskbar let’s take a look at what you can do.
In the upper left-hand corner there is a small section of the taskbar that looks different. This is the “show desktop” button. Right next to it is the DSM “start” button. Clicking on this opens up a new window with that has some of your basic options for configuring your new DiskStation.
Now many of these options are already on the desktop as icons (just like in Windows or OSX). You can also drag these out onto the desktop for quick access. The start menu also has your shutdown and restart options here.
Moving over to the right you have options to eject any external devices, look at any events logout and configure the current user, and of course search through the DSM.
On the desktop (in addition to the icons is a widget that allows you to cycle between a few views. The default is system health but you have scheduled backups, resource monitor, current connections, file change log storage and recent logs. There are three sections in the widget and you can set each one to a different view so you are getting the most out of your time in the DSM. You can also minimize it if it is in your way.
Now that we have gone through the meat of the desktop let’s look at the individual pieces that make up the DiskStation.
File Station–
In the File Station Window you can control the files that are on your DiskStation. You have different options to create shared folders on the volumes available on the DiskStation or folders inside the shared folders. You can also upload data with two options; skip or overwrite.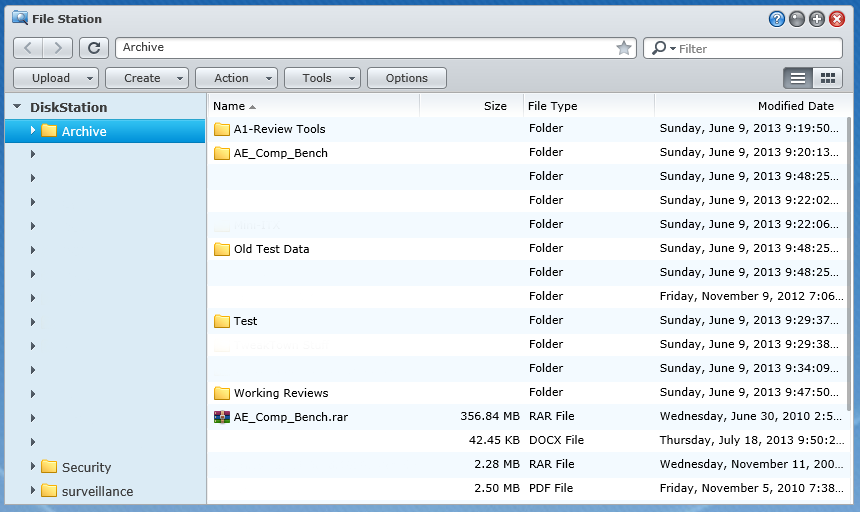
Creating shared folders is simple with easy to follow steps (including making the shares hidden or encrypted). You can choose the type of Access Control List you want to use (Windows or Local) and also if you want the folder indexed for fast searches.
Once the folder is created you can adjust the privileges including being able to disable directory browsing. Another option lets you setup Network File System privileges which enables the NFS protocol on the share (this is great for Linux and also many Virtual host operating systems).
The action menu is just that all of the actions you can perform on a specific file. You also have some nice options to mount remote files (meaning you can use the File Station to connect to other folders on a different NAS device and share them through the single interface) you can mount .iso image files and share them out as well. It is a very cool utility to have and one that makes any DiskStation more than a simple NAS.
Clicking the options button brings up the security and logging options for the file station. Here you can decided who can share links, mount folders and ISO and also enable the log that will let you see who was doing what to the files on the file station.
Control Panel -
In this window we find all of the tools and utilities that make the DS1513+ so flexible. Synology has broken the control panel down into chunks (it looks a lot like OSX to be honest) to make it easier to navigate around.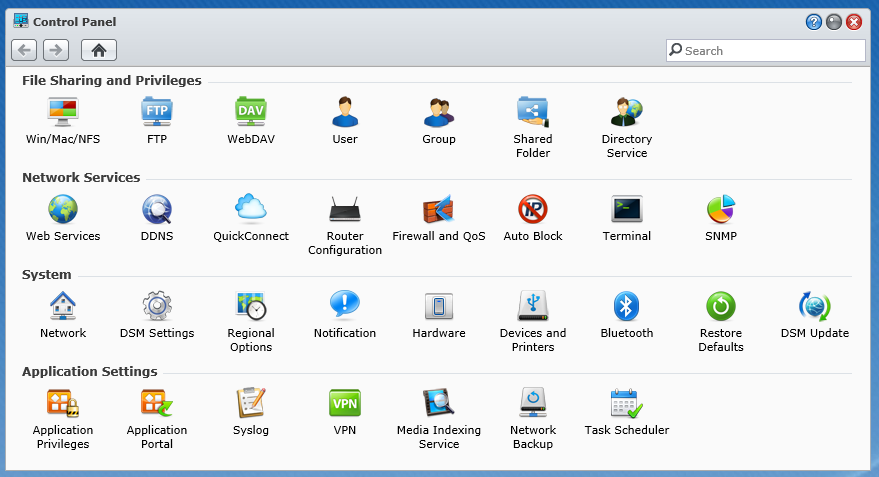
File System and Users -
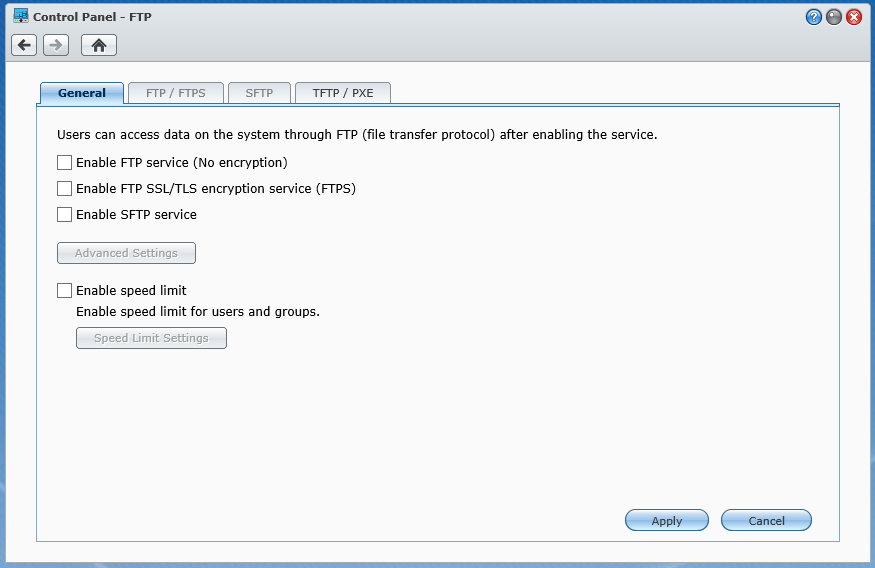
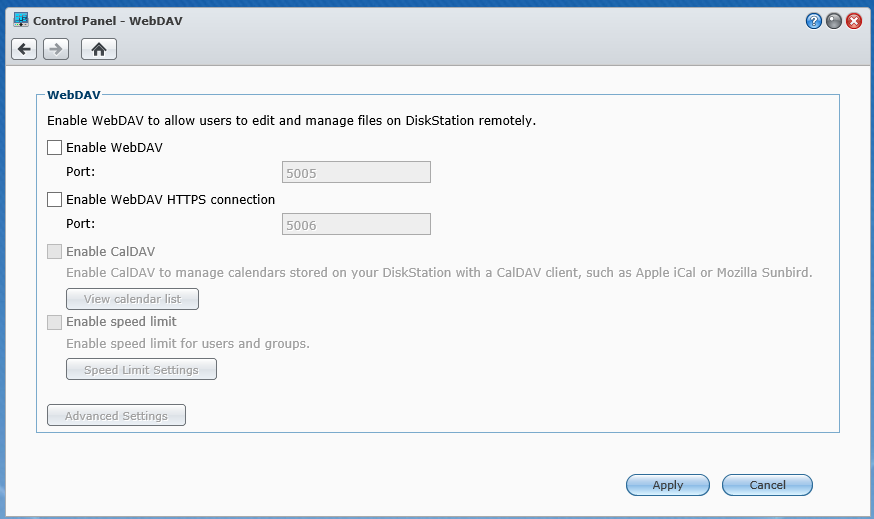
At the top of the window are the file sharing and privileges options. Here you can setup Windows, OSX, NFS, FTP, WebDAV shares and permissions. The FTP options are very nice as they allow you to force connections to use SSL/TLS for security.
 |
 |
 |
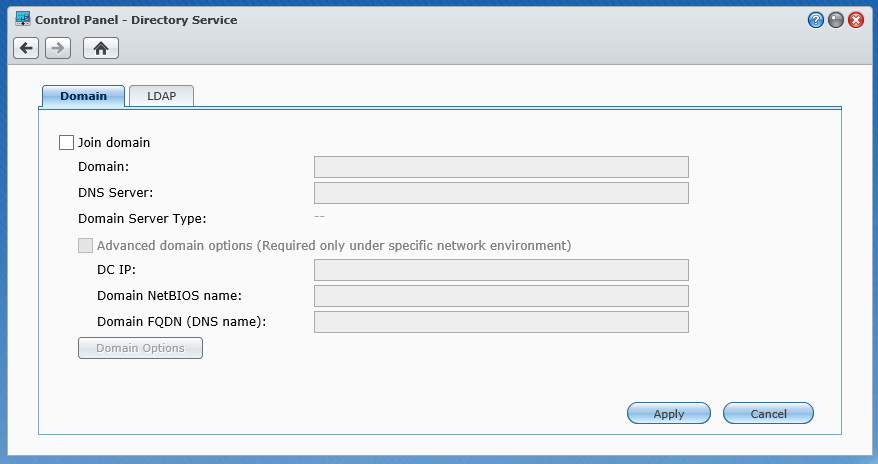
The user and groups options are self-explanatory so we will not get into them here; we have also already covered the options you have in the shared folder option. For Directory Service here are your options to connect to a Windows domain through active directory or the Lightweight directory access protocol. An extra bonus here is that the DS1513+ has the option to enable 2-step authentication using Google’s One Time Password authenticator. You set this up through your phone (iOS or Android) and use either the QRC or a key that you manually enter. Once this is setup then you will have an extra screen that you have to pass before you can access the back end of the DS1513+. It is a much appreciated extra layer of security to help keep malicious individuals at bay.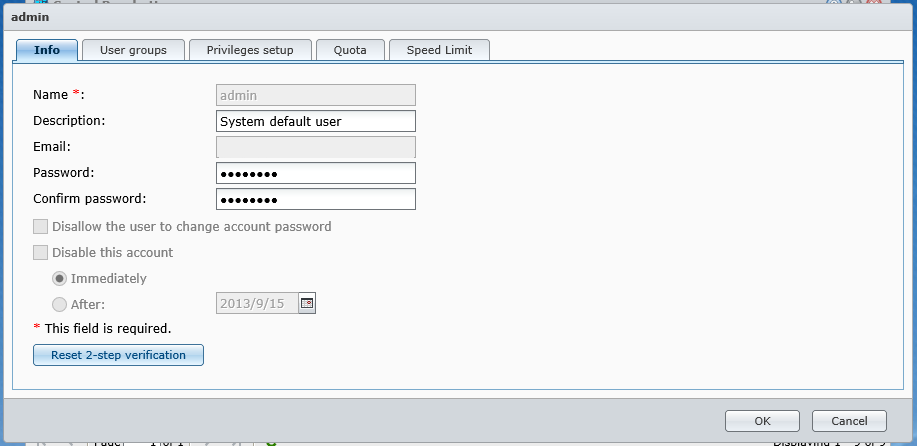 Network Services -
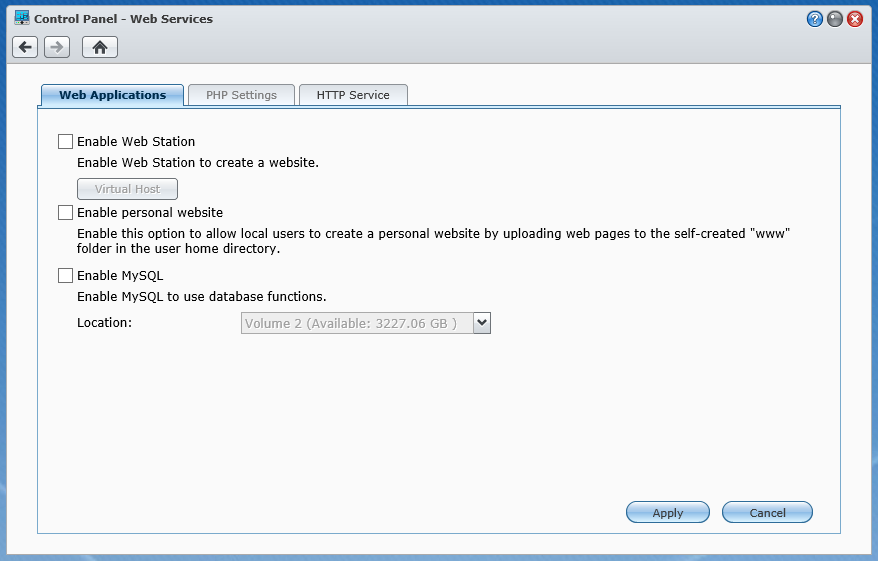
Moving down from there you have even more options, but these are for the network services. You can setup web services (yes it will become its own webserver). Here again you have some decent security options and can setup solid PHP security to protect your files and the DiskStation.
 |
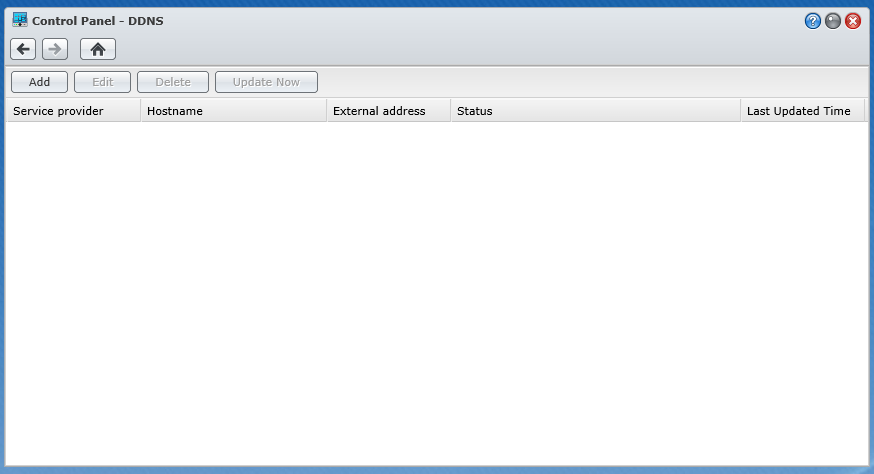 |
The QuickConnect option lets you publish certain services to Synology’s QuickConnectservice for quick access via the internet. As part of the setup you can also register a dynamic DNS domain name with Synology to make connecting back to your DiskStation that much easier. The DSM software also has a quick connect feature that allows you to easily setup paths to your data without the need to tinker in your router. Synology does recommend that you setup port forwarding for best performance, but you do not have to with this service. Now, this means that your DiskStation can become your own personal cloud for file access and more.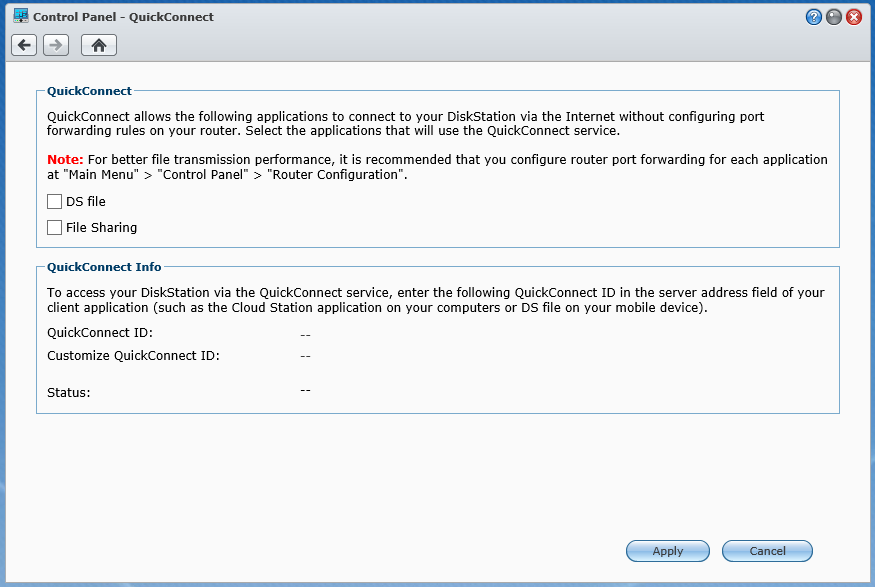
The router option allows you to control access to your DiskStation without needing to connect directly. Your particular router must be on the list to make the connection and to control the device. Our router was not listed as the list currently only includes residential products.
The firewall option gives you extra security for your DiskStation. For example you could create a rule blocking a subset of IP addresses inside your network or a single host. You can also block access to certain ports all in the name of making things more secure for your data. For the really paranoid (or for anyone using the cloud features) you have an auto ban feature that will automatically ban access to the DiskStation by IP after too many failed login attempts.
The next two options are for more advanced users and allow you direct terminal access to the DS1513+ via Telnet or SSH as well as setting up SNMP (Simple Network Management Protocol).
System -
The system options are just that. From left to right you have your entire network configuration including basic IP settings, teaming (including 802.3ad) and even an option to allow for IPV6 tunneling. The DS1513+ has a few extra options here. Not only do you have four ports you can setup under 802.3ad you also have the ability to setup an HA (High Availability) cluster with another DS1513+ which gives you failover between the two units (we will talk about this setup a little later).
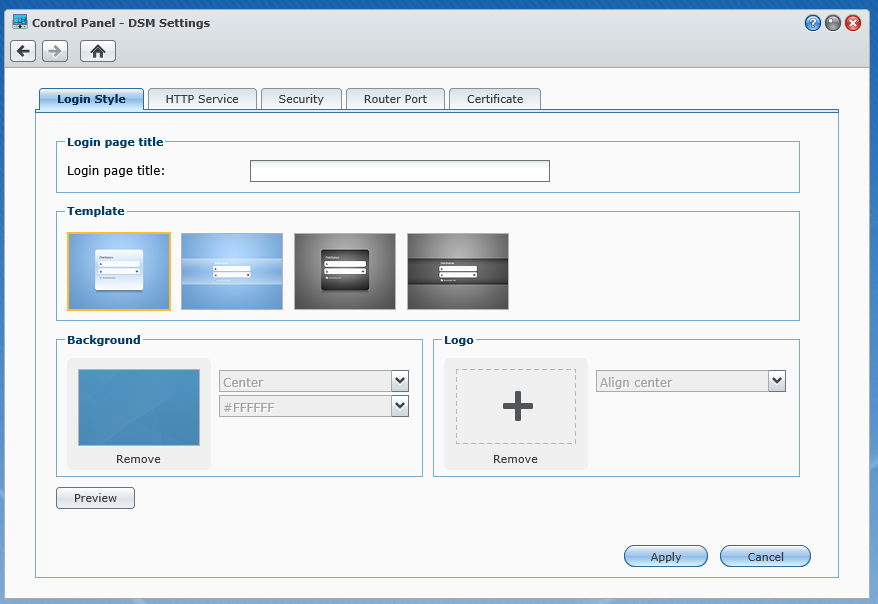
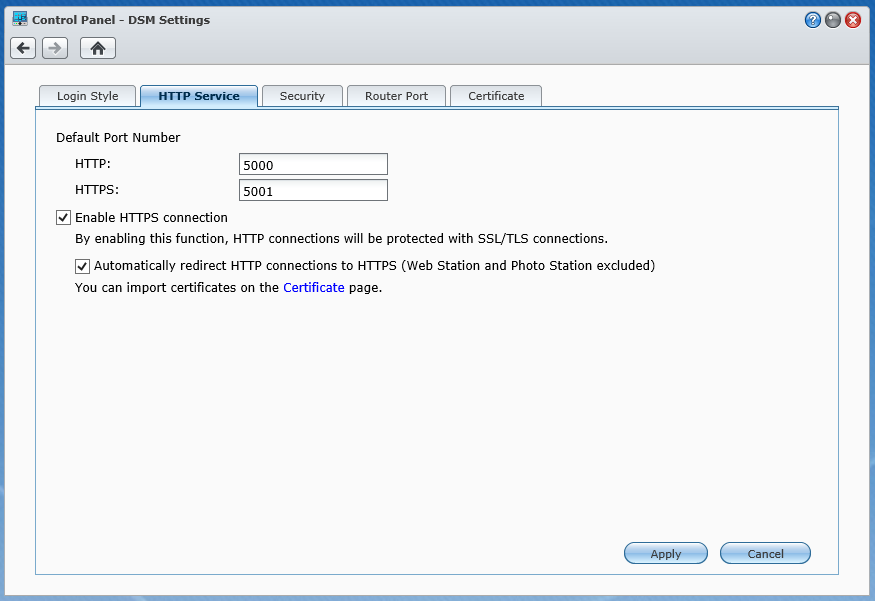
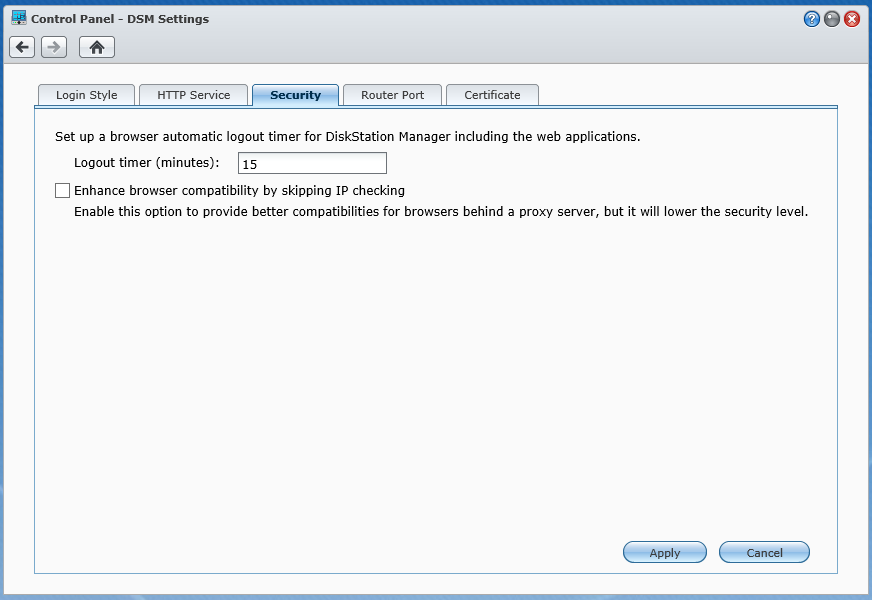
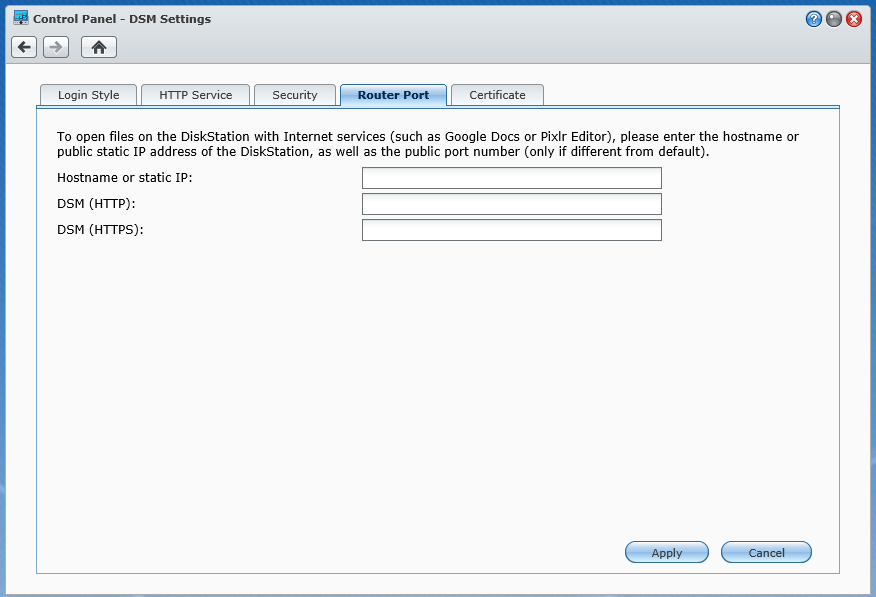
Next up is the base settings for the DSM software including the style of the login screen, HTTP and HTTPS connection settings, the inactivity timeout and the port that you will use to access shared files through your router.
Regional settings and notification are again easy to understand, we will add that Synology allows you to setup email, SMS, and direct push notifications which is a very nice touch.
You can pretty much guess what is in power settings, you can control wake on LAN, HDD hibernation what to do after a power failure and even set times for the DS1513+ to power on and off.
External Devices is just that, it will show you any external devices that are plugged into your DiskStation. I our case we plugged in a Seagate Black Armor eSATA disk to see how it would work. We had no issues with this or any other external drive we plugged in including a USB 3.0 HDD dock From Thermaltake.
Restore Defaults and DSM update also do not need explanation.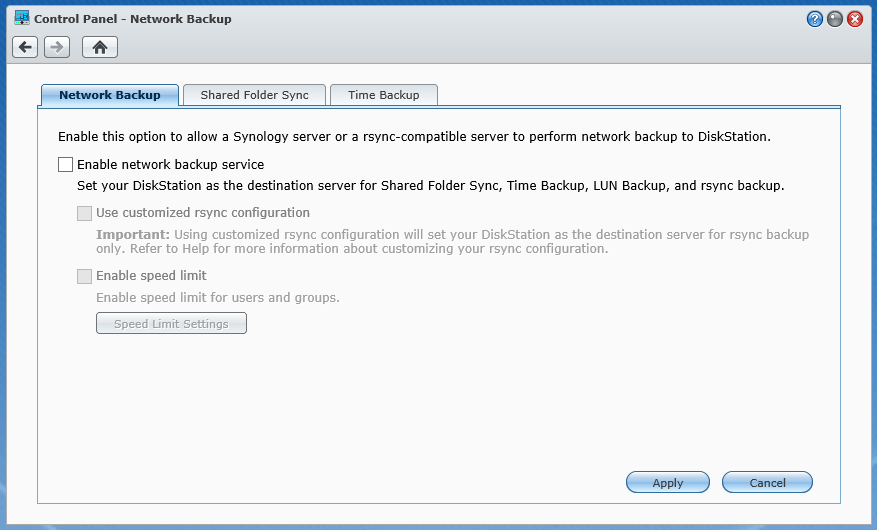
The last item under networking is the backup system. Here you can enable your Synology DiskStation to be the target for backing up other DiskStations or any other rsync-compatible server. With the time backup package you can perform timed “snapshots” of your data so you can go back to various points in time to see different version of a file. If you are worried more about the data on your desktop/laptop do not worry there is an app for that too. Synology has their free Data Replicator 3 software that allows you to setup a very granular backup plan for those too. For Macs you will be happy to know that your DiskStation has native support for Time Machine. You can turn this on when you enable the Mac File Service.
Application Settings -
Synology has worked very hard to make sure that their products are not stuck in a rut. There is nothing exciting about storage to most people. However, if you make the device capable of working with multiple systems and give it the ability to add additional functionality then it becomes much more interesting to anyone looking at it.
 |
 |
To make sure things are still secure you can setup different access for different people, if you do not want a user to have access to a certain application you can deny that right from the DSM. This includes both local and Windows Users and groups.
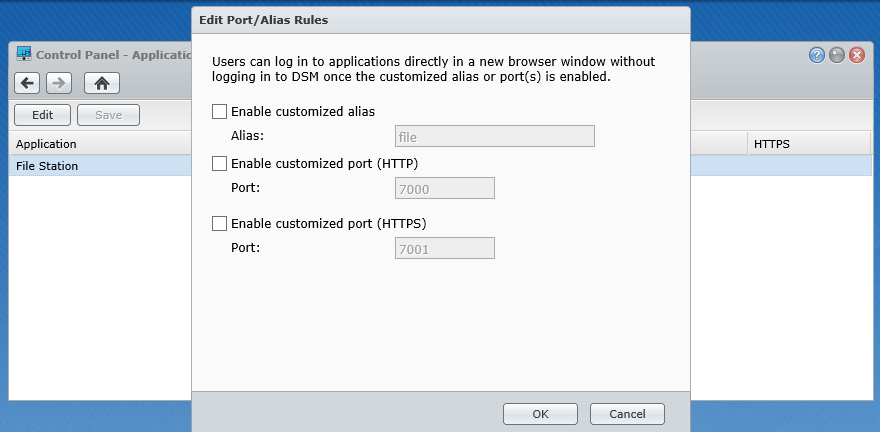
The Application portal shows you the currently installed applications that are accessible to users directly (they do not have to log into the DiskStation Manager to get to it) the default is File Station, but you can add others. To get this working you will need to setup an alias and a port (either HTTP or HTTPS).
Syslog is what it says, but you will need a syslog server to send these logs to. Luckily there is a package for that in the package center which we will talk about in just a minute.
The VPN option allows you to create a VPN tunnel between the DS1513+ and another site. This is great for offsite backups to another server. You can have a secure tunnel over the internet while your data is transmitted.
Media Indexing is, again, self-explanatory, but in this case there are some options that you would not normally find under Media Indexing. One of these is the conversion settings. You can set the quality of the thumbnails for pictures and also enable videos to show up in the photo Station when using a mobile device. You can also create indexed folders straight from this menu and list them under a different name for the Photo Station.
 |
 |
 |
 |
Package Center –
One of the advantages of the Synology System is that they have quite a few default packages available for you to install to your DiskStation. In addition to ones written and offered by Synology there is a pretty good third party eco system that you can extend the functionality of your DiskStation even farther including having your own CRM (Customer Relations Manager) software and even a WordPress Blog. Each of the applications keeps a log so you can see if there are any issue with them and quickly resolve them if there are, or forward the information to Synology Tech Support to address any issues that are too complex. For our testing we had the Antivirus Essential, Photo Station, Media Server, Time Backup, Python, HA, and The Cloud Station Installed. 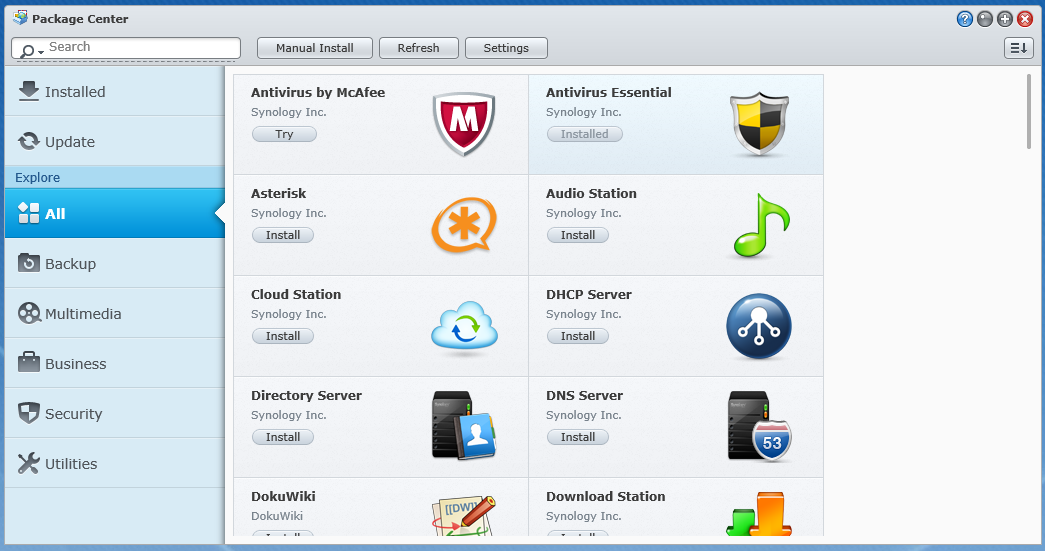
A few other nice features -
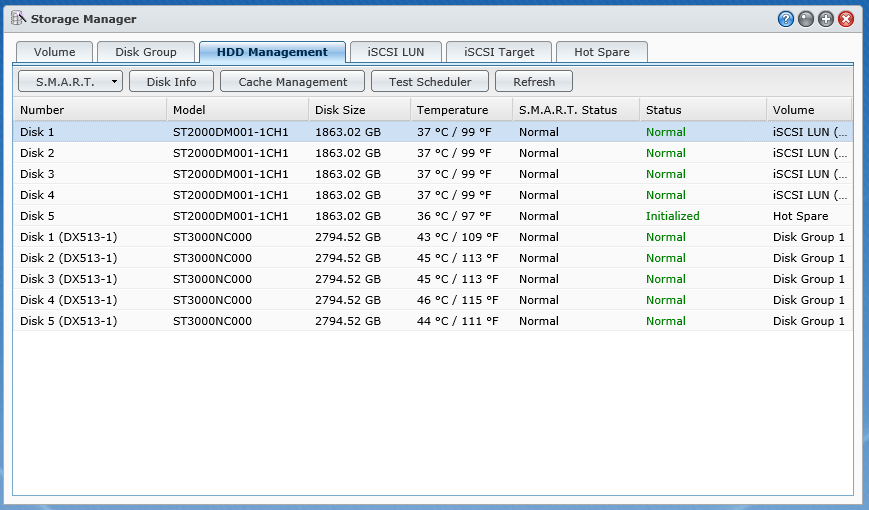
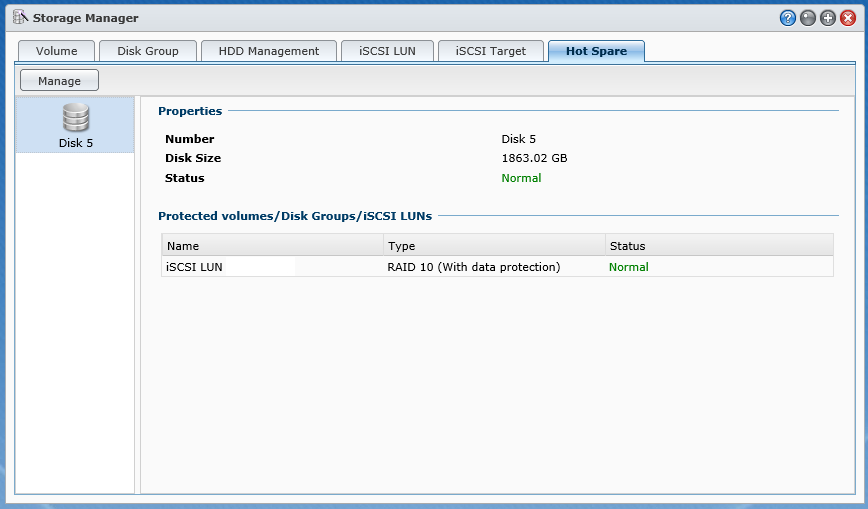
The Storage Manager is the root of the show. Without this piece of the puzzle there would be no need for anything else. Here you can create and build volumes to share as well as check on the status of your disk drives. When we received our DS1513+ it arrived with 5 1TB Seagate drives for use in testing, as you can see in the HDD Management Window all are running as they should, with one drive running a little hotter than the rest.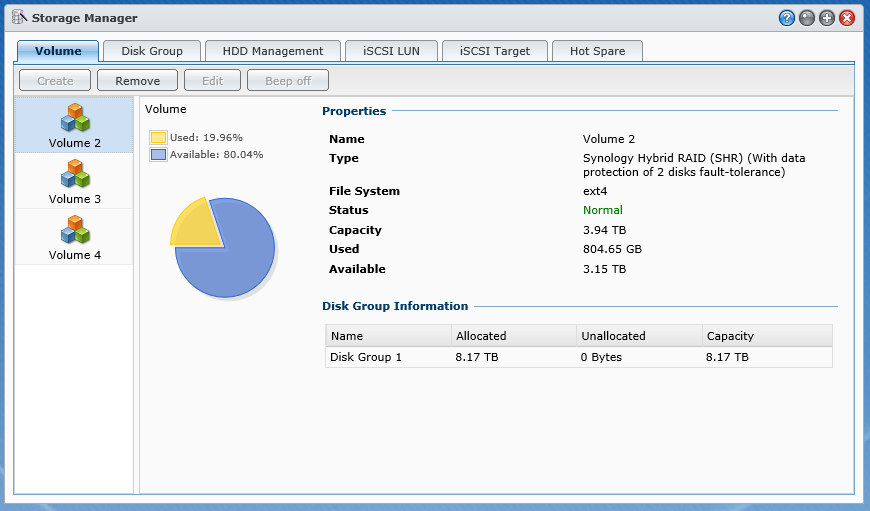
The default volume structure is Synology’s SHR (Synology Hybrid RAID) with a single drive for fault tolerance. You can change this easily and have options for RIAD 1, 0, 5, 10 as well as drive spanning and JBOD (Just a Bunch of Drives) The SHR can also be configured to use two drives for fault tolerance if you are concerned about data redundancy.
 |
 |
For those that are looking to get into virtualization you have full iSCSI support on the DS1513+ as well as (as we have already mentioned) NFS support. This will allow you multiple options for connecting your DS1513+ to your virtualization environment.
For iSCSI connections you have some additional options for security and data integrity after you make your LUN (logical Unit Number). You can change the name of the target, the IQN (although we do not recommend that) and enable authentication through CHAP or Mutual CHAP. In CHAP (Challenge-Handshake Authentication Protocol) the connecting device authenticates with the target; in Mutual CHAP both authenticate each other, this is the most secure form of connection, but can also be a huge pain to manage.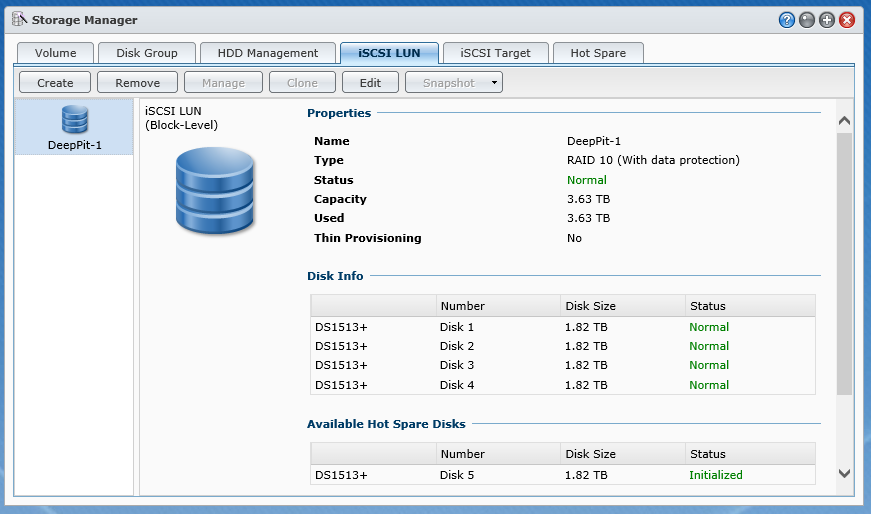
For added data security you can also enable the header and data digest CRC Checksums which will give you more assurance that your data is not being spoofed, but can also slowdown your system.
Mapping and masking are simple; mapping maps the iSCSI target to an existing LUN or LUNs and Masking is the base permission level assigned to the target.
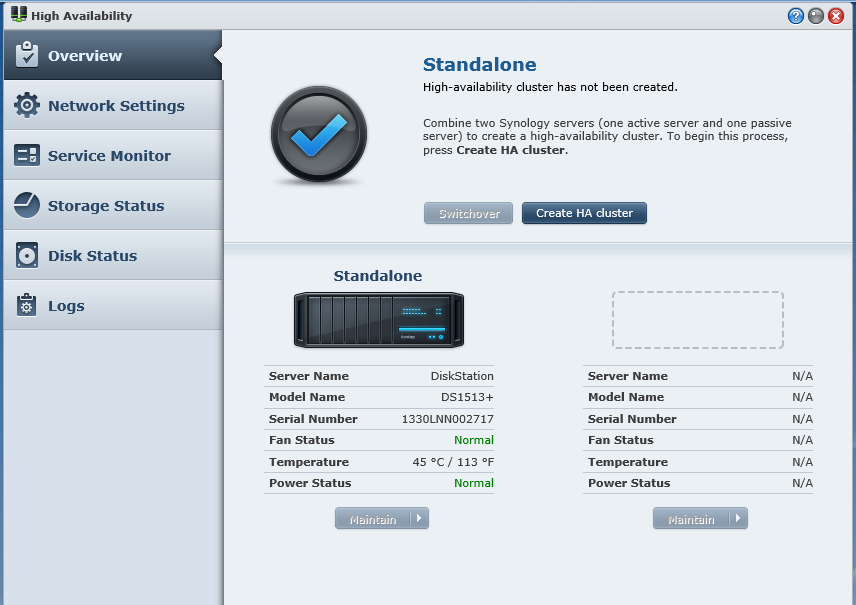
High Availability -
HA is not actually a built-in feature of the DS1513+. Instead it is an application that you need to download and install before you can use it. The HA Application has a prerequisite though. You have to install Python before you can setup the HA App. After getting all of that taken care of we can get HA setup and running.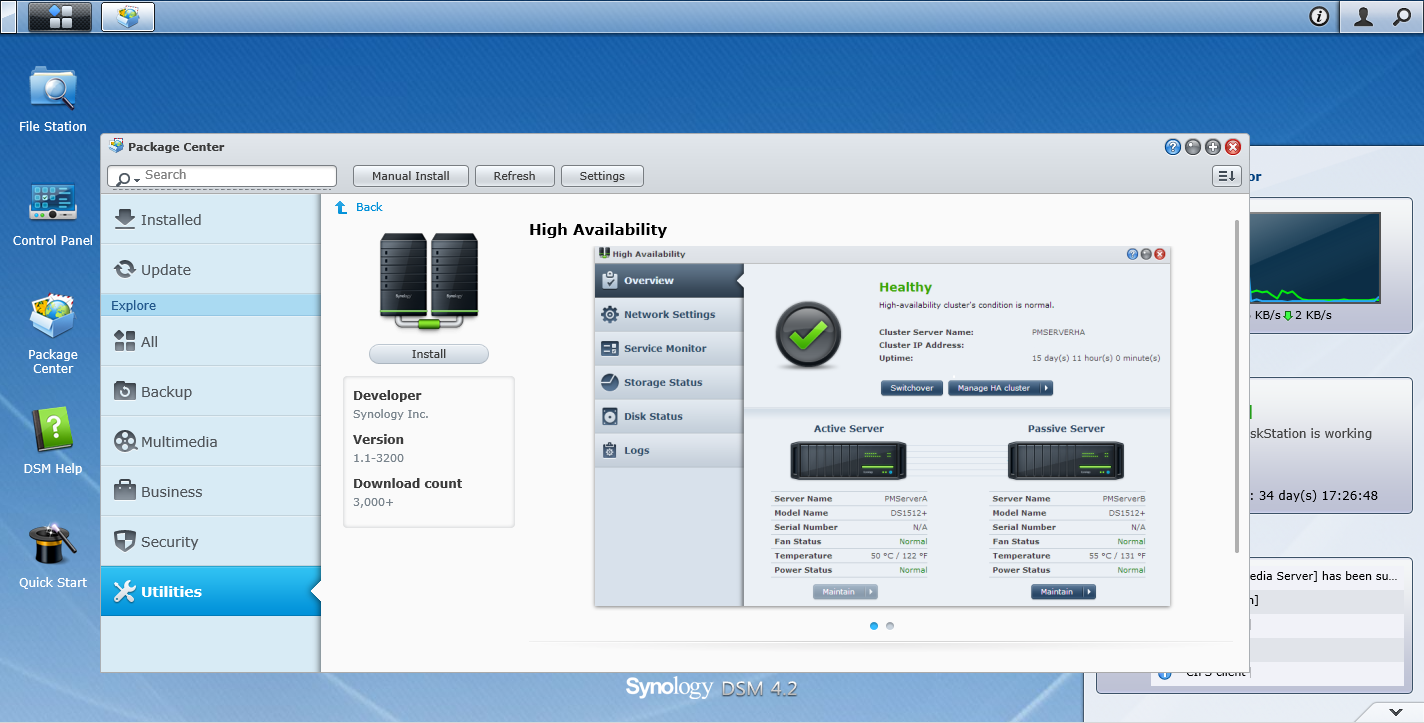
The setup for HA is quite simple, but once again you need to do a few things beforehand. As with most clusters you need to connect the two boxes either directly or to a switch that has a reserved vLan just for the two DS1513+s. This connection gives them a heartbeat connection that is outside of normal network traffic. For our testing we used a direct connection and used an out of band IP address (something not used in any other areas of our network). The subnet mask used was also limited to the two IP addresses used (255.255.255.252 or /30) to keep things straight.
 |
 |
One downside to creating an HA Cluster is that you cannot make use of all of the network connections available. For your main connections to your network you only get to use one LAN port on each unit. Synology has said they will be changing this in the next version of DiskStation Manager, but as of the time of this writing it is only a beta so we will not be covering it. It is also important to note that HA does not work with Synology’s Hybrid RAID, you can only use RAID 5, 6 or 10 with this configuration.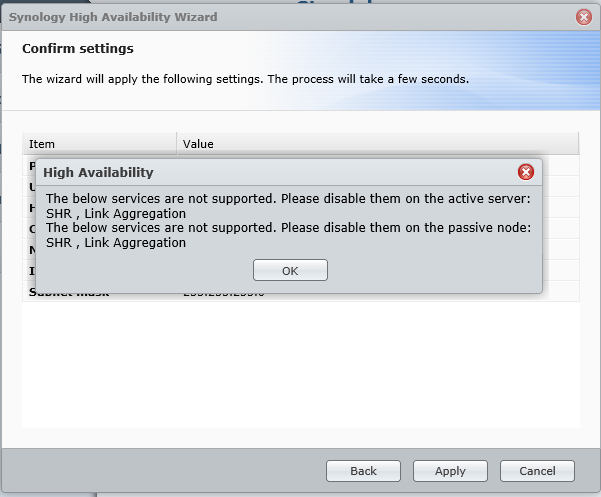
 |
 |
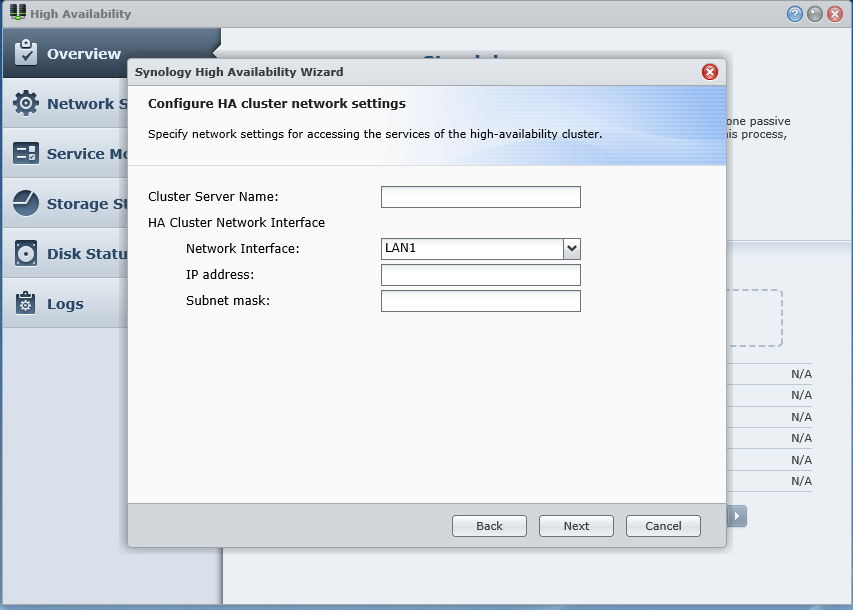 |
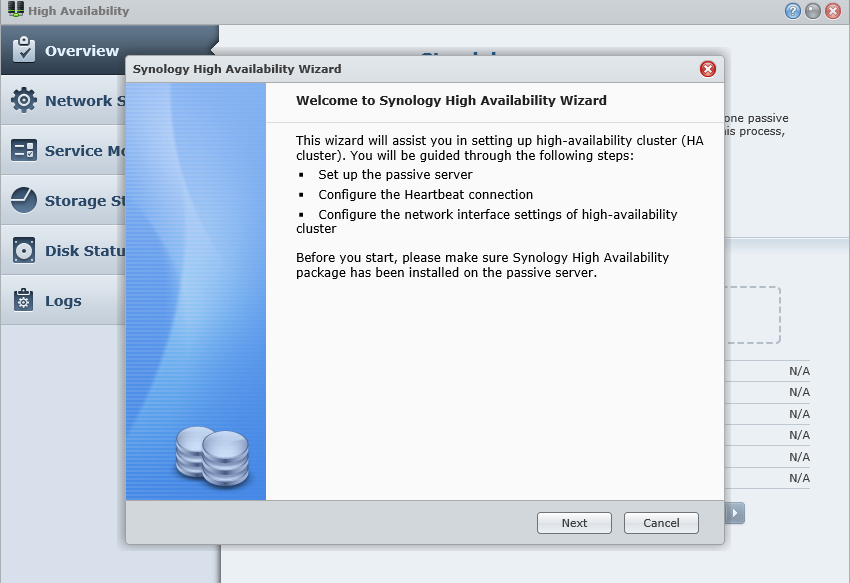
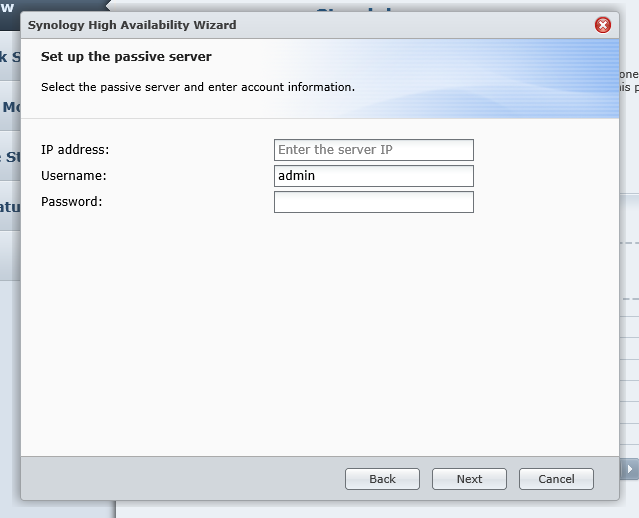
After you setup your Admin and Heartbeat networks you can launch the setup wizard. The first real step is to enter the admin network IP address (plus the admin username and password) of the device you want to use as your passive server. If you are building a new HA cluster from the group up the IP you use does not matter, but if you are adding a DS1513+ to an existing network then the IP address must be the new DS1513+ as the software will copy everything from the active node to the passive node and overwrite all settings (including data). The next step is to setup the heartbeat network. As you can see Synology recommends are direct connection, but you can use a private VLan with tagged traffic for this as well.
After you establish the role of the two nodes and your heartbeat network you need to establish the virtual IP for the cluster. This IP is shared between the two nodes, but is only owned by one at a time. The nodes will pass ownership any time there is a failover so that data continues to flow. All clients will connect to this IP address instead of directly to the node that owns the IP.
After you complete these steps the application will begin the synchronization of data between the two nodes. This can take a little while to complete, but once done the systems will maintain sync between themselves using the Heartbeat network moving forward. This differs from a traditional cluster in that there is no shared quorum. Instead it is an active/passive data copy cluster which has some drawbacks compared to traditional quorum based clusters.
Because of the time it takes for the nodes to take ownership of the IP address and cluster name we found that the HA mode Synology is currently using is not sufficient for any High I/O data. Streaming video, audio, SQL databases, etc. will lose connectivity during the failover. We found that the fastest transfer time between nodes was around 5 seconds. This prevented the system from maintaining a good connection to our SQL databases used for testing. The clients all errors out and had to restart to gain access again. The same is true for streaming audio and video the media players lost connection to the source for long enough that at restart of the media player was required to restore the flow of data.
The best thing we can say about the type of HA used by Synology is that you will not be down for long in the event of a hardware failure of a single node. You will have a few seconds of downtime, but it will not put you out of business. Still in the price range that the DS1513+ is in, there is almost no competition for this level of availability.
The Test System and Comments -
The Synology DS1513+ was tested as received with five Seagate 2TB drives setup in SHR with a single drive in fault tolerance. We also tested it with additional RAID types after the initial “ship” testing was completed. The follow on testing was raw performance and did not include many of the real-world tests we use. The version of DiskStation Manager installed was 4.2 (DSM 4.2-3211). We used VMWare’s vShpere 5.1 with two hosts and our usual 20+ guests for the VMotion Testing. For all media and photo station testing we used a combination of AVI and Jpeg files that total about 24GB of data. These were accessed from various devices including Apple iPad and iPhone, Android Phones and Windows 7 PCs.
The file transfer tests were accomplished using the same 24GB of files that we later used for our media streaming and access testing. For network connectivity we used the most bandwidth possible and teamed the four 1Gbe LAN Ports using LACP (Link Aggregation Control Protocol) this was connected to a cluster of ports on our NETGEAR GS728TS Switch stack. The port group was setup to allow for LACP traffic (and in particular 802.3ad) to pass through as if they were one port.
For HA data throughput testing we used a single connection to the switch stack (due to the current limitations of the DSM software) and ran through the RAID types supported by the HA application. You will see the results listed below with each section.
Performance testing overview -
We test things a little differently here at DecryptedTech, we try to combine repeatable data with real-world usage to give you a much broader picture of how the device will perform when you get it back home or in your office. Numbers like MB/s and IOPs are not going to matter if the device is not easy to use and does not meet your set of requirements. This is why we spend a lot of time with each product to see how it performs over time and during different events (like power loss, losing network connection etc.). Each of the tests below are intended to give you a broad picture of how well the Synology DS1513+ performed under daily load, when maxed out and when trying to serve multiple requests.
Intel NAS Performance Test -
This test is a common test across the internet to find out the raw throughput of a Network Attached Storage device. To use this you have to setup a folder share on the device and allow the NASPT to read and write specific data back and forth to it. We ran this using all of the different RAID levels available to the 5-drive NAS. You can see the testing configuration and results below.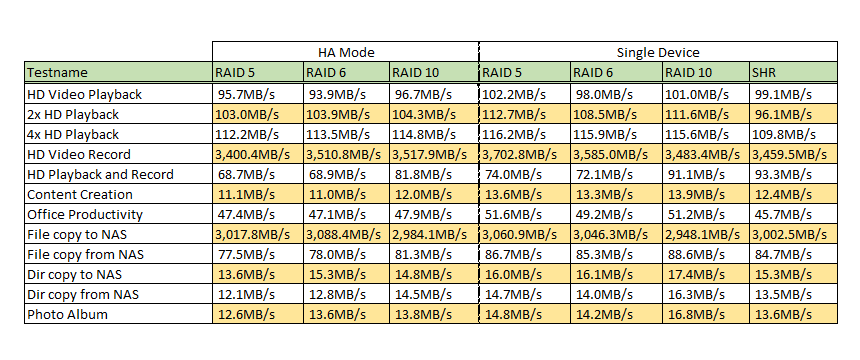
On the NASPT side of things we saw solid performance across the board when connected using 4 x 1Gbe connections in single node mode. All of the tests in the suite had performance levels that were above what we have seen form similarly priced units. On the HA side of the house we were happy to note that for a single connection test (one client to the NAS) there was no performance hit in this mode. We had expected a slight write hit as the device had sync up the data between nodes, but this was not the case.
VMware vSpere 5.1 VMotion -
Our testing with VMware has two parts to it. In the first we establish that we can create a new virtual system on the NAS using both iSCSI and NFS shares. From there we begin moving active servers back and forth between our two storage devices (the custom built NAS and the target or test NAS). We time how long it takes to move the servers between the devices and record the best times. All of the test servers (for movement) have the same size, thick provisioned with 120GB OS drives. We also have a final phase of the testing that we call “the plugs out” test. During this test we disconnect the NAS from the switch (disable the LAN ports on the switch) and then reconnect the system in normal usage the host should be able to reconnect to them without any data loss. If not then there is likely a problem with the way the system is buffering the information before writing to the drive.
We were very impressed with the live move of servers we were able to move our 120GB test servers to the Synology DS1513+ in as little as 15 minutes. This is actually very fast considering they were thick provisioned (meaning they were taking up the full 120GB). Moving back to the Custom Built Storage Server was a little quicker with the fastest time coming in at around 12 minutes. Performance and accessibility of the systems that were stored on the DS1513+ also seemed to improve especially the exchange server cluster. Here the failover between servers in the DAG (Database Availability Group) was significantly faster than what we have seen on other storage boxes.
The DS1513+ also passed the plugs out test without any issues. This was very nice to see as we have not always had success with this when we attempted it. Still it does represent a possible failure point and one that can cause havoc with Virtual systems including corrupting virtual servers and making them unusable (always have a backup…)
The HA mode failover test was interesting. The servers in question appeared to pause and Vcenter locked up until the passive node took over. This transition was between 5-10 seconds, but always resulted in the system reconnecting and the servers coming back online. We did have to clear multiple errors in the system including VMware HA failover errors ((VMware tried to fail the guest systems over to another host). Still it was much better than the issues you can have if you lose a switch, RAID or other larger failure. As long as you anticipate clean up and also reboot the guests (as time permits) you will not have any long term issues to deal with.
File Transfer-
As we mentioned before our file transfer testing involves a group of files (image and video files) that are around 24GB is total size. We send this to the target NAS and then copy them back over to see how quickly it can complete the task. We also send files back and forth to the target NAS during our streaming tests.
The 24GB file group made the trip in about 6 minutes from our desktop to the DS1513+. The average transfer speed was around 60MB/s This is a nice transfer time and shows that the DS1513+ can handle large file transfers even with files that cannot be compressed like jpeg or AVI files.
Media Streaming -
For our media streaming we used four Windows 7 systems and two media players (NETGEAR NeoTV Max and Prime). Two of the Windows 7 boxes were connected via 1Gbe LAN connections while the remaining devices were connected via wireless (two 802.11ac and two 802.11n). On the Windows 7 systems we used a combination of Media Center and the standard windows share to stream the media to the device. On the two media players we used the built in DLNA service and Synology’s Media Server Application.
Once again the Synology DS1513+ showed us that it is more than capable of handling the duties of serving multiple requests. We were able to view videos on all devices without any stuttering at standard definition. At full HD we were able to watch on the four Windows PCs without any issue while there was a delay in buffering the HD video on the two NETGEAR media players. Once the video was buffered there were not additional issues notes. Now it is important to note this was tested with four 1Gbe LAN ports bundled into an 802.3ad LAG. This allows for 4Gbe of bandwidth that the DS1513+ can serve data. The individual connections were not able to saturate that 4Gbe pipe while sticking with Synology’s Hybrid RAID gave us enough performance to keep data flowing. Under RAID 5 and 6 the performance was not a good. We saw the performance drop off after the fourth device connected when pulling HD video. RAID 10 fared better and was able to keep up with the SHR for the most part.
Backup -
The backup software that comes with the DS1513+ is nice and allows you to setup some pretty granular backups of your system(s). We were able to set this to a nice schedule and thanks to the option to enable a certain number of file versions we could go back in time to any point in the previous five days and see the version of that file. The backup of our local review folder (which has video, RAW, Jpeg and PNG files in addition to the word and excel files) took a little less than 4 hours to backup using a low priority backup option. We also had the option to sync a folder with folders on our system so that we had identical copies of all of the files available. It is a nice option as more and more people operate with both a desktop and a laptop.
Special Features -
Operation of the Package Center was seamless, fast and simple. We simply love this option and hope that it continues to grow. In fact the features here make the cost of the DS1513+ seem trivial considering everything that you can get from it. It is not going to replace a real server in a business, but if you are a home user and are a small business that is just getting started then the extras you get here in the package center are amazing. Each one has its own configurations page and settings that can be adjusted to suit your needs. This is one part that Synology certainly got right and as they continue to work on adding their own packages and services from third parties this feature will continue to be a value add.
Value -
Value is another very subjective topic. What is expensive to some might be a deal to others. You can look at this topic in multiple ways. One is raw price and the other is what you get for the money. Each is accurate and both are correct ways to look at price/value. We tend to look at features, performance and real-property when we discuss value. However, we also take into account the raw cash cost of the item. The DS1513+ as reviewed will set you back about $1350.00 (plus shipping and any applicable taxes). That is $850 for the DS1513+ and $500 for the five Seagate 2TB drives (ST2000DM001). To get the full HA pair your cost will double of course, but even at $2700.00 (plus shipping and any taxes) you are well below other solutions that are capable of storage HA. Additionally when you look at what you are getting here; large amount of storage, no need for additional licenses, email, backup, virus protection on files, VPN access, private cloud services it is something of a deal. For a home user $1350 is a little much, but for an enthusiast or small business it is not and the features, performance and everything Synology bundles into the DS1513+ make it a good investment. For those that feel the $1350 is too much many of these features are also available in their smaller NAS products so you are not locked out there.
Conclusion -
To wrap things up, Synology makes a very good product that has features beyond the apparent price point that each one is marketed at. For the DS1513+ this is even more evident as you have some excellent security and availability options without breaking the bank (relatively). With the DS1513+You get good network bandwidth, storage size, expandability, flexibility and much more. The DSM OS that runs the DS1513+ is another plus and could be considered a feature all on its own. When you put all of these items together you get some solid performance. Synology also made sure that your investment into the DS1513+ will not be just for a place to put your files. Even if you do not have the funds to build a larger network Synology has applications that will give you many of those options right inside the NAS. The price point is one that will make it attractive for small to medium sized businesses as well as for home offices and enthusiast. It would seem that Synology is positioning themselves to have a big impact on the storage world and the DS1513+ will be just one of the products that will be helping them do this.
 |
 |
With its combination of price, performance, flexibility and ease of use we are awarding the Synology DS1513+ our Gold Key Award and Must Have for the Small to Medium Business Crowd.
Discuss this in our Forum
