Reading time is around minutes.
BIOS -
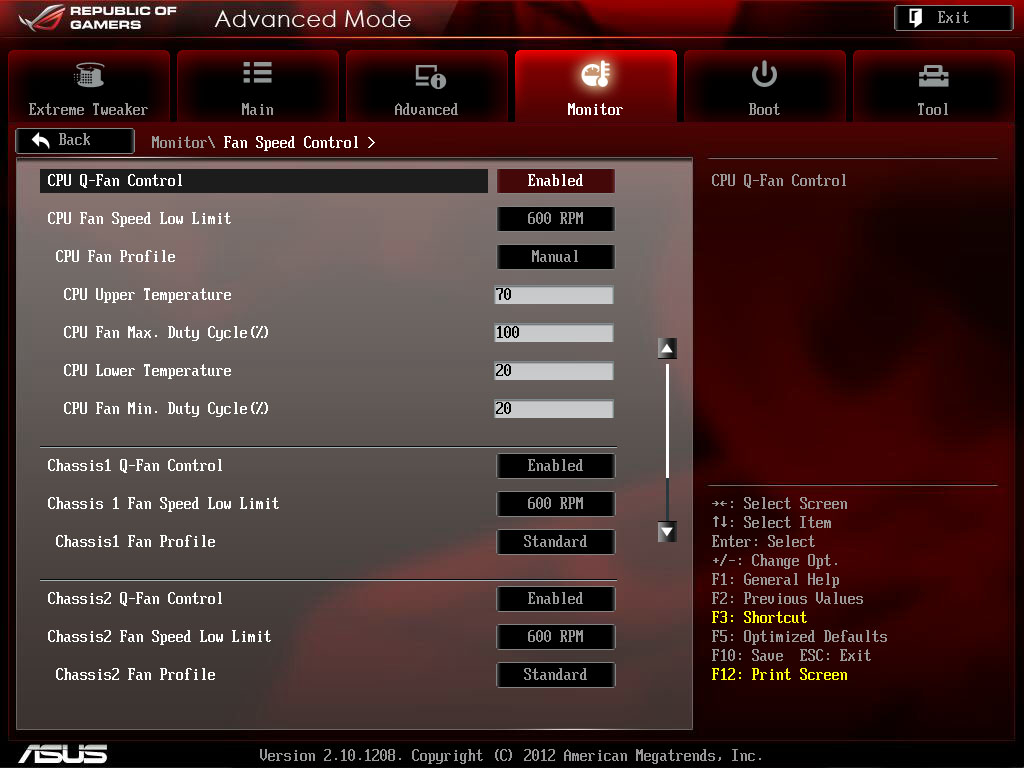
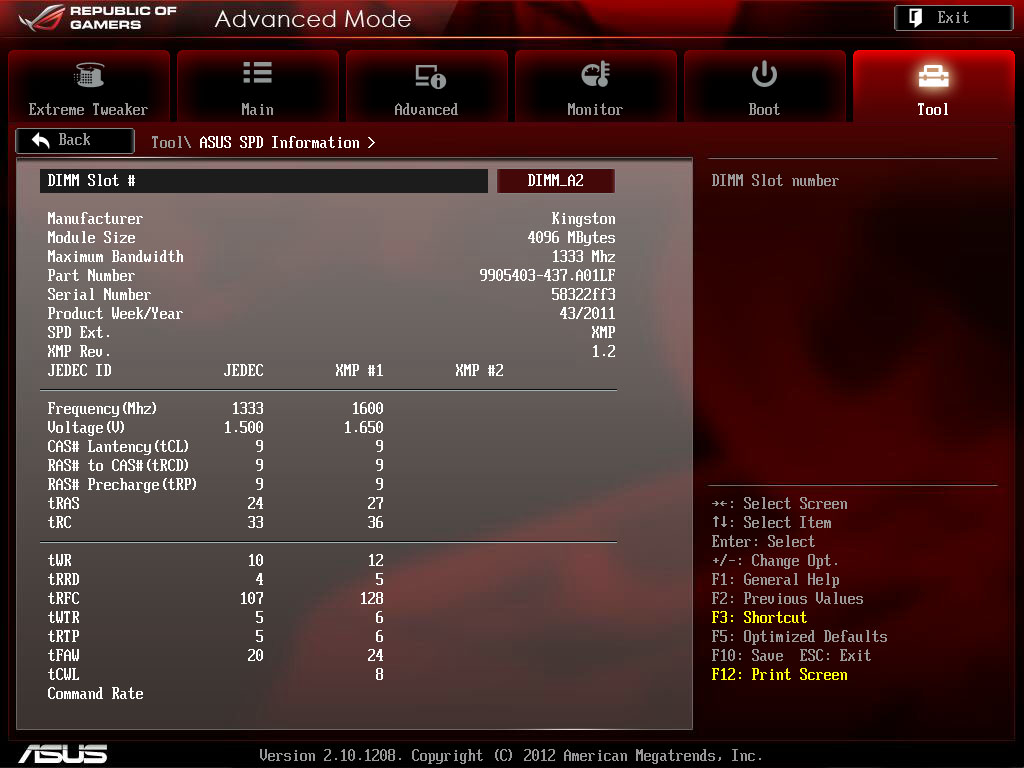
BIOS is an acronym that stands for Basic Input/Output System. It is meant to control your product at a very low level. As of right now there are three regularly used BIOS formats (there are actually more than that but there are three common ones). These are the AMI (American Megatrends Incorporated), Award, and Phoenix. Asus is one of the manufacturers that have consistently worked very hard to improve their BIOS interface. Their latest UEFI offerings are not only easy to use and navigate around, but they are very responsive. This is something that has frustrated us with other implementations of the UEFI BIOS. Take a look at our video coverage of the UEFI BIOS on the Maximus V Gene below and you will see what we are talking about.
 |
 |
 |
 |
 |
 |
On our wish list for Asus is a search feature like we saw on the Intel DZ77GA-70K BIOS…
Overclocking –
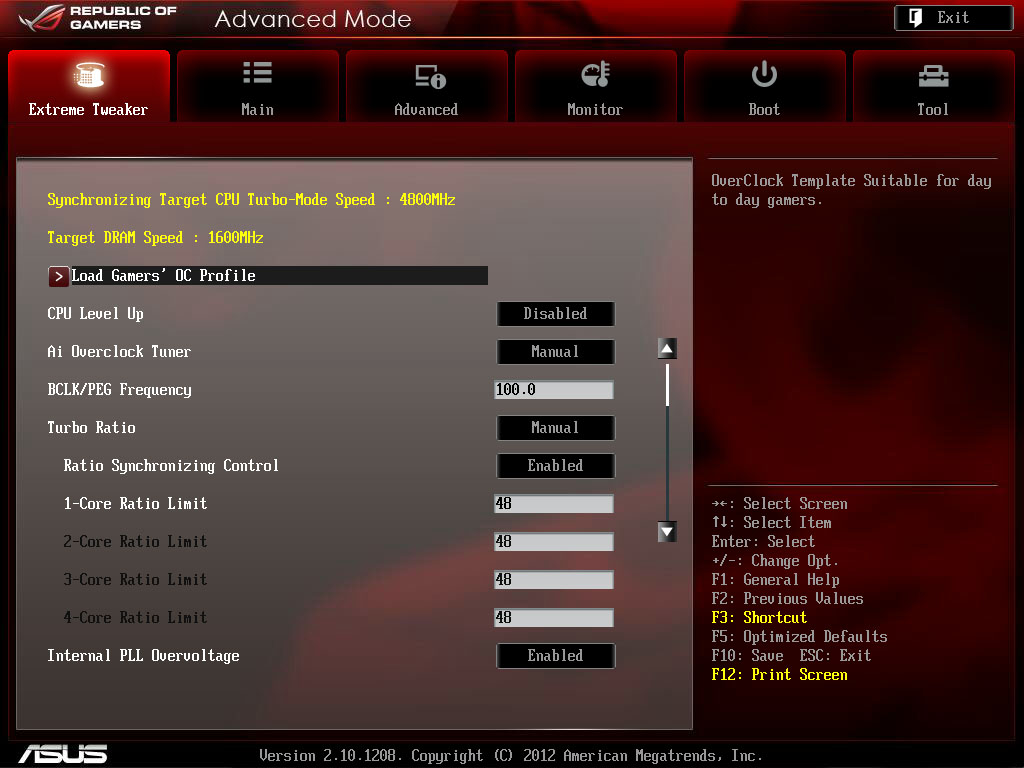
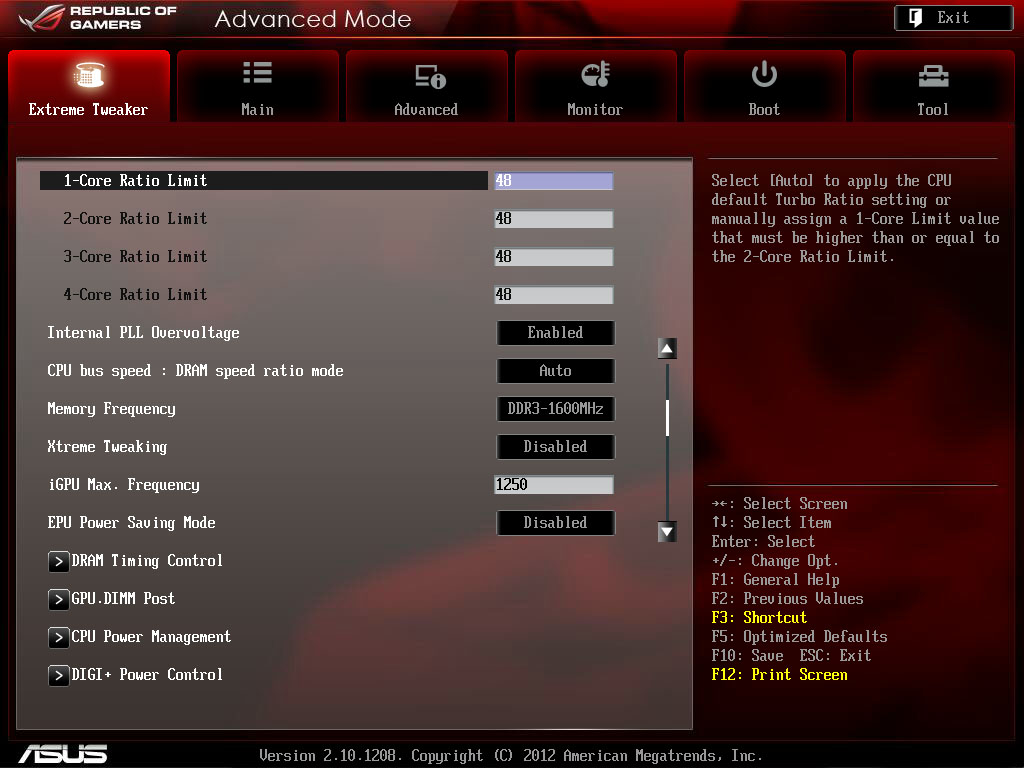
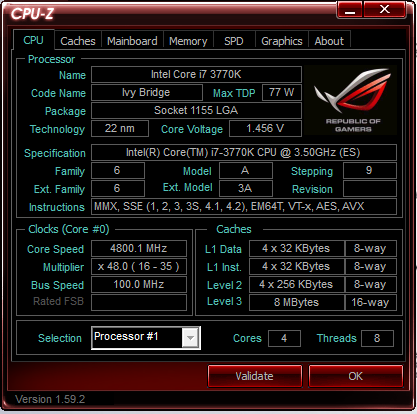
Normally when we pull out one of Asus’ ROG motherboards we know we are going to get very good performance from stock speeds and also plenty of headroom for overclocking. With Ivy Bridge we are not getting much more than we saw on Intel’s DZ77GS-70K. We were able to get into Windows at 5GHz and actually run a single run of Cinebench at 4.9GHz, but we could not get things stable until we dropped back to 4.8GHz. Even then we needed to run with a 1.36 voltage in the BIOS for stability.
Again due to NDA we do not have validation links at this time, but we will be tinkering around this this board quite a bit more and will have what we hope will be much better clocks and performance very soon
Of course overclocking is a picky subject. I can buy to identical CPUs from the store and they will not always perform the same way under stress. This is the same with motherboards, RAM and GPUs. So again it is important to keep in mind that our results represent a specific hardware configuration. Yours may be similar but will rarely be identical.
Overclocking Tools -
Like many other features Asus has been working on their overclocking tools and has combined them into their AI Suite II utility. This is a bundle of tools that allow you to control your motherboard from overclocking to the speed that you have fans running. Although AI Suite II covers more than just overclocking we are only going to touch on the overclocking features here. We will cover the rest of the software and APIs in this suit later in the review. 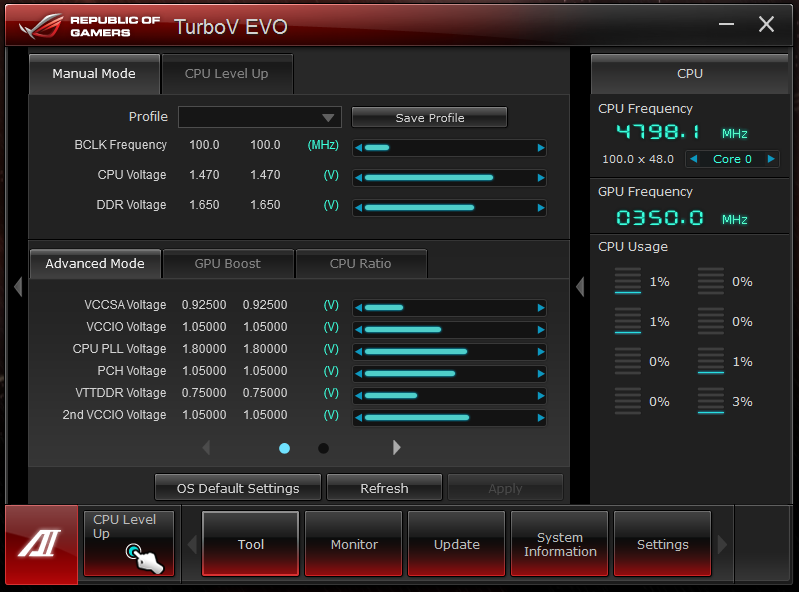
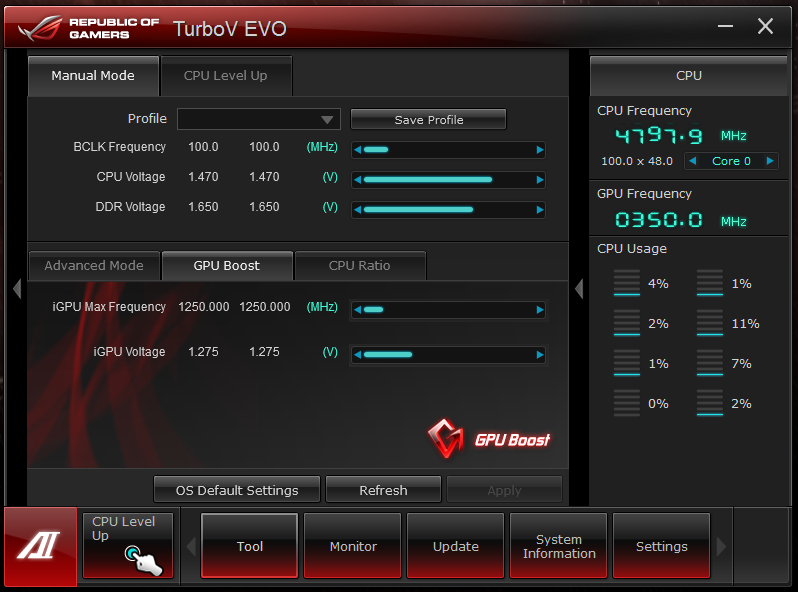
When you open up the AI Suite II you will get a slim toolbar that pops up on your screen. There are plenty of options here each has options to either help you tweak your system, or to monitor once you get things setup. For overclocking you will want to kick things off in the TurboV EVO utility. Once this was a standalone object, but now it has been completely integrated into the main AI Suite (which is a good thing).
The look of TurboV EVO has not changed much over the last couple of years even if Asus has added features to it. There is one thing that has still not been added; memory divider options. The biggest reason these are missing is that even if they were present changing the memory divider would require a reboot to register so Asus left it out with the thought that if you are looking into the Maximus V Gene and wanted to switch memory divider you were probably going to do that type of tweaking in the BIOS. Still even without the ability to enable XMP profiles or change memory dividers you get a good deal of flexibility here.
 |
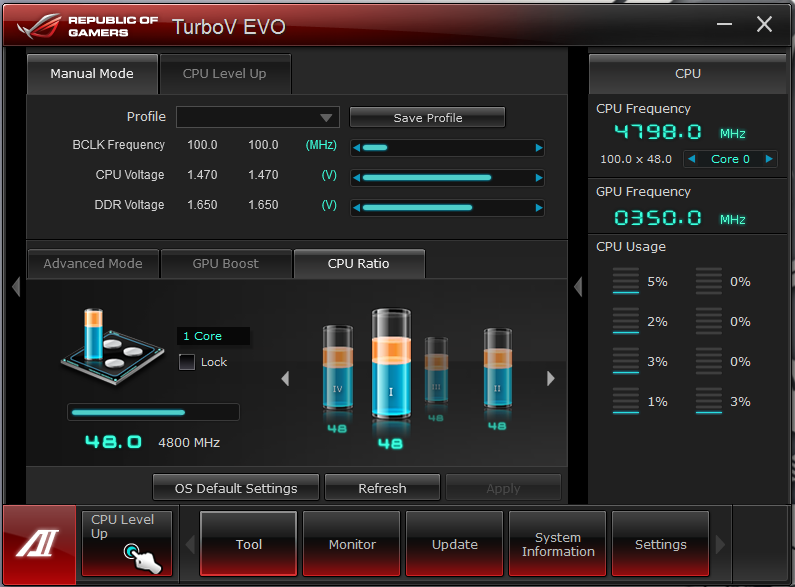 |
TurboV also includes a new utility to overclock the IGP on your CPU. This is handy especially with Lucid’s VirtuMVP running. Even if you have an add-in graphics card you can still get a benefit from overclocking the GPU. Something new in this generation of TurboV is the ability to change the ratio per core. This was only possible in the BIOS before. It is a pretty nice feature and can let you get a higher OC while maintaining stability; all without needing to disable the cores in the BIOS.
 |
 |
 |
 |
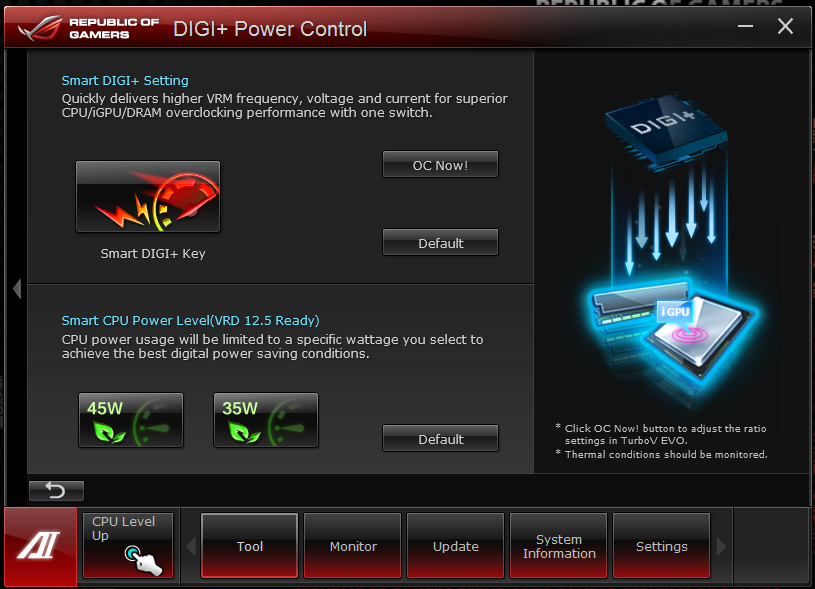 |
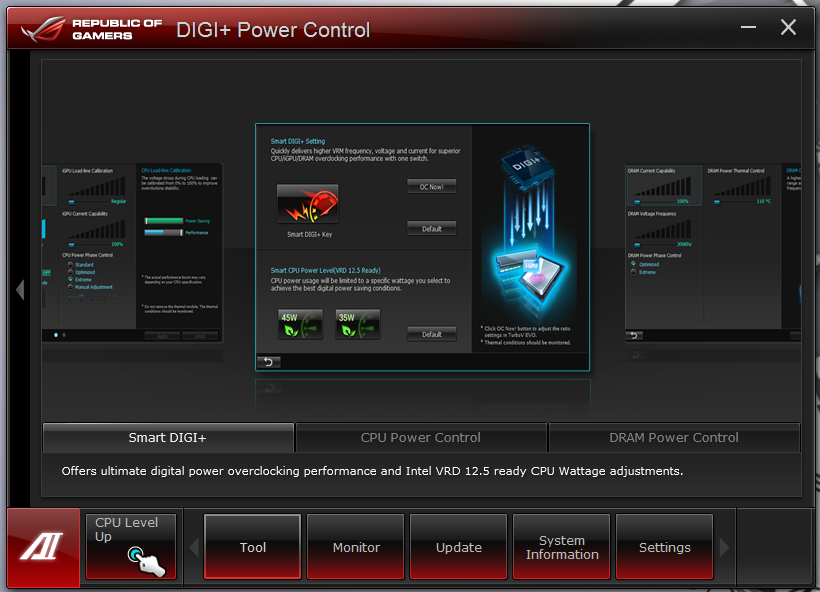
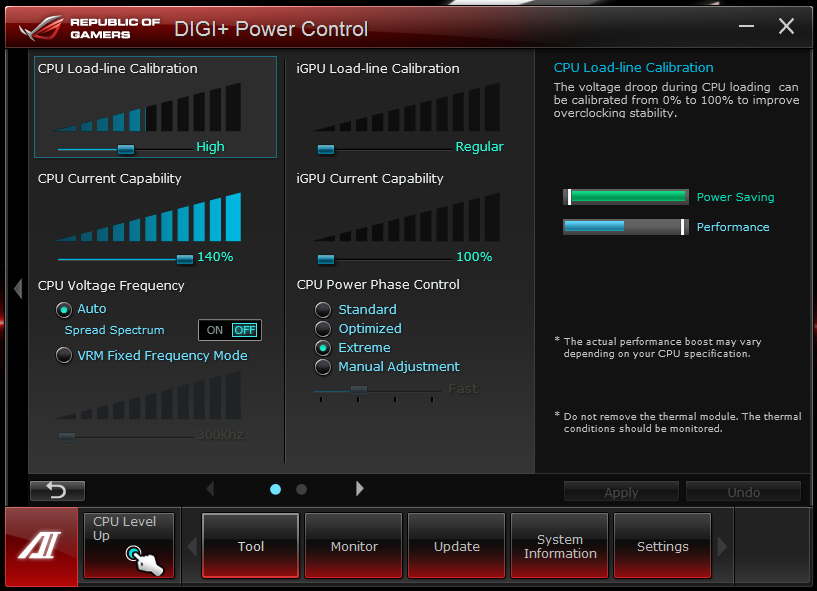
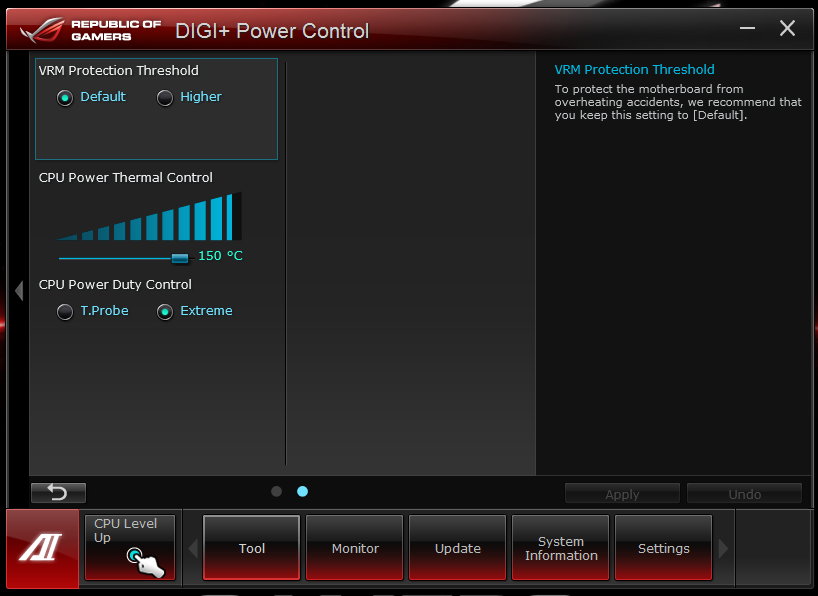
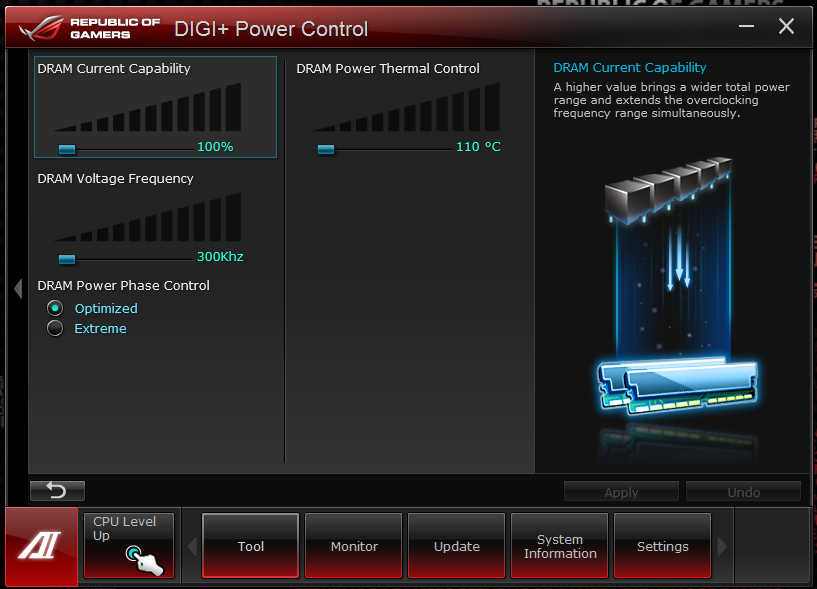
Asus has had digital power controls in the ROG ling for a long time now. These controls are very mature and give you a good deal of control over the way you motherboard handles power. A new feature in their suite of tools is something they are calling Smart Digi+ Settings. To put it simply Smart Digi+ is a way to implement the best settings for a certain performance envelope. As you can see in the image below you can adjust your board for overclocking with a simple mouse click. You can also setup your board and CPU for better power efficiency with a single click. These are some great controls and do not require you to know the ins and outs of each setting that is available (although you should). If automatic settings are not your thing then you will like the next three pages. Here are the manual controls for just about all of the Digi+ power settings that are in the BIOS. There are still some that you will need to manually setup (like current limits), but these are very complete.
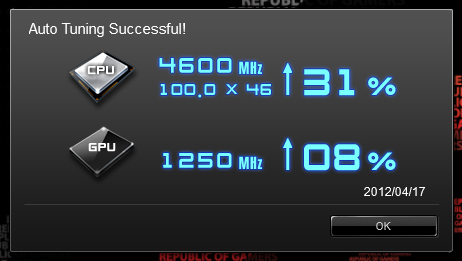
Along with all of the manual overclocking tools Asus has (of course) included its auto tuning utility. This handy little item will get you the best overclock while keeping inside certain voltage, bootstrap and thermal envelopes. When we ran this on ours we managed to get to 4.6GHz right off the bat. Not too shabby for an automatic overclocking tool.
