Reading time is around minutes.
BIOS -
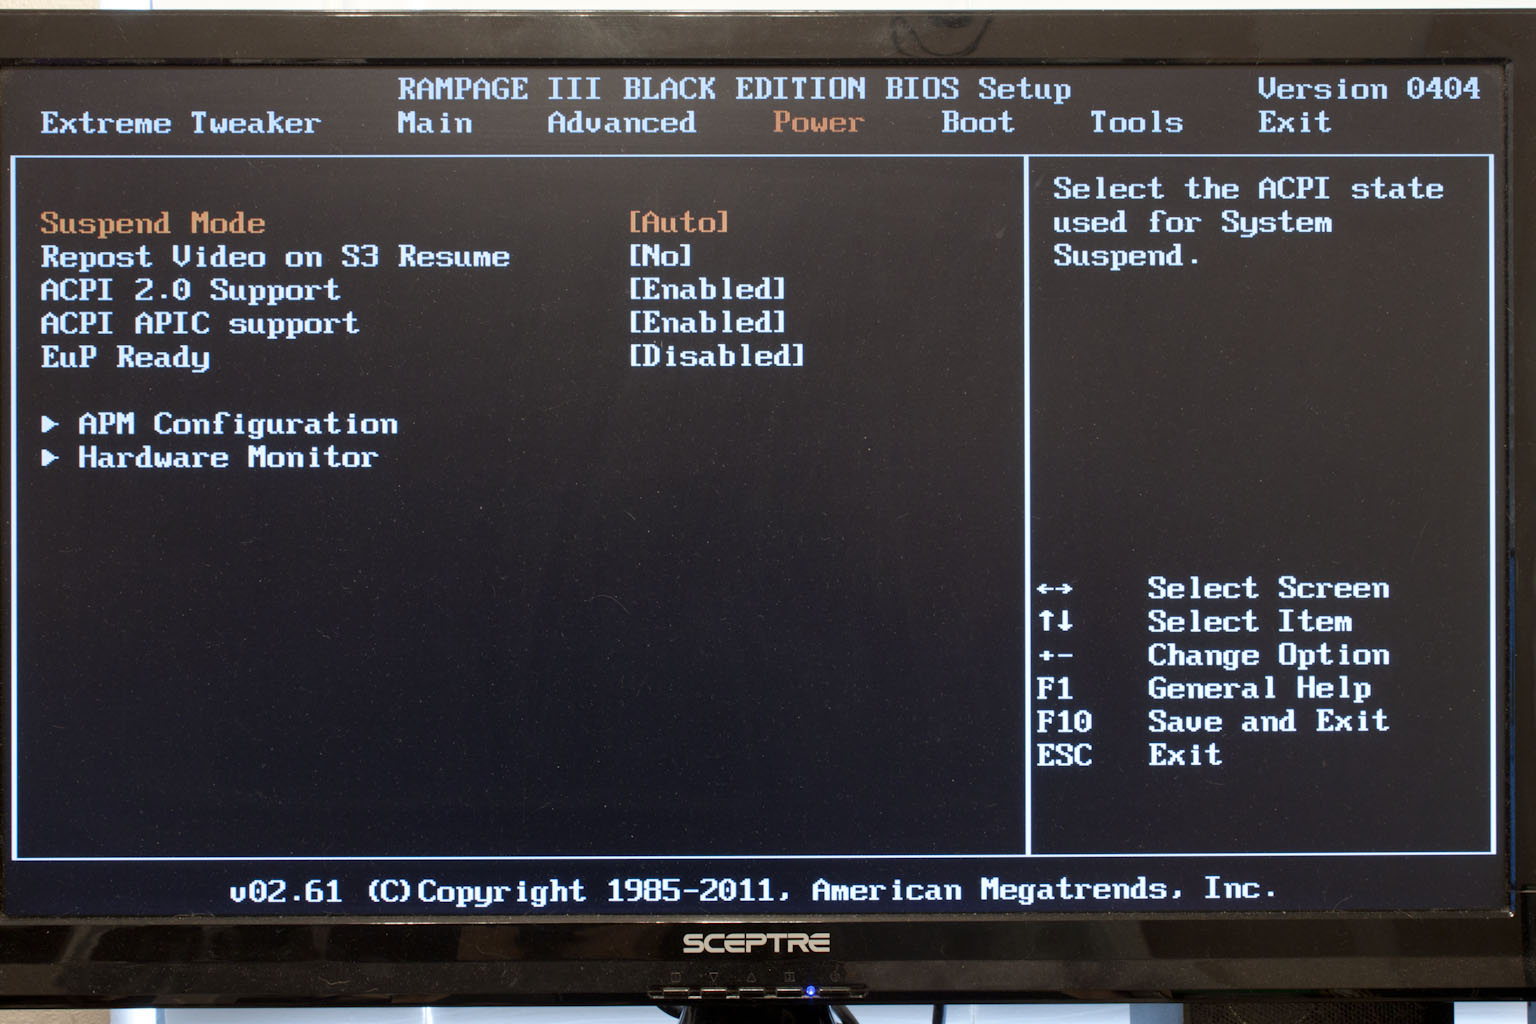
BIOS is an acronym that stands for Basic Input/Output System. It is meant to control your product at a very low level. As of right now there are three regularly used BIOS formats (there are actually more than that but there are three common ones). These are the AMI (American Megatrends Incorporated), Award, and Phoenix. Although the BIOS on the Rampage III Black is still a modified AMI BIOS, Asus did make some changes to keep things in the same style. The background is Black and not the typical blue you find in other BIOSes. They have also changed the rest of the color scheme with the highlighted option orange and all back ground data a blue tint. 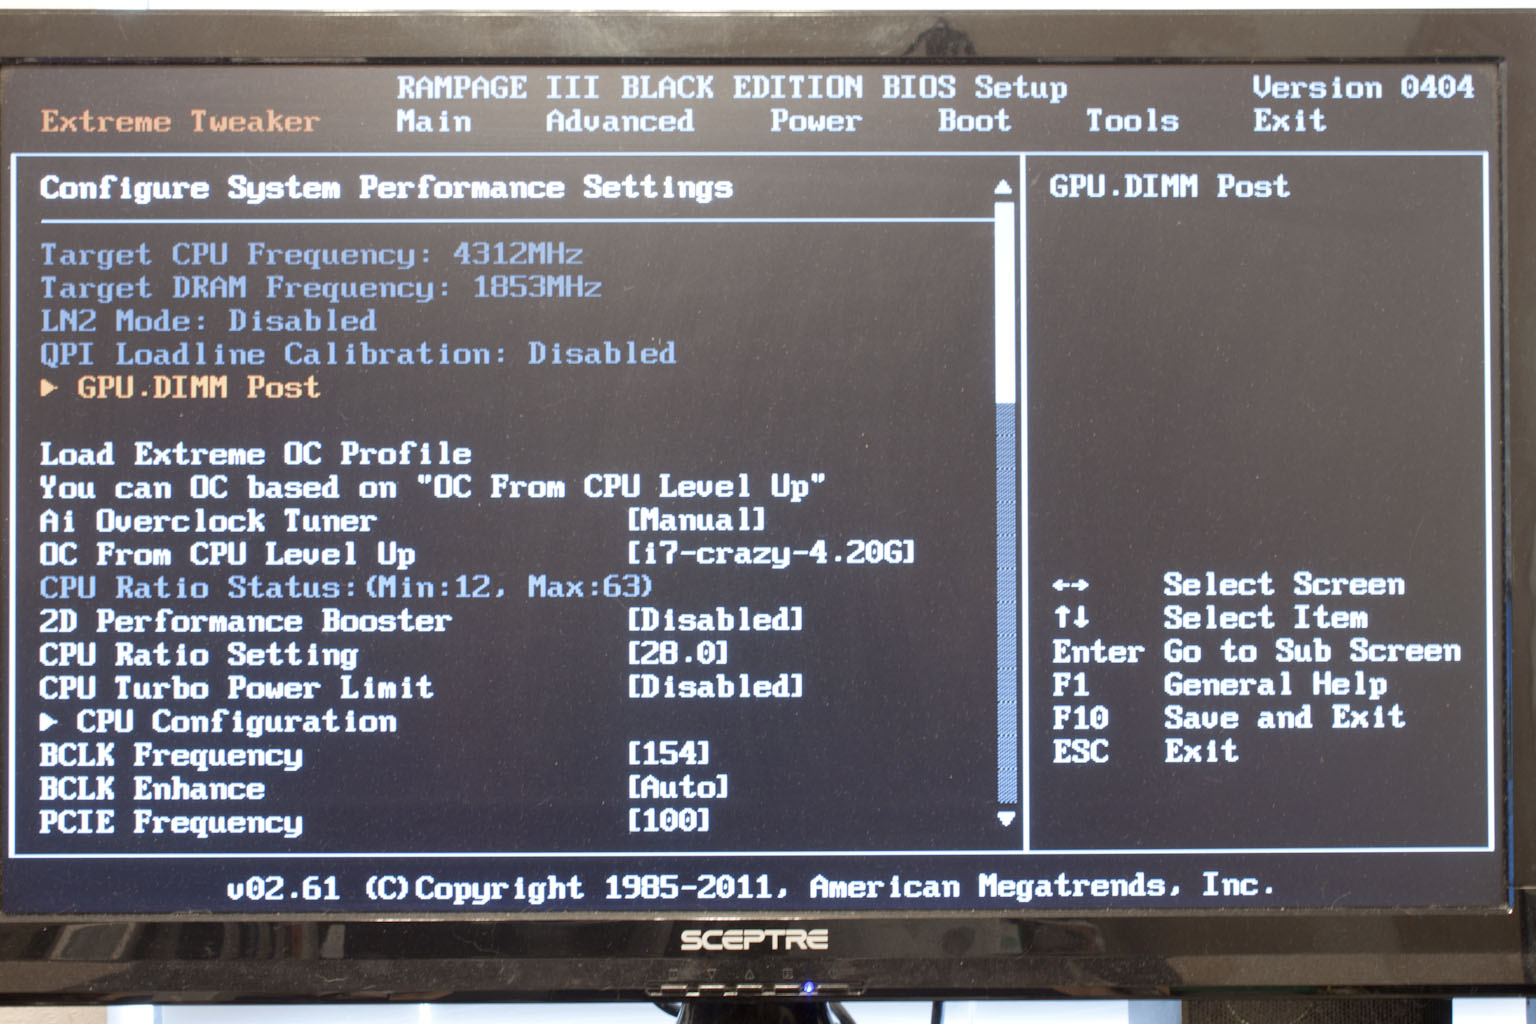
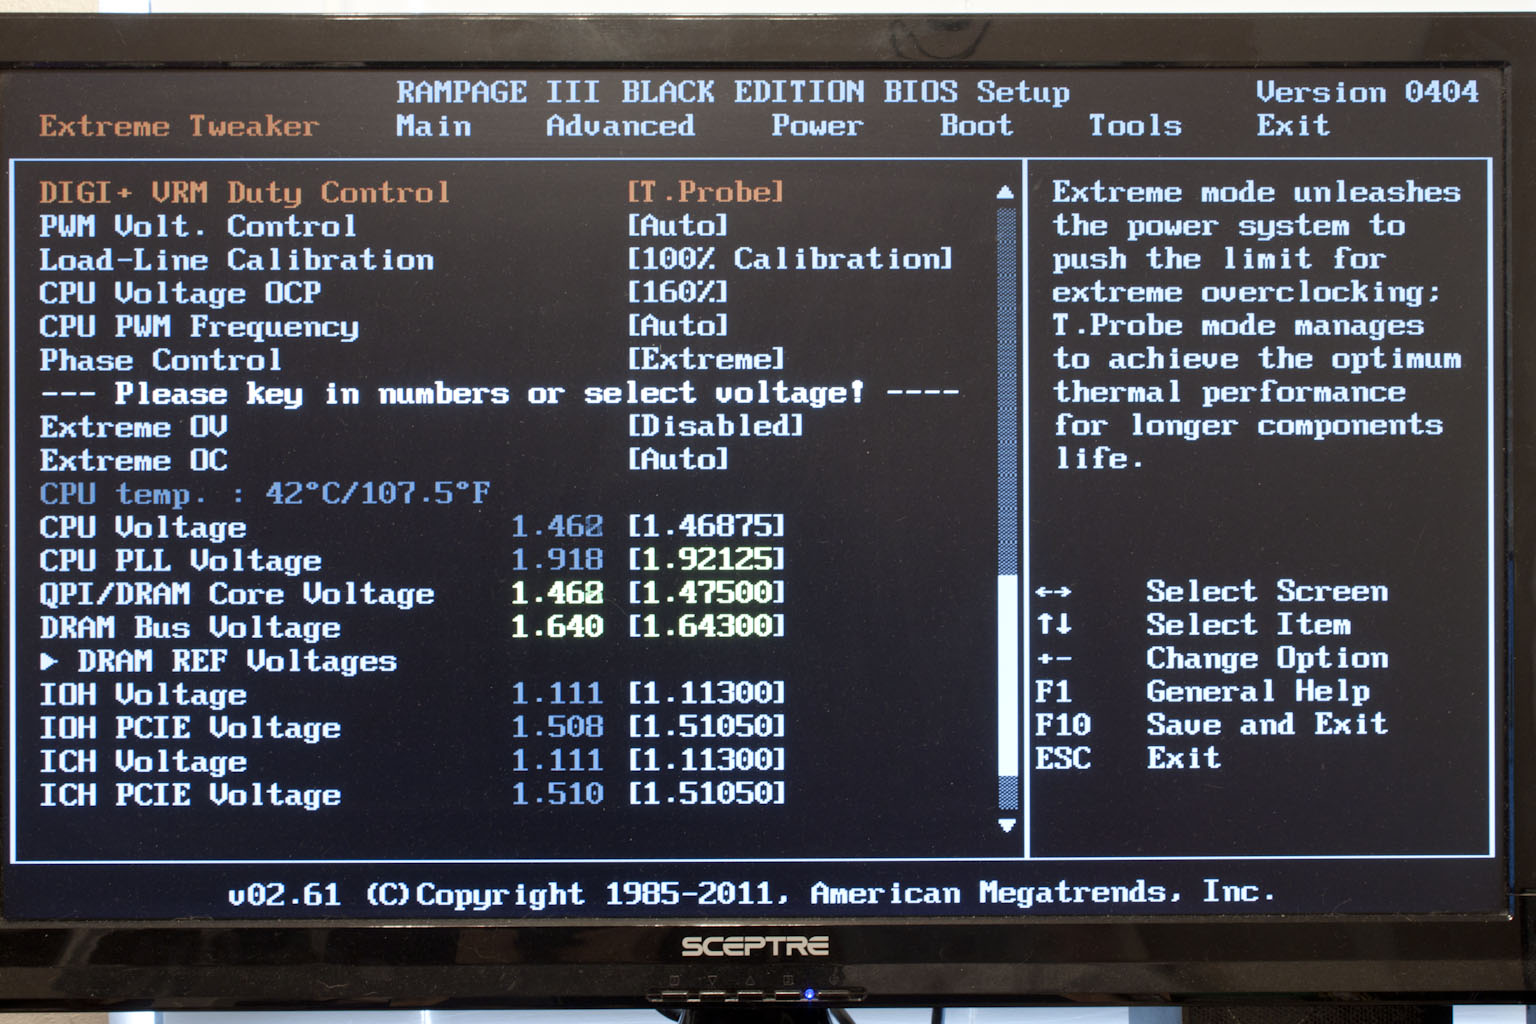
Although the color is different you still start off on the Extreme Tweaker page and you have some of the same options found on other Rampage boards with a few minor differences. The GPU.DIMM Post screen is great to find out the state of your memory and your video card setup. As you can see it will tell you exactly what each card is running at for quick reference. I do wish it could pull more information than just brand of GPU though. I think this would be cool to have. 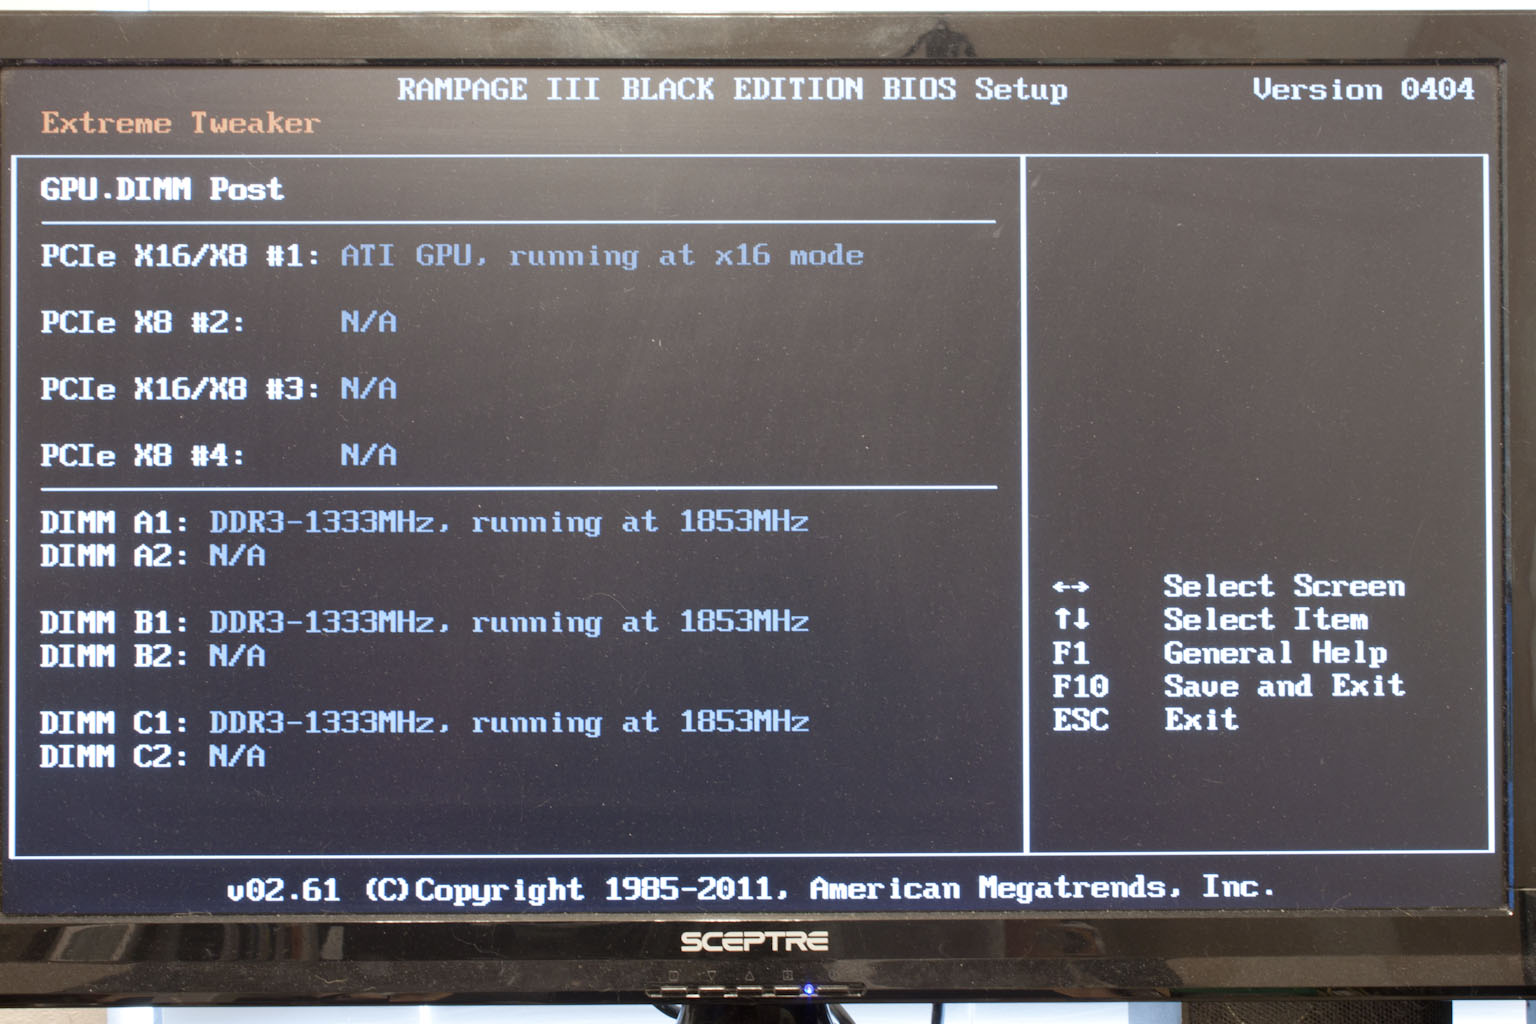
 |
 |
 |
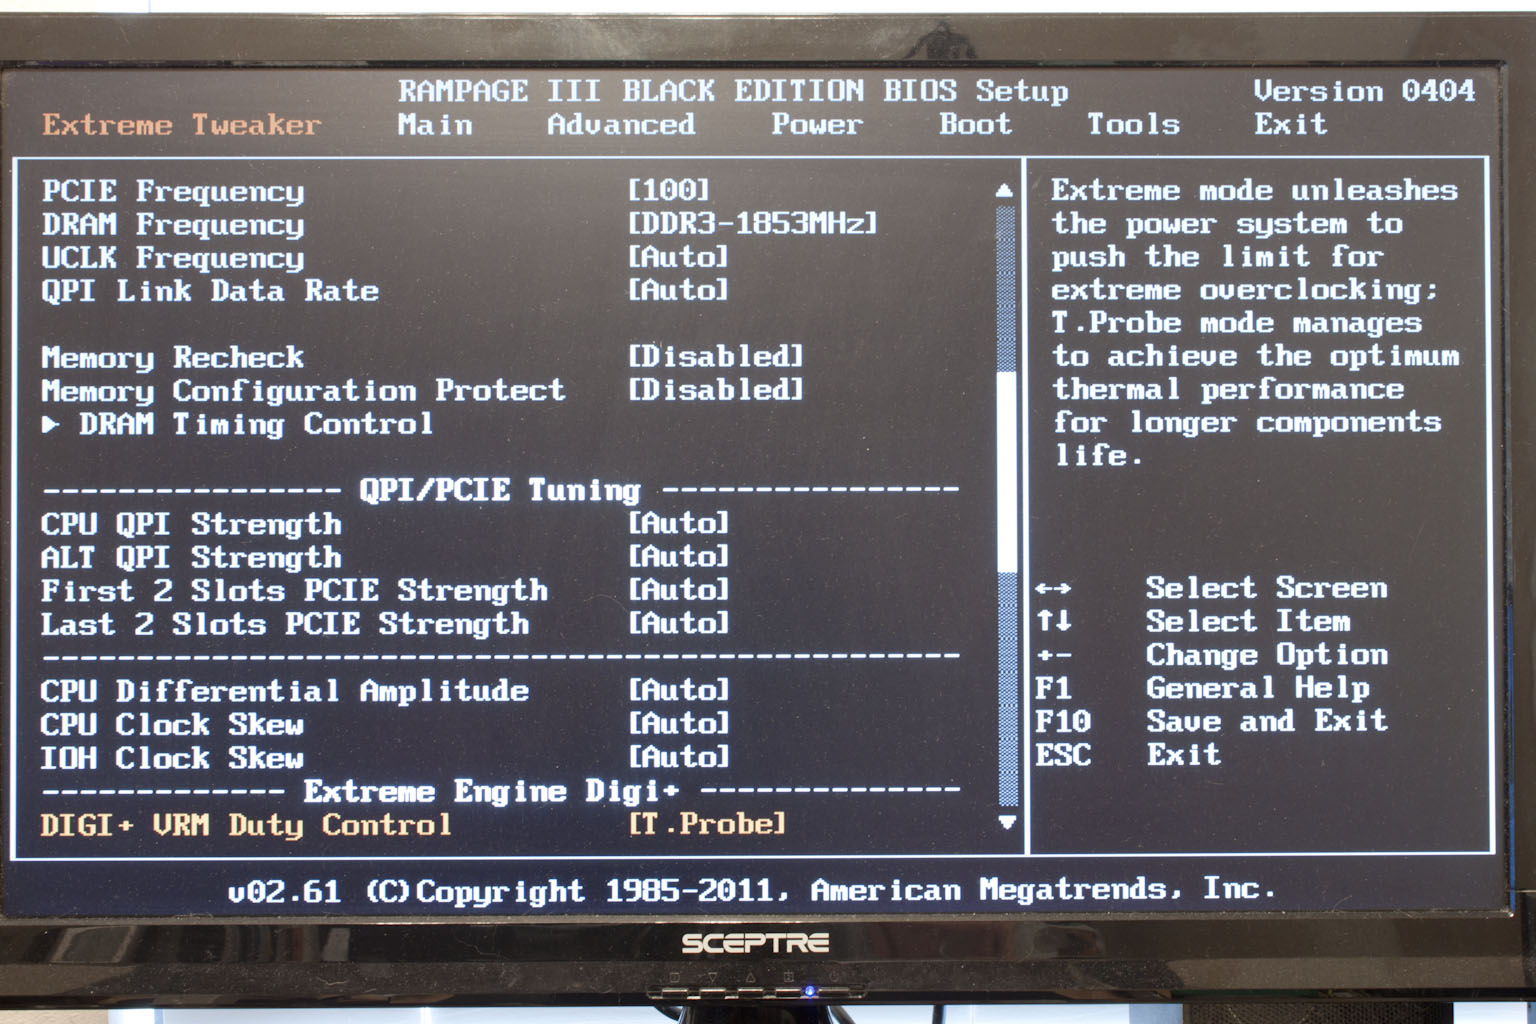
Getting back to the main page of the Extreme Tweaker section we find that you have some hand options for making sure you balance the board in terms of performance and stability. Being able to adjust the driving strength of the PCIe slots can be a big help when overclocking both the CPU and the GPUs.
 |
 |
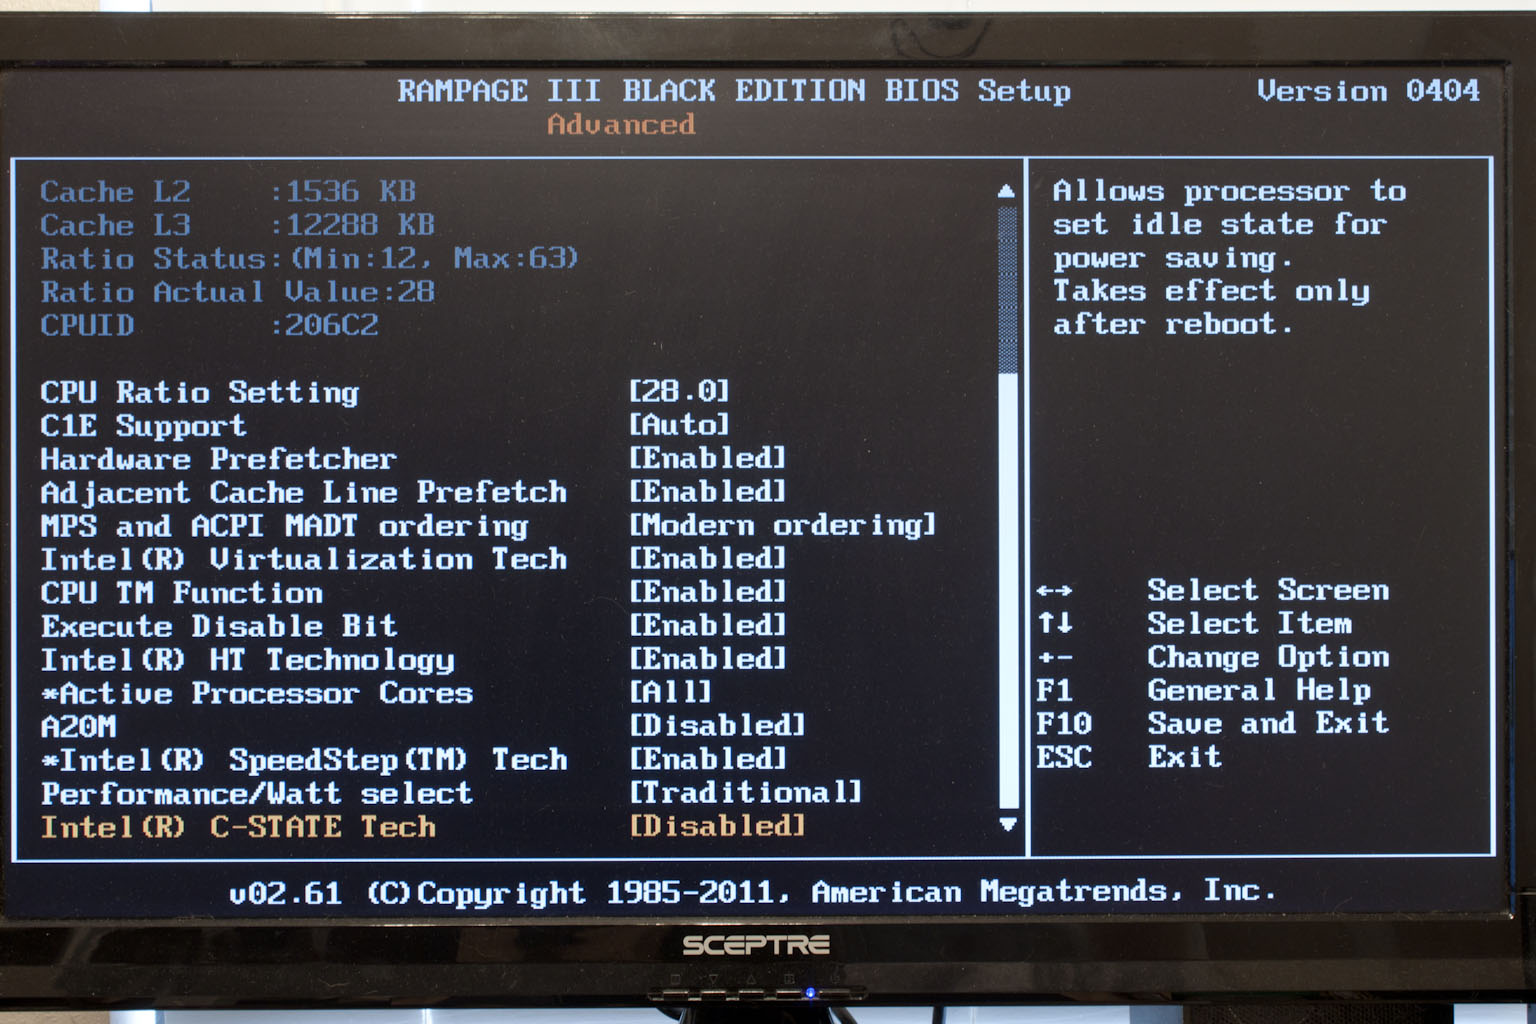 |
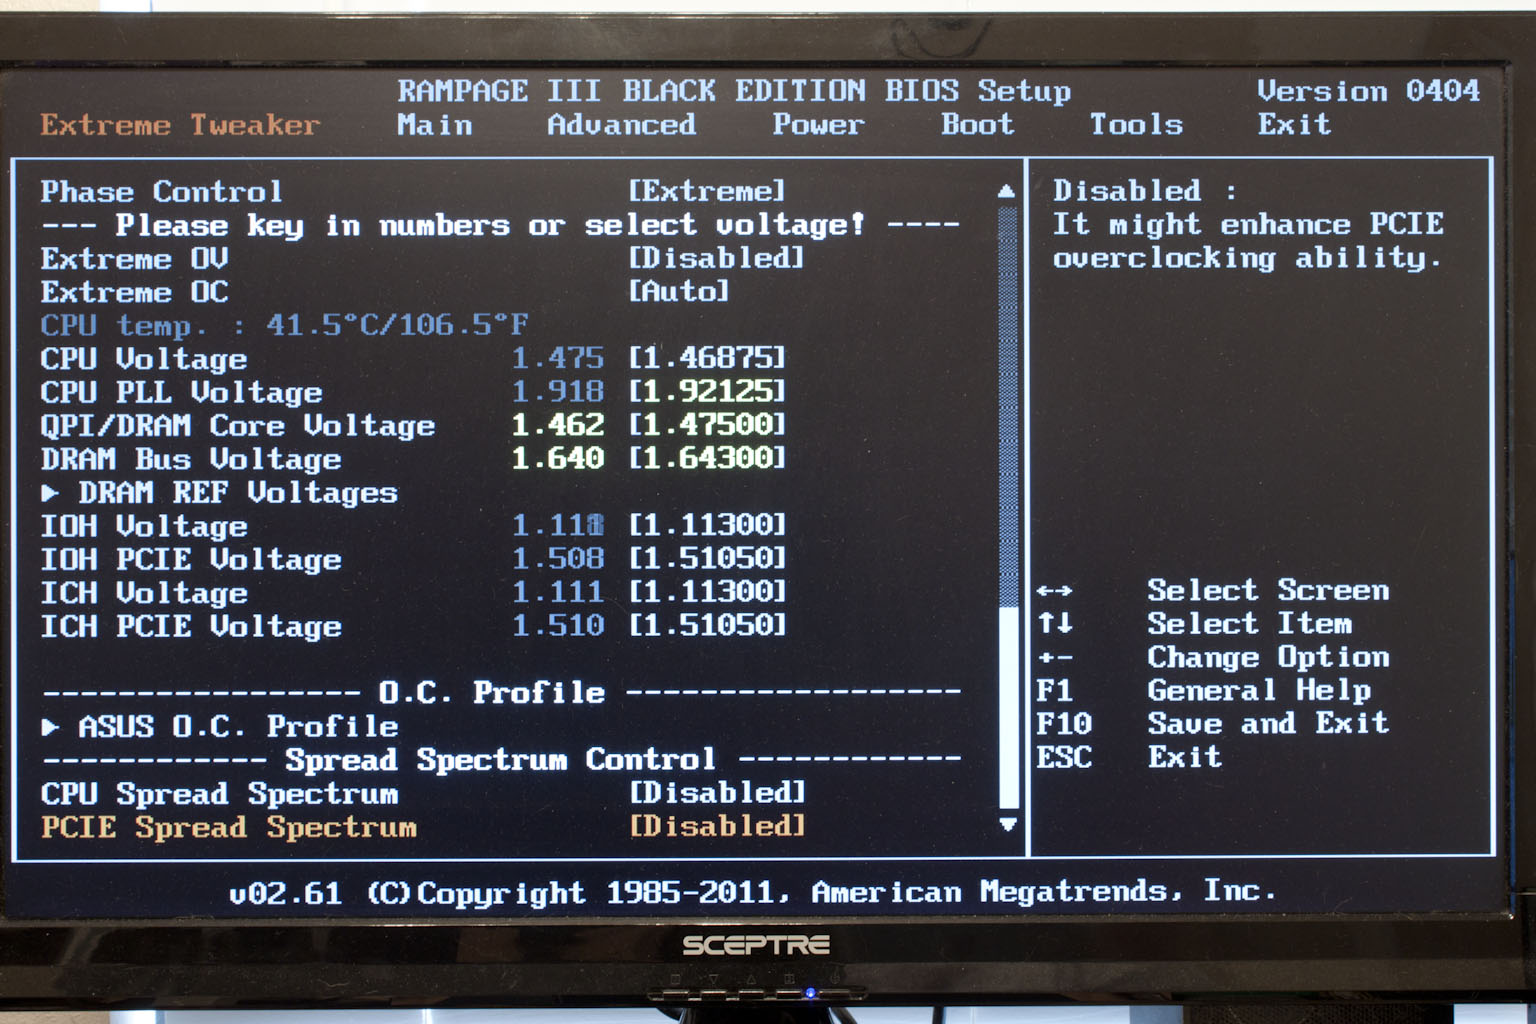
The rest is fairly typical for an Asus overclocking BIOS, which is to say that it is very well designed with more options than most people will ever need or use.
 |
 |
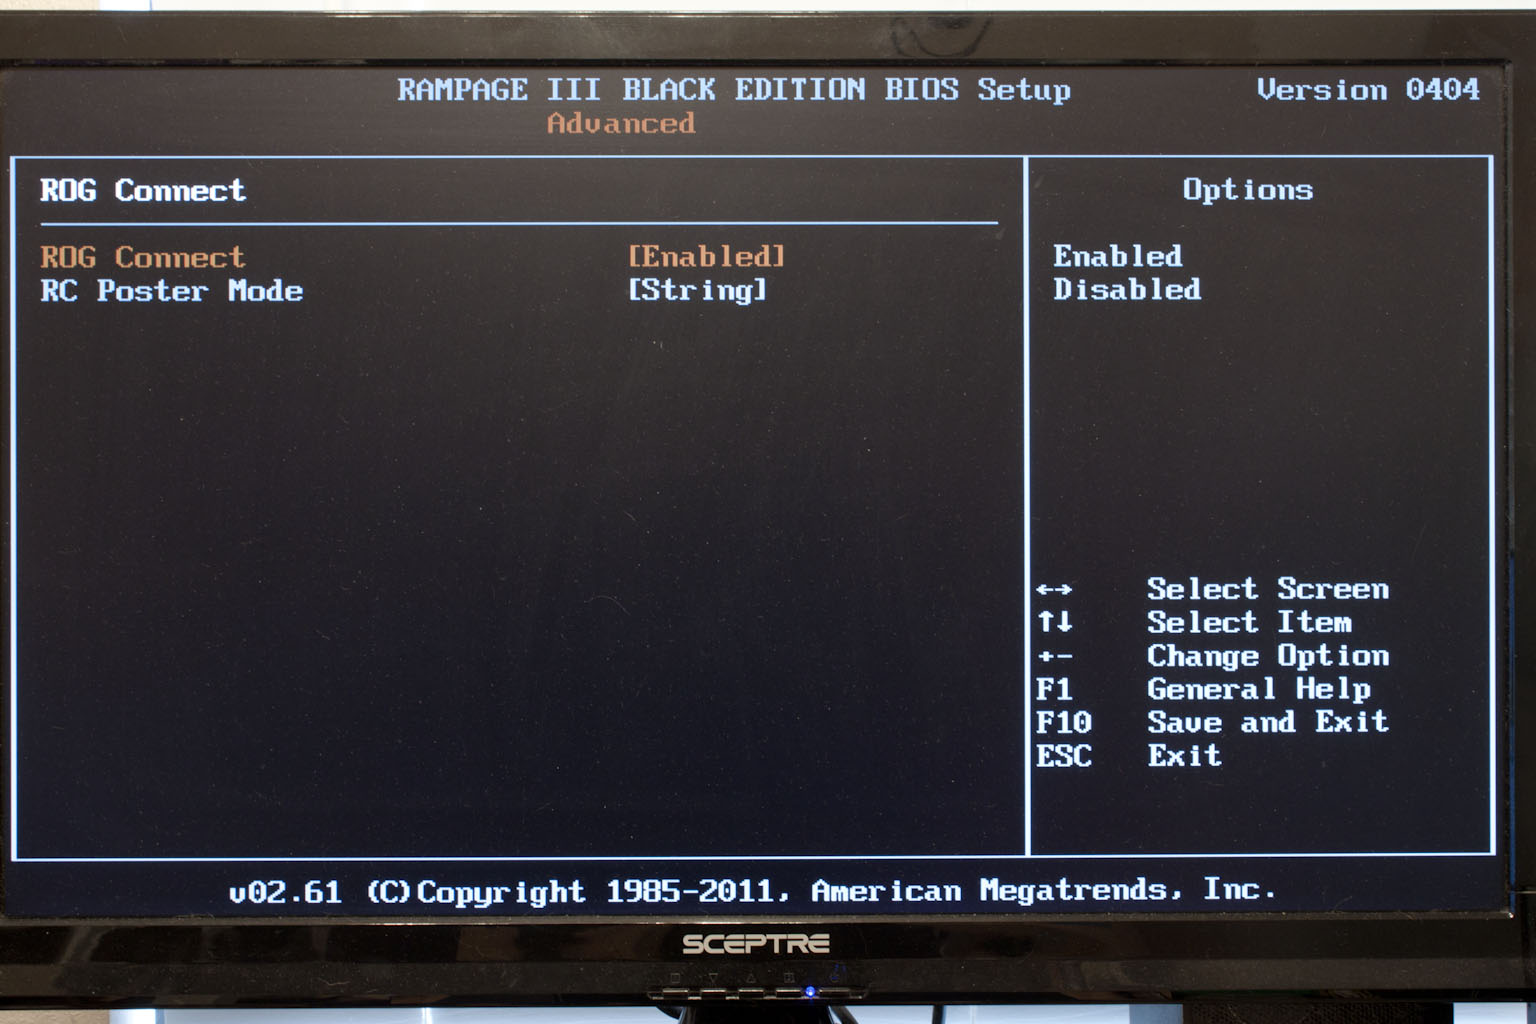 |
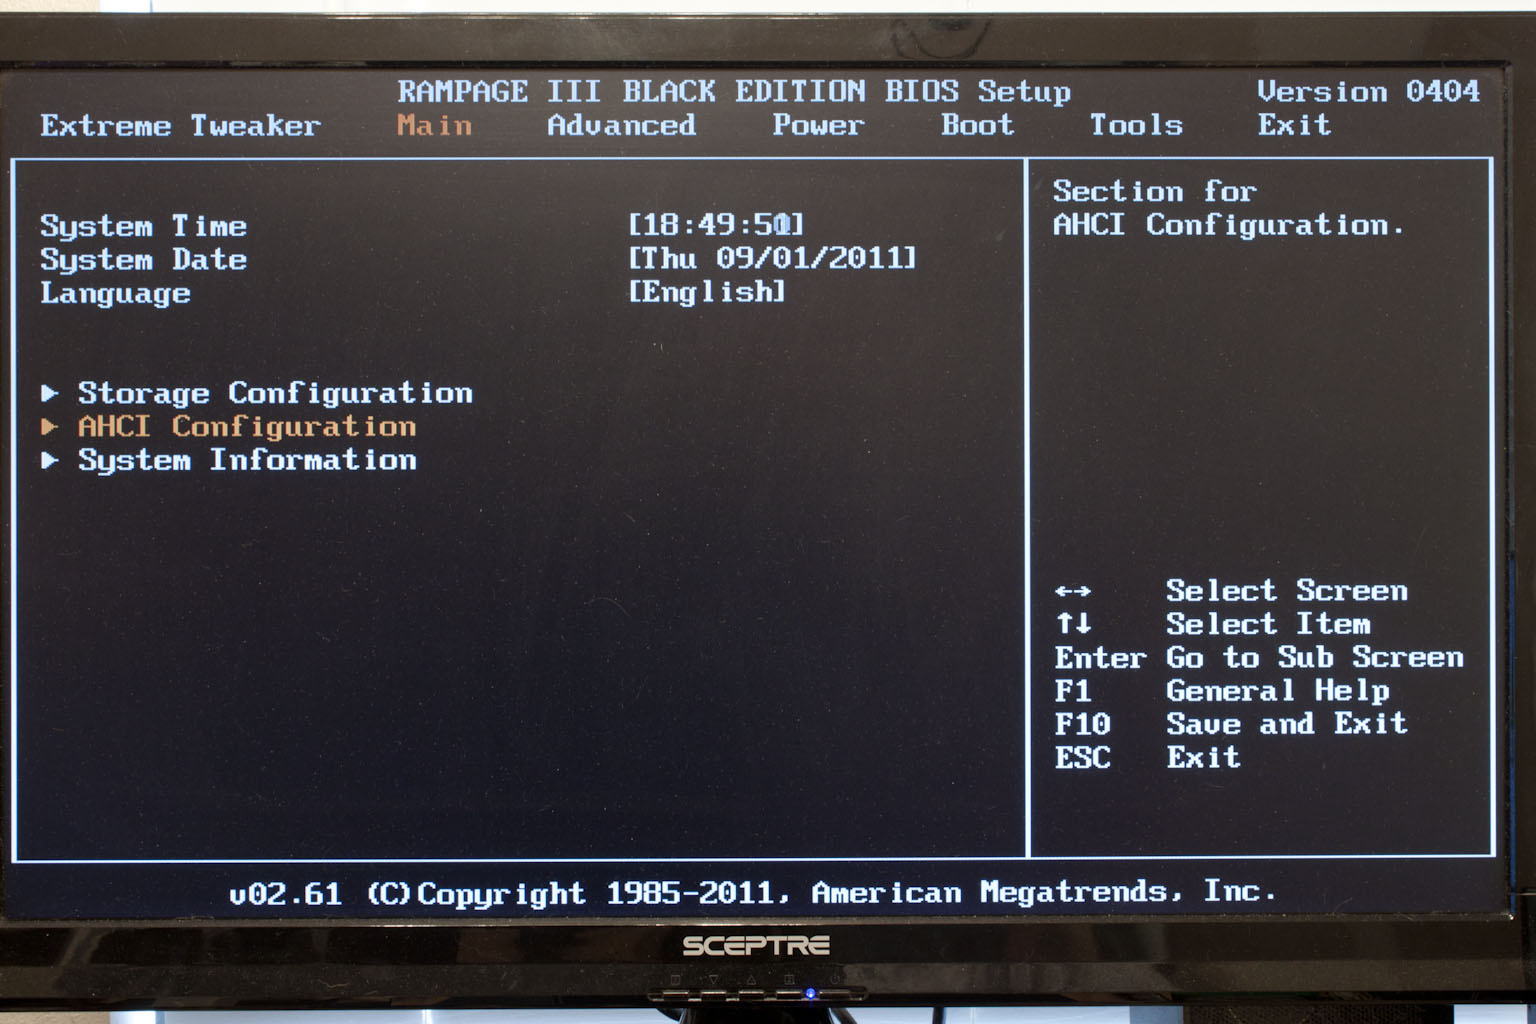
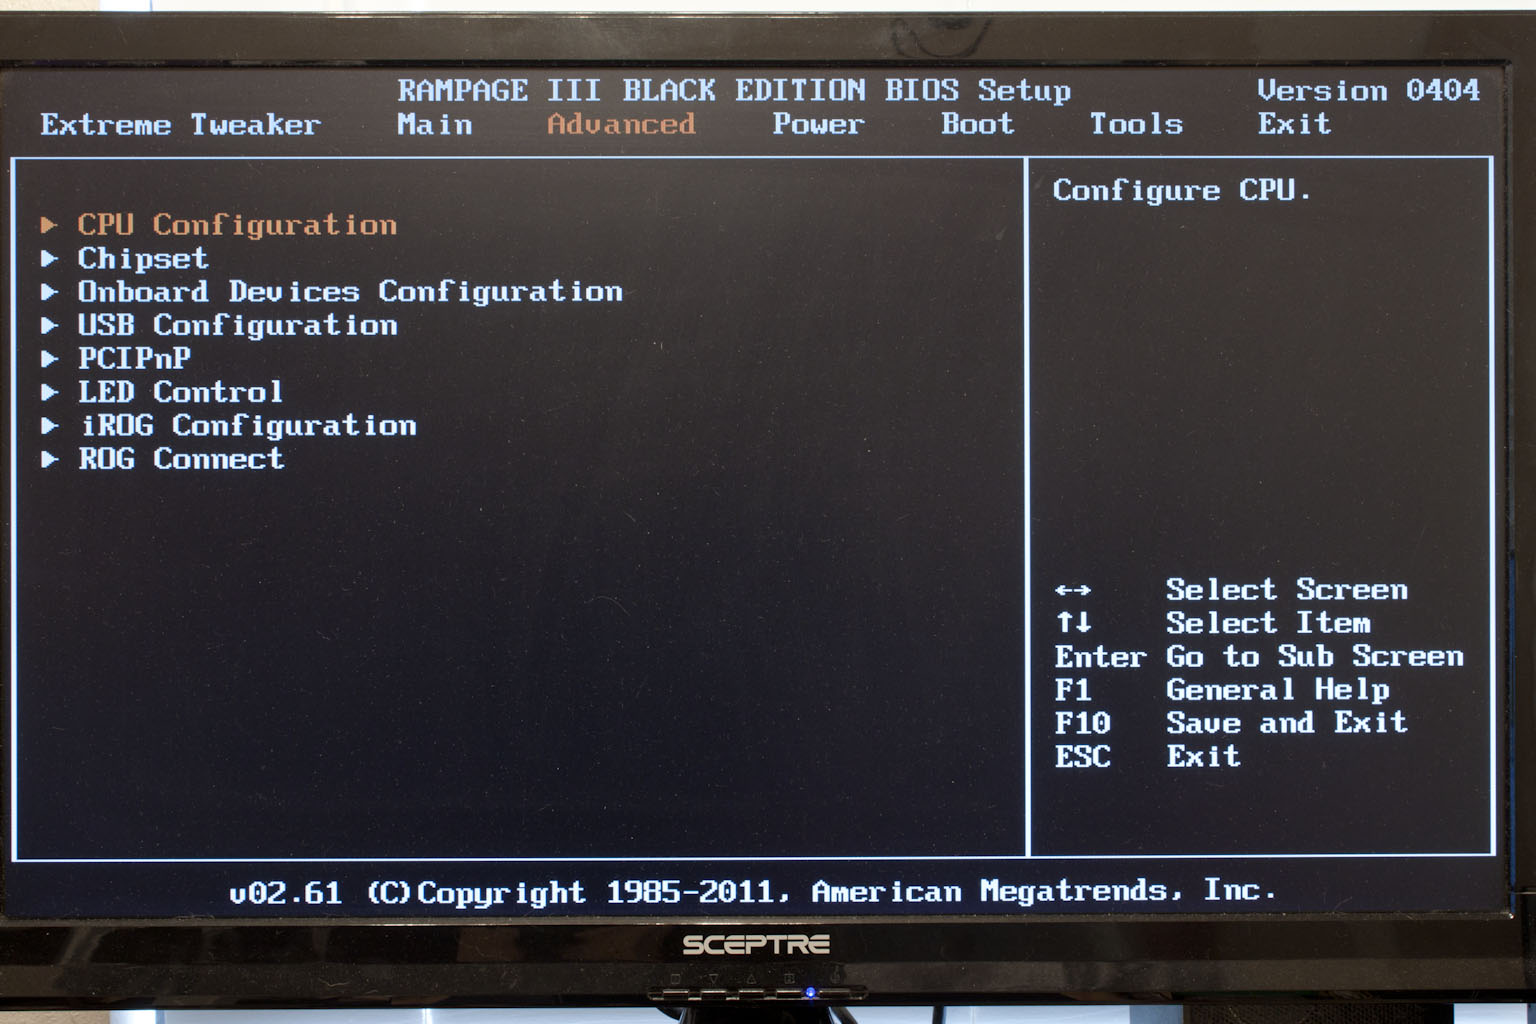
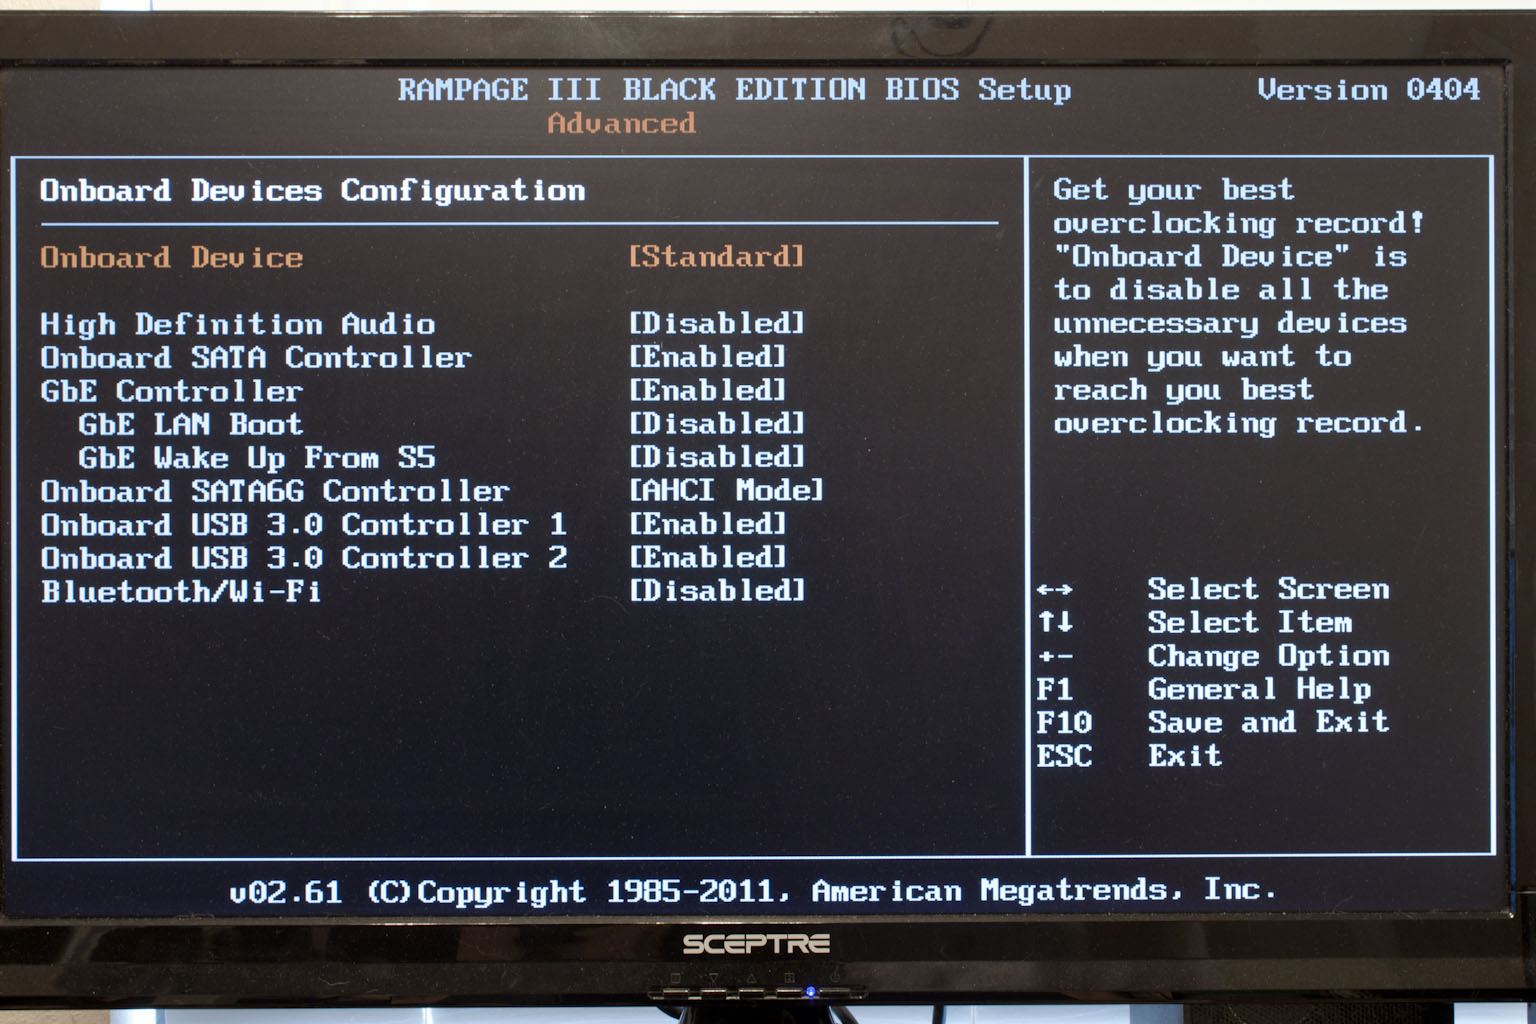
Moving on through the rest of the BIOS you find the more mundane options; Date and Time, Storage configuration, etc. these are what you would expect in any BIOS. However, there are still some spots that are of interest to overclockers. One of these is in the Onboard Devices Configuration section. Here you can enable or disable all peripheral devices. By doing this you can often get a much better overclock (because you remove all of the parts that might not be able to handle that extra speed. Another item of note in the BIOS is the ROG Connect settings, here you configure the information sent out to the systems that are connected via the ROG connect interface. (or Via Bluetooth).
 |
 |
 |
After that there is not much more to the BIOS on the Rampage III Black. It is a good BIOS and Asus does include their Q-Fan profiles (which I still think are great, especially the manual settings), but really not much more to be excited about.
Overclocking -
As the Rampage III Black is an Asus board you would expect to get some good clocks out of it. What we found was very interesting, we were able to get very high clocks but the higher we pushed the system the slower it seemed to perform. We started backing things down and finally found that best combination of performance and clock speed. This ended up being 4.323GHz (155x28) with a memory speed of 1823MHz. Now this is not a bad overclock, but we would have liked to keep the 4.6GHz we hit and have the same level of performance we are getting at 4.3GHz. We do imagine that we could get that high clock stable and performing properly with more time to tweak things.
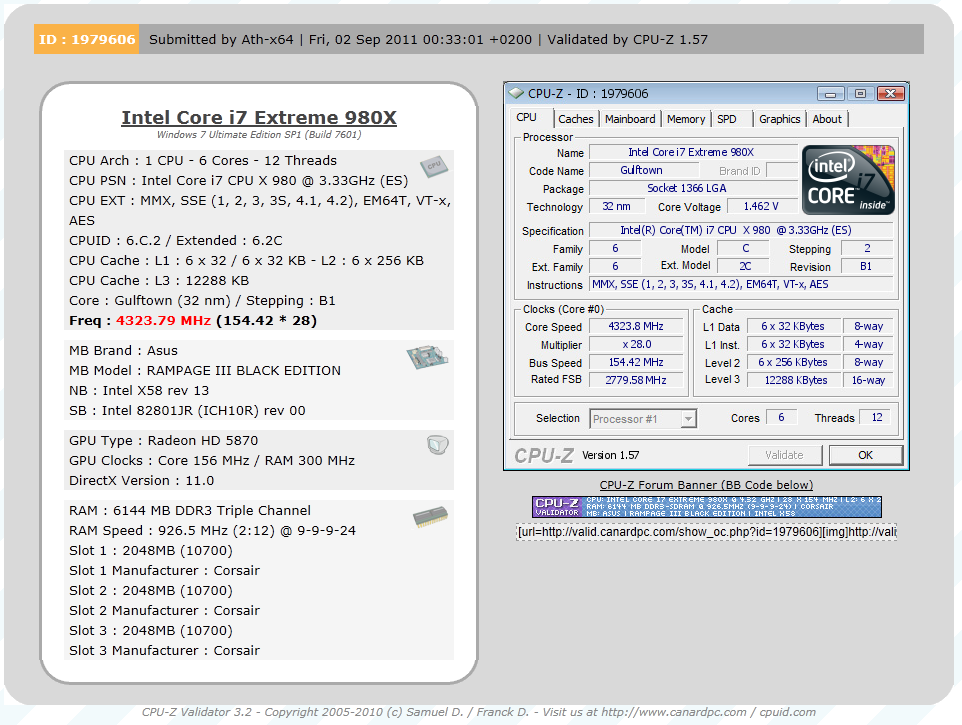
Click the image to see the actual Validation page
Of course overclocking is a picky subject. I can buy to identical CPUs from the store and they will not always perform the same way under stress. This is the same with motherboards, RAM and GPUs. So again it is important to keep in mind that our results represent a specific hardware configuration. Yours may be similar but will rarely be identical.
Overclocking Tools -
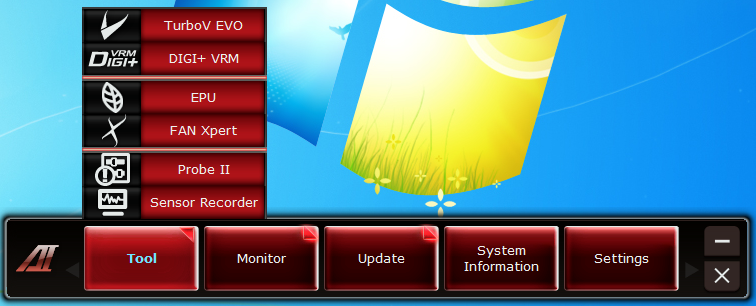
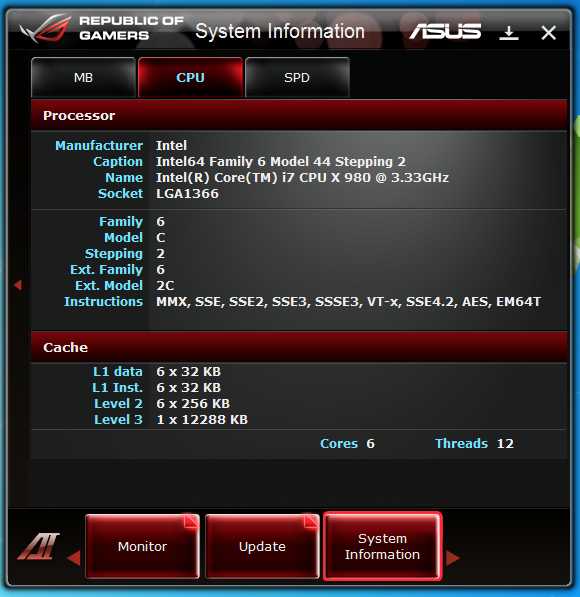
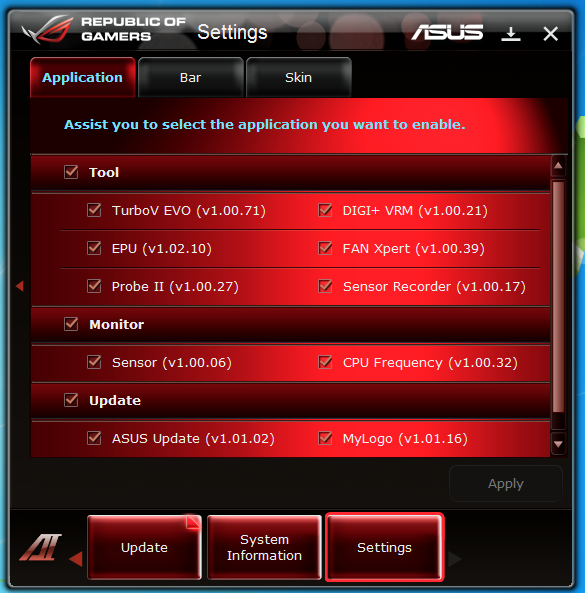
As with all other Asus products (the ones that are intended for overclocking) the overclocking tool is AI Suite II. On the ROG Line the suite is a little more robust and offers quite a bit more. When you open up the AI Suite you get a tool bar that has all of the available options. Clicking on any of the buttons will open up the options for that button. Most overclockers will be interested in the items under the “Tools” button. Here you have some access to some great overclocking features that are built into the Rampage III Black. 
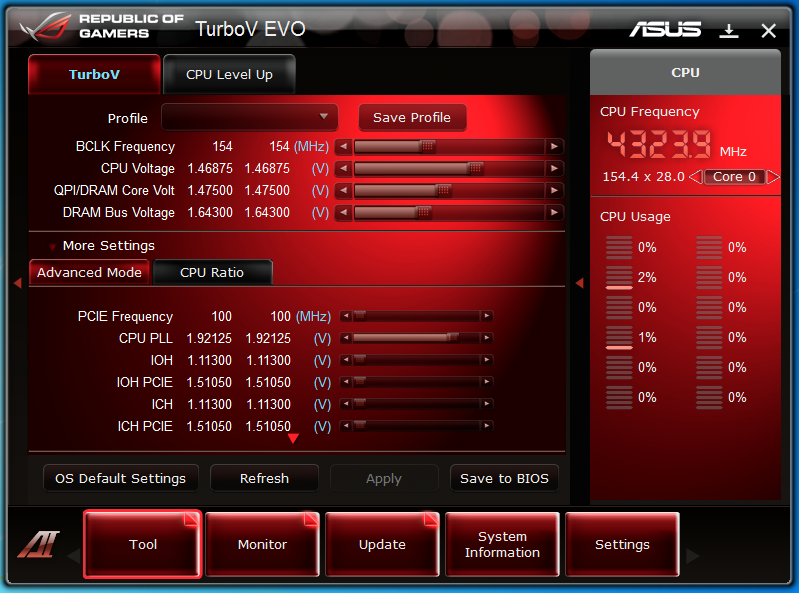
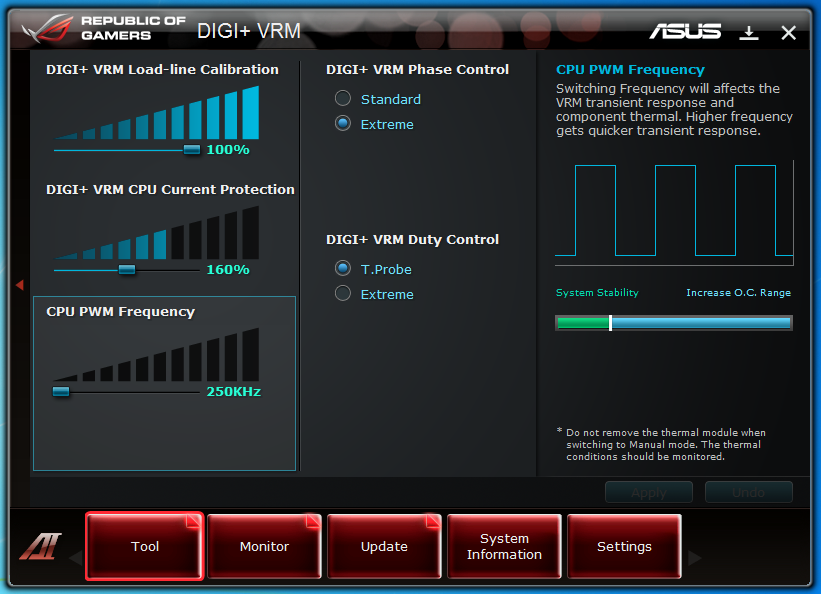
Kicking things off with the TurboV application we find the typical tools for this with the exception of the ability to change the memory multiplier to do that you have to reboot and get into the BIOS. The next item on the tour is the Digi+VRM. Here you can adjust the Voltage Regulation Module in a number of ways from tweaking the frequency to changing the load line calibration for memory performance.
 |
 |
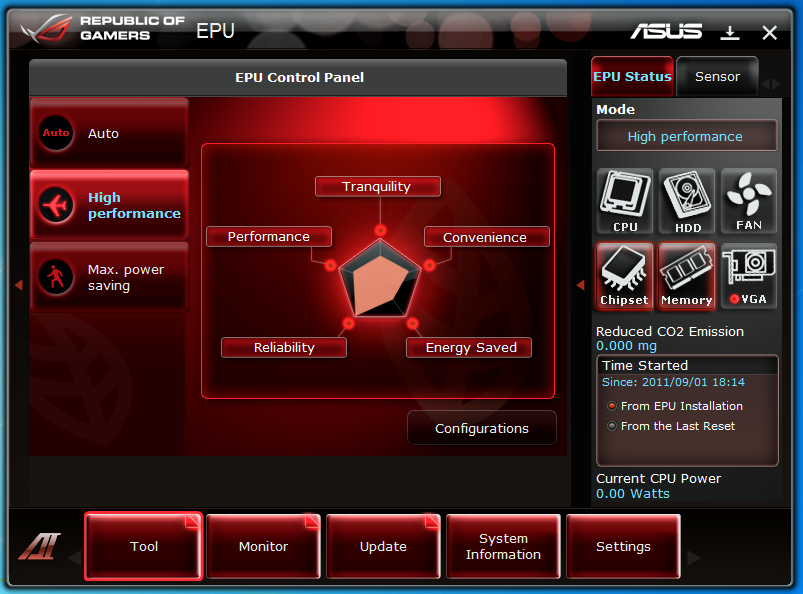 |
One item in the list that we found a little odd was the inclusion of the EPU software. Normally in the upper end overclocking boards this software is left out (as most people that overclock do not use it. This leads us to feel that this is not intended specifically as an overclocker’s product but more of hybrid that is meant to cover multiple needs.
 |
|
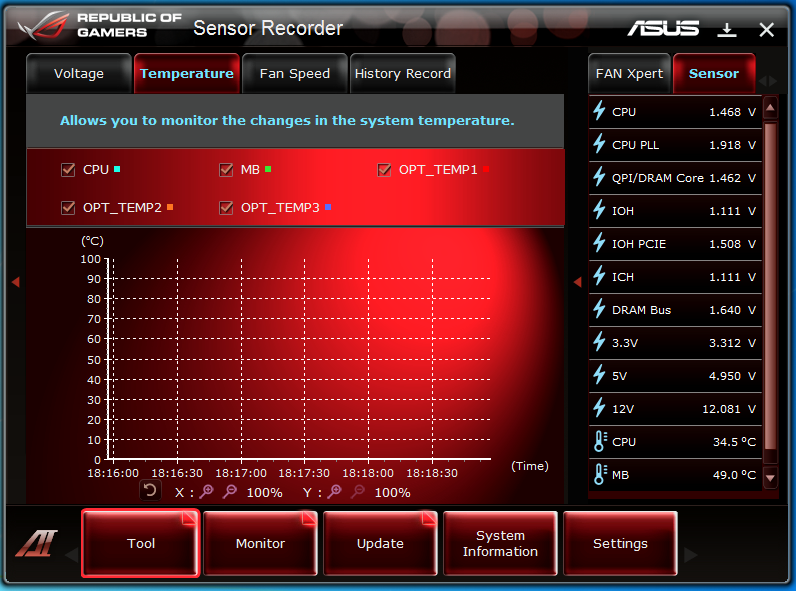 |
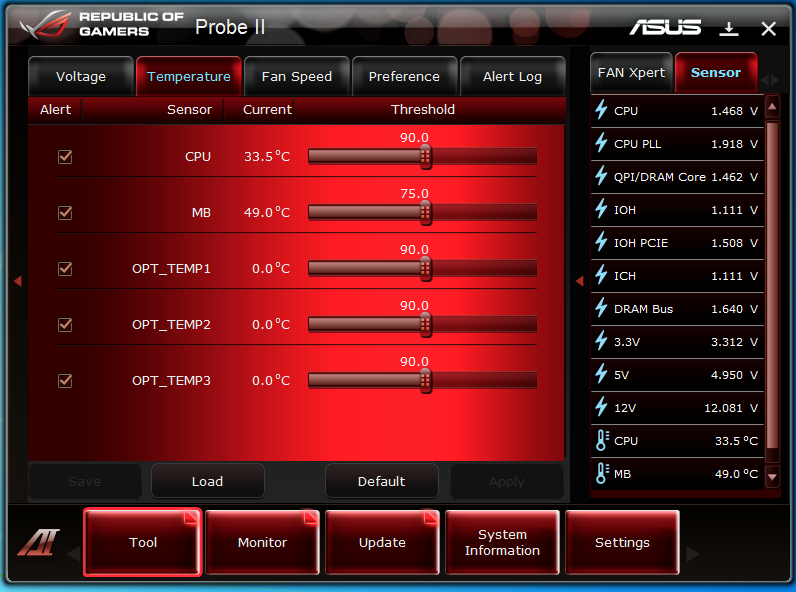
Fan Xpert, Probe II and Sensor Recorder are all tools that can be used to help you maintain your overclock. Fan Xpert allows you to manually control the fans on the board while Probe II and Sensor Recorder allow you to track the temps and voltages used for the clock you are trying to achieve.
 |
 |
The rest of the tools are more support for the tool itself and system information. In all we feel that the AI Suite is probably one of the better tools out there for Windows based overclocking. There are still some items that I would like to see in there (memory overclocking) but I imagine that this will eventually happen.
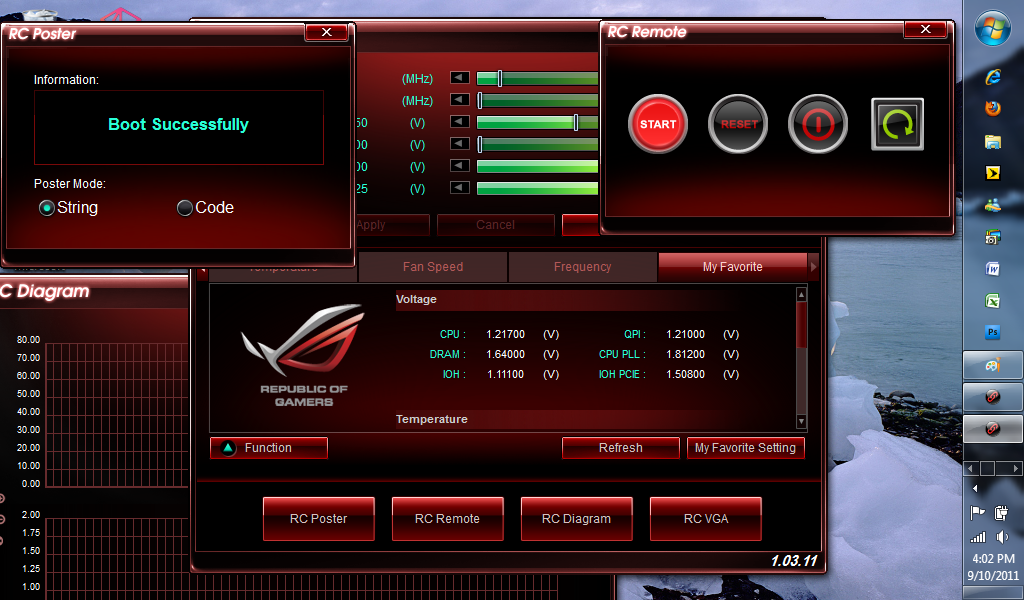
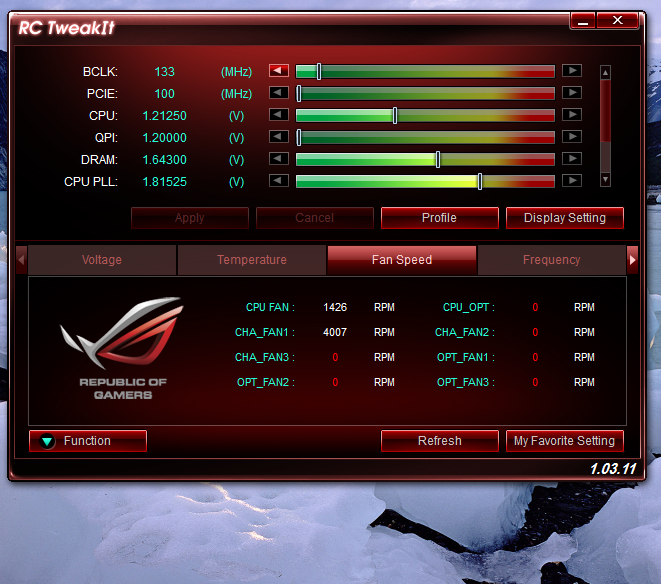
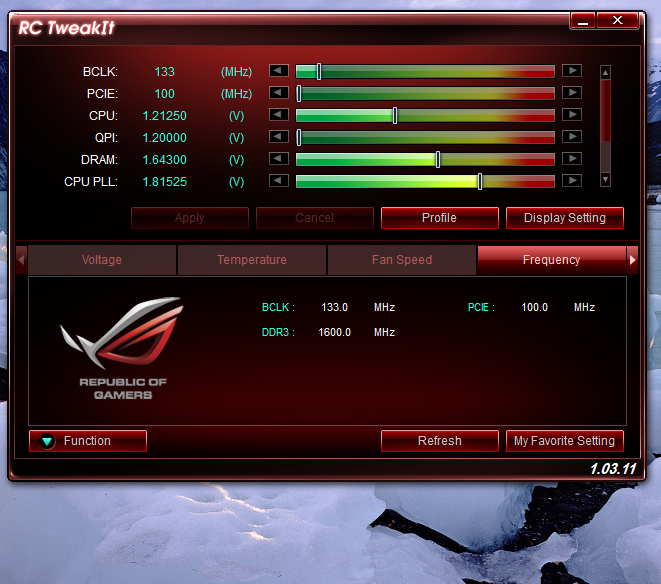
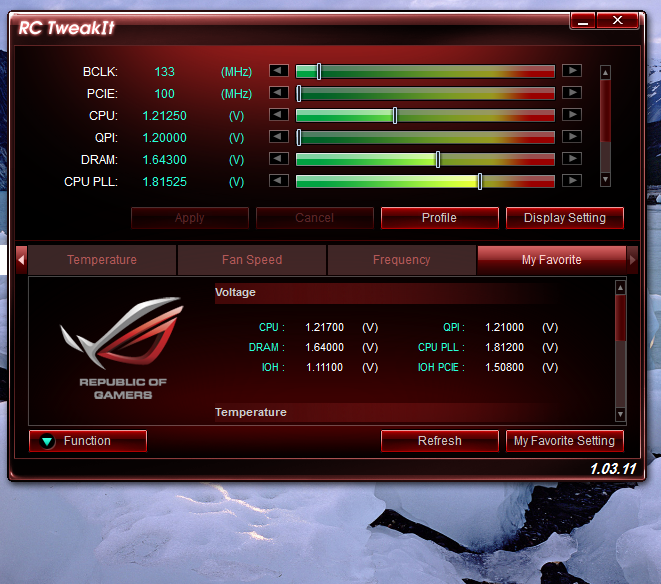
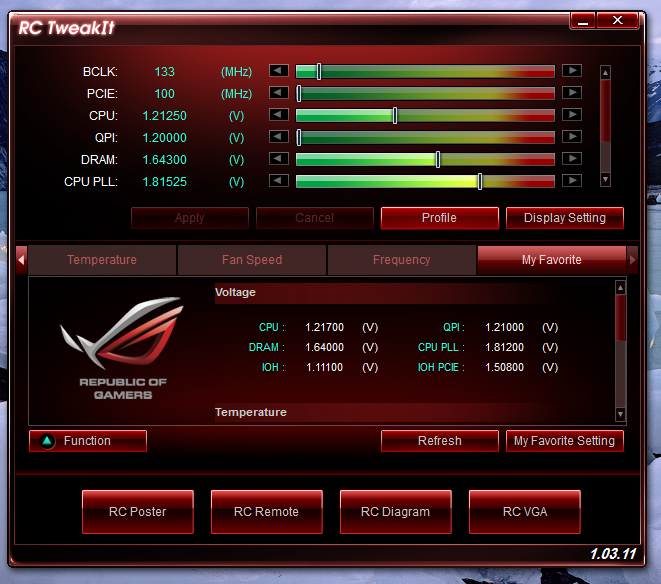
ROG Connect -
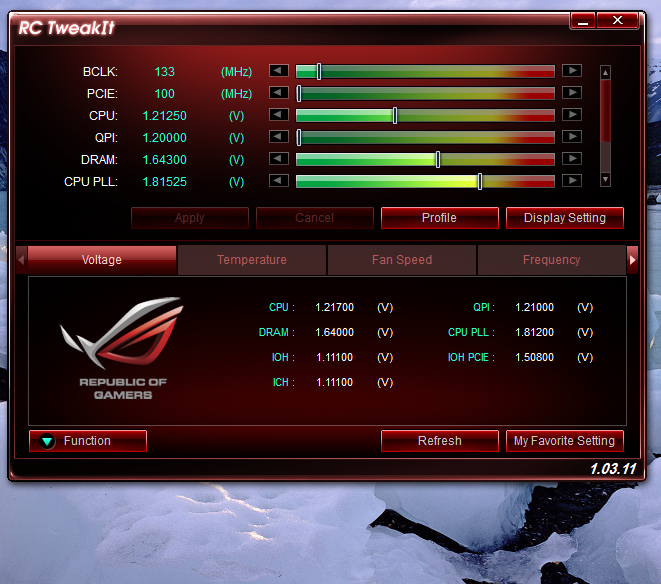
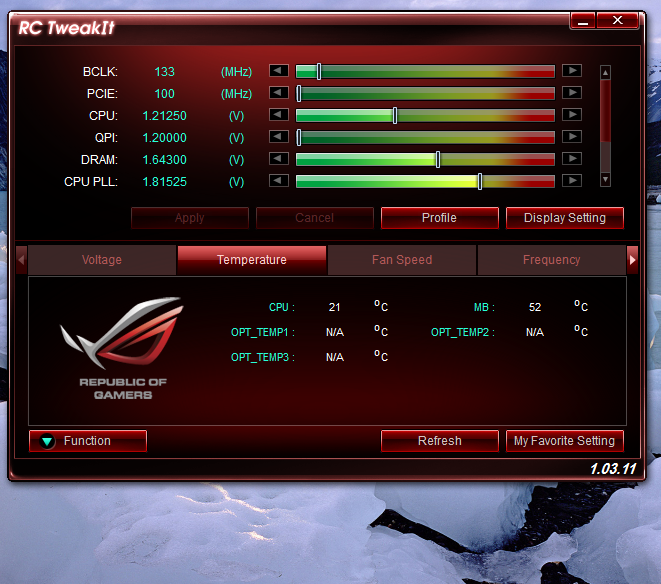
One of the more impressive tools that comes with the ROG line up is the ROG Connect. This is a multi-facet tool that allows you to connect to your system Via Bluetooth or USB to directly control the overclocking on the system. We used a small netbook to connect to our test system and were able to run the RC TweakIT application to adjust things. One thing new with the RIIB is a GPU Tweak software that is supposed to allow you to overclock your GPU directly from the RC TweakIT software, however we were not able to get it to work and have begun to wonder if this is for the X58 line.
 |
 |
 |
 |
 |
 |