The Box and Goodies -
The Stryker’s box is pretty nice looking. The front has a very clean picture of the case on it which gives you are very good idea of what it offers for expansion and shows off the “Storm Trooper” look we talked about. Of course you have probably seen multiple pictures and videos of this case so you know that it looks like, but the inclusion of the picture was a nice touch. The tank in the background is a little odd, but we are guessing that it was intended to show the strength of the case and also relate it to gaming somehow. In the upper right-hand corner there is a sticker that announces support for both USB 3.0 and 2.5-inch SSDs. Cooler Master did this part of the Stryker right as we will show you later in this review.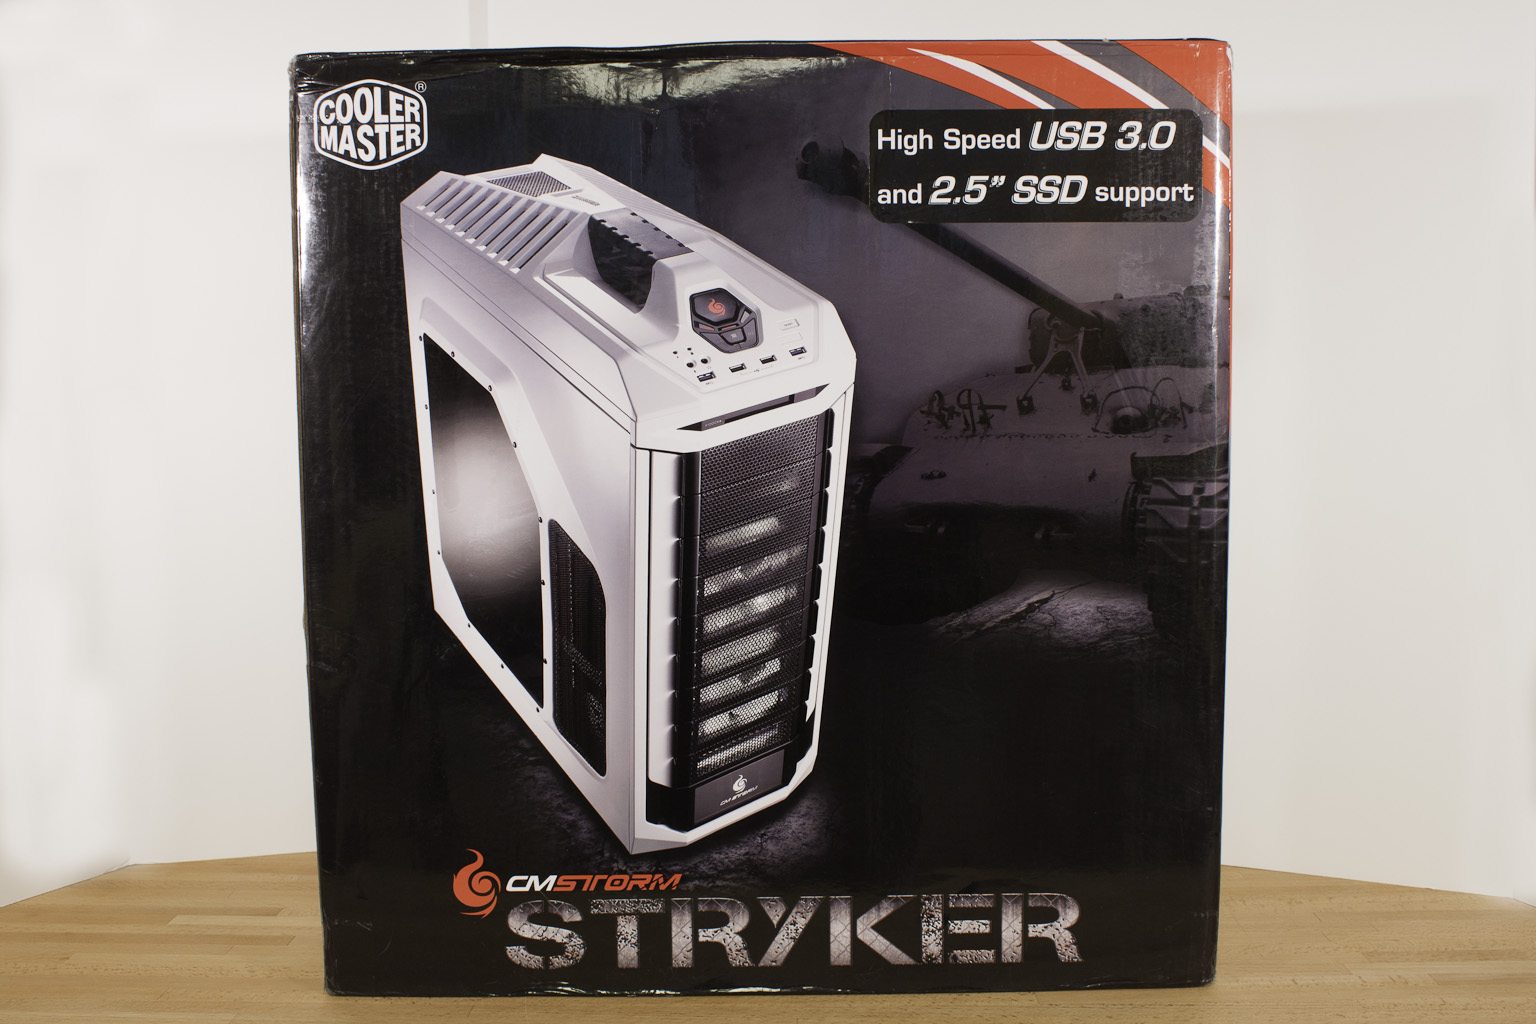
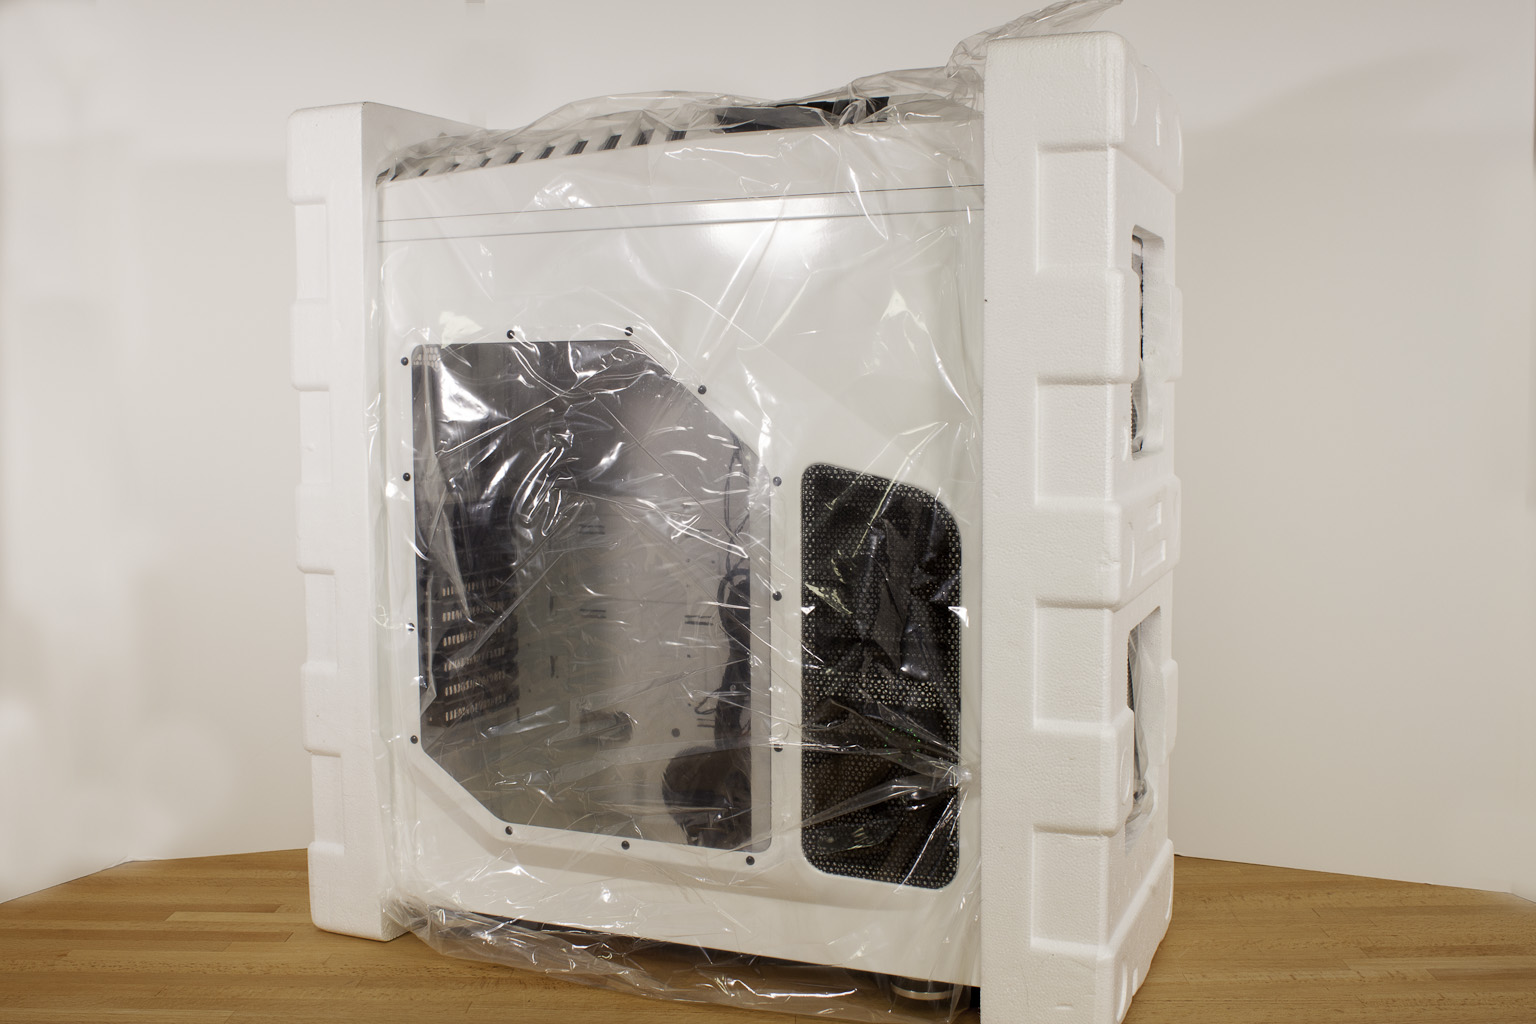
The back shows off a three-view diagram of the Stryker, but us a little misleading. Looking at the side and front views you might get the impression that you are getting four 120mm fans, two on the side and two in the front. Unfortunately that is not true. There are only two 120mm for the two 3.25-inch HDD cages. The direction of the fans depends on the way you mount the cages (front or side facing). We will talk more about these cages below.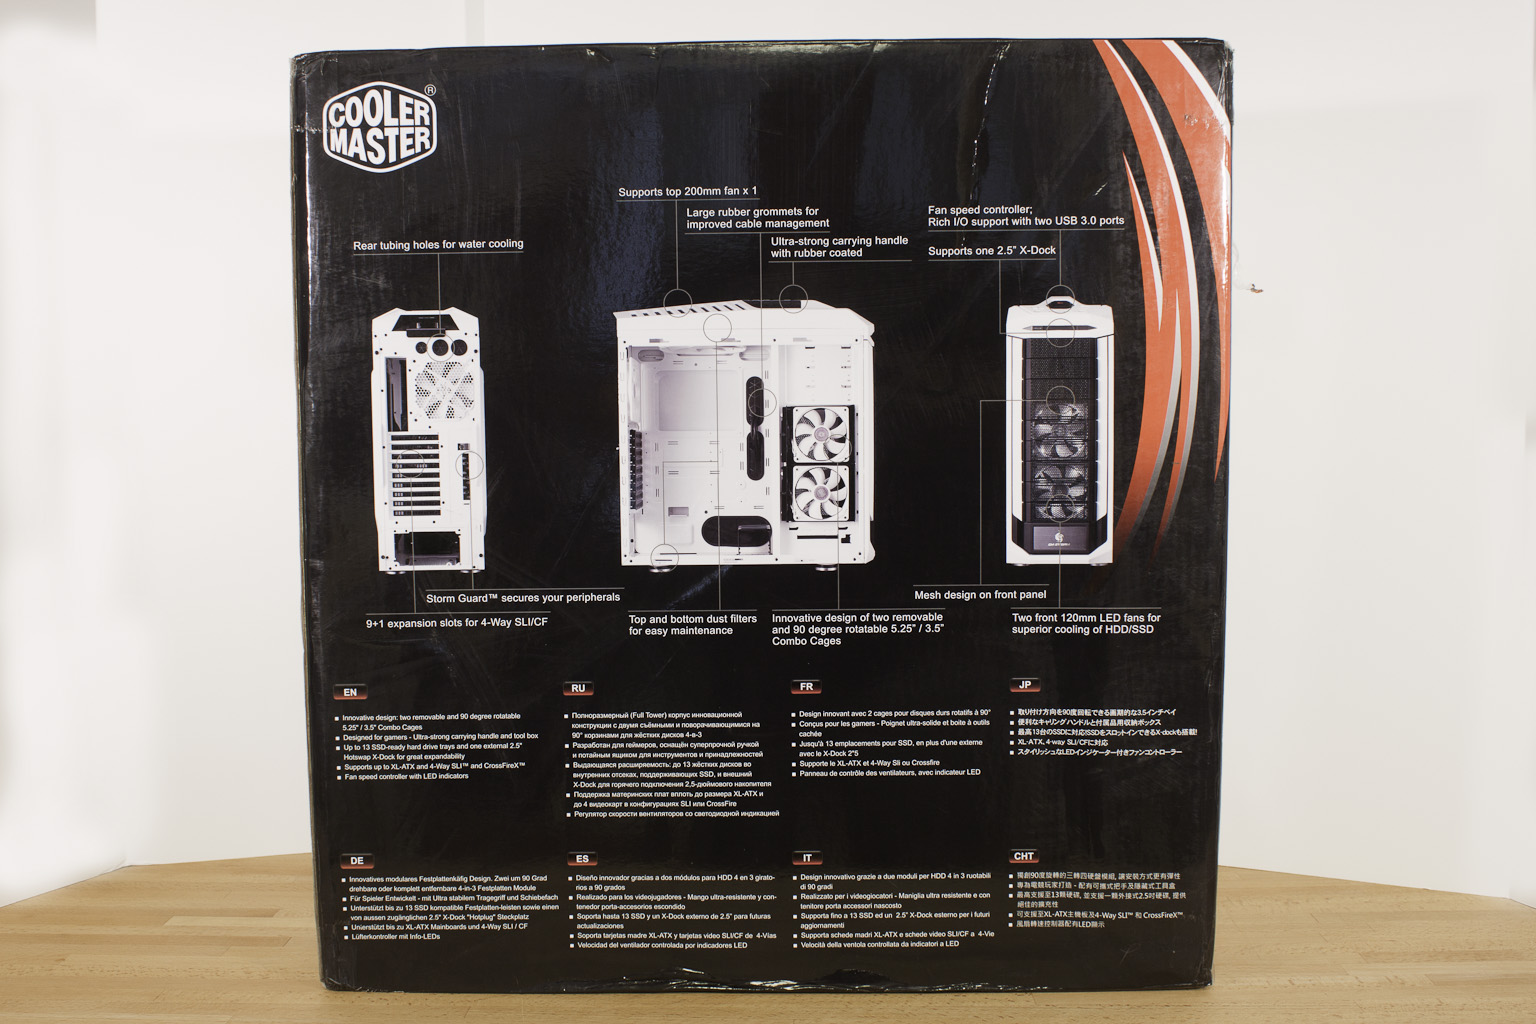 Inside the box the Stryker is relatively safe between to Styrofoam end caps and inside a nice plastic bag. Between these two and the cardboard box they can generate a nice amount of static electricity. Be sure to ground yourself before touching anything important after pulling this out. You can also wait until a friend is close and give them a healthy and fun jolt if you are into that sort of thing.
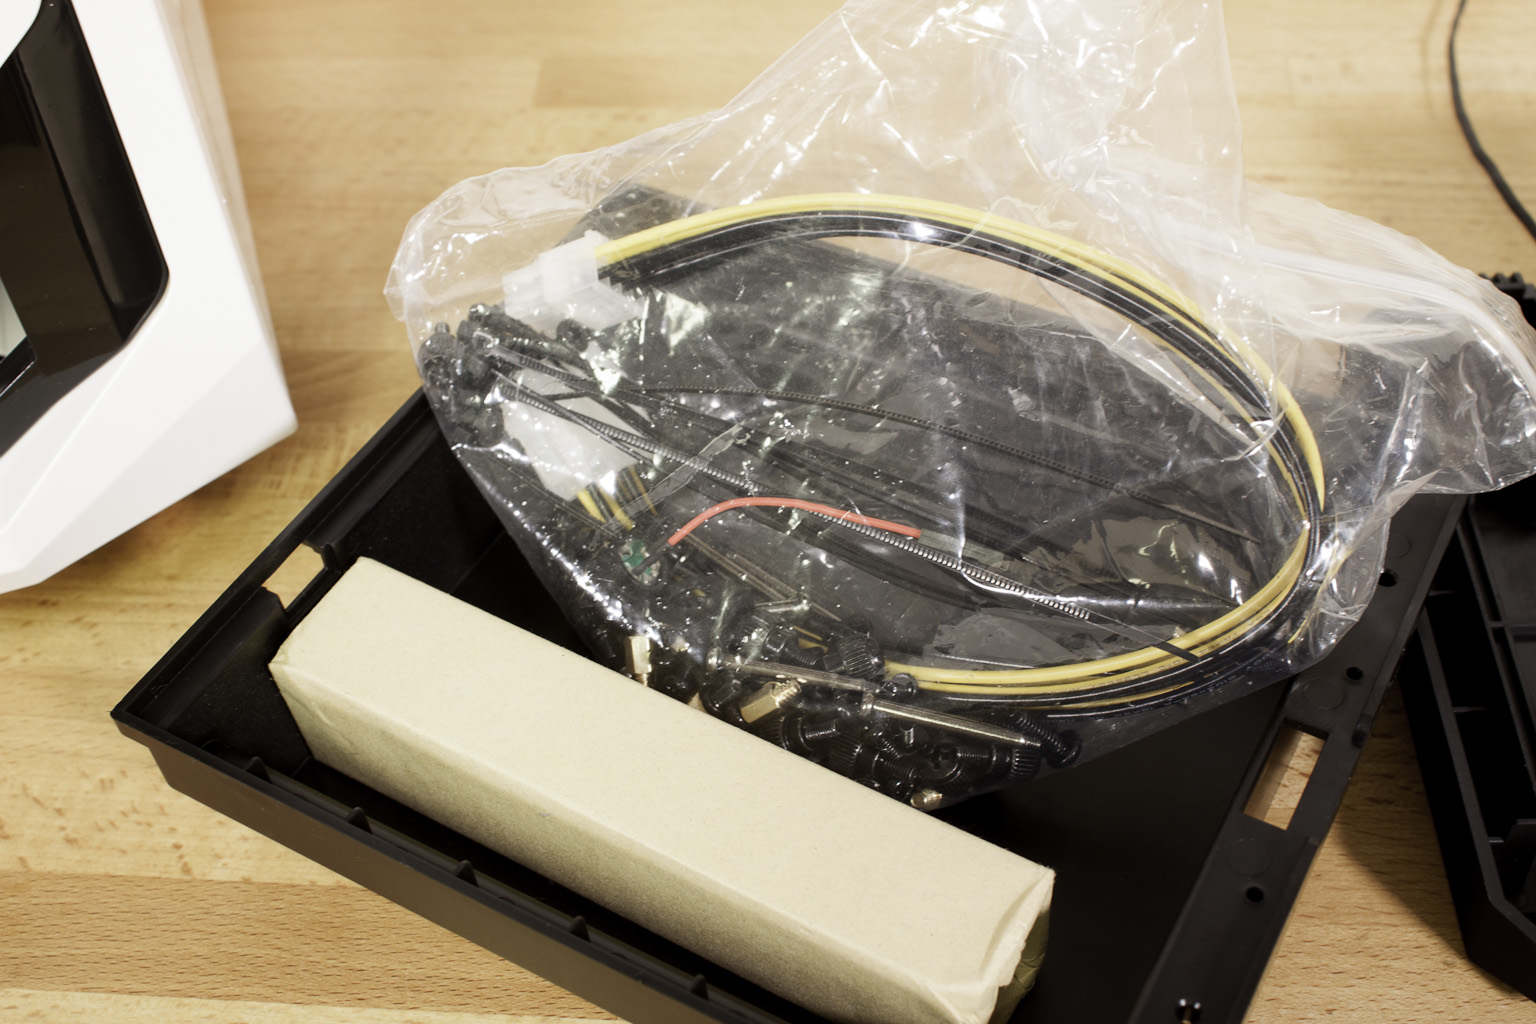
Cooler Master has included quite a bit of mounting hardware and accessories with the Stryker. They are stashed away in several places around the when you first get it open We will talk about some of the more creative hiding spots as we do our case walk around.
The CMStorm Stryker -
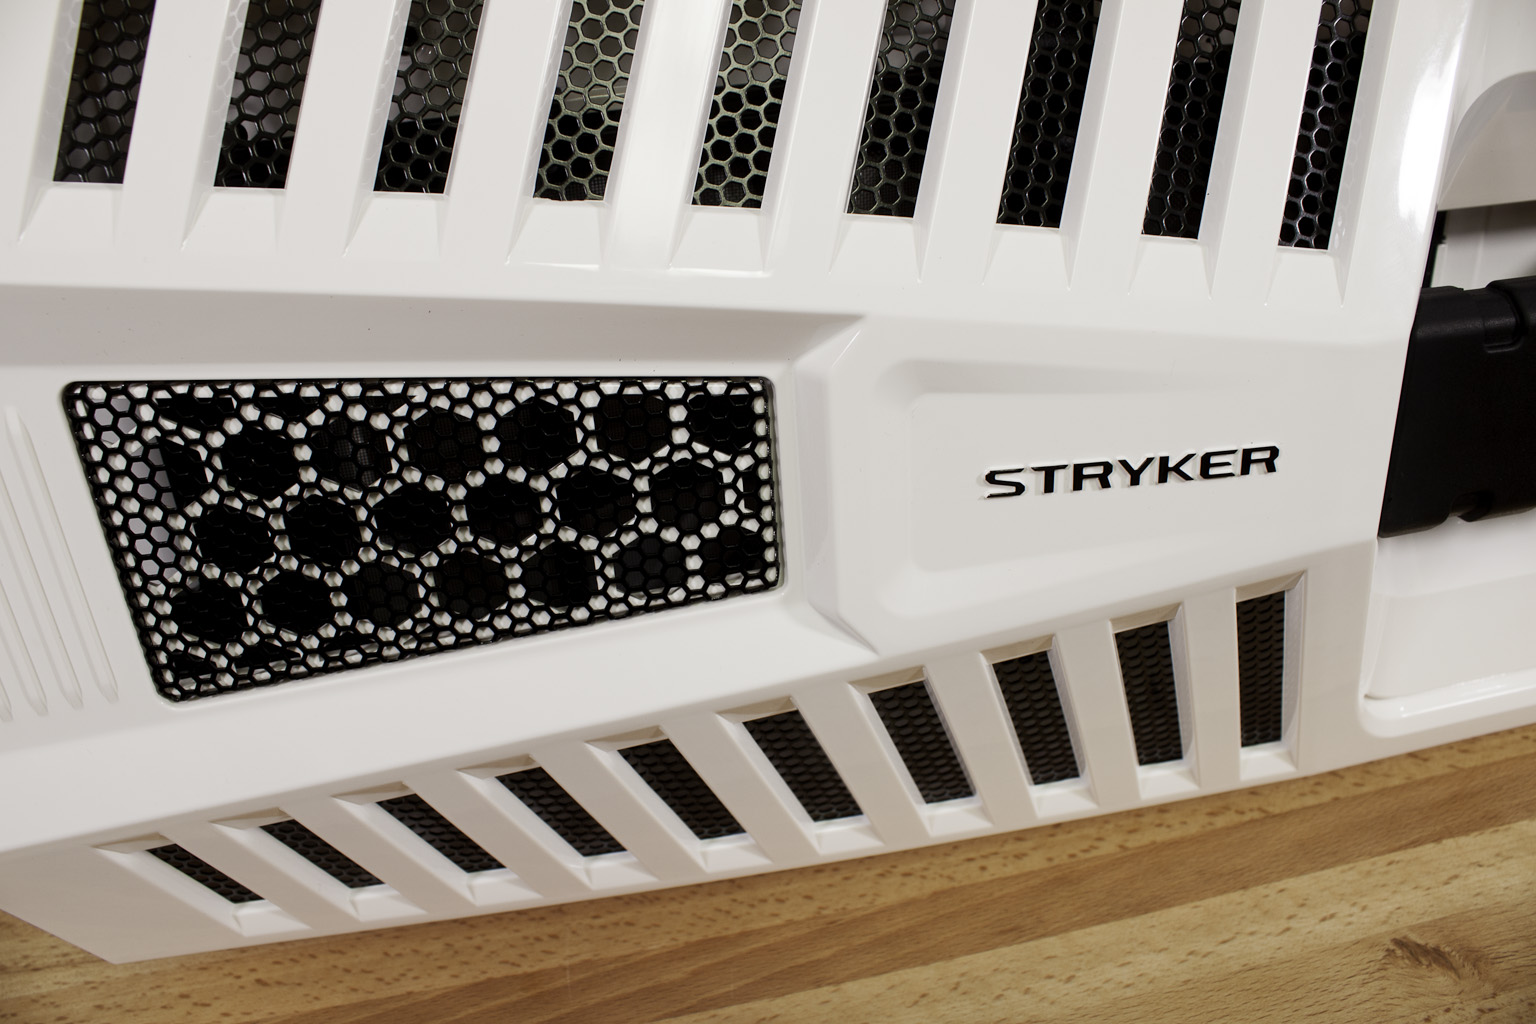
Cooler Master has been making from impressive cases for a while now. This started back when they decided to pay more attention to for as a condition of function instead of just trying to make them look flashy. It was an important lesson for Cooler Master as they worked to get the very fickle gamer and enthusiast market to notice them. With the Stryker the first thing you see is the glossy white of the main portion of the case in stark contrast to the black grills. Cooler Master decided to use a combination of plastic and metal to achieve this look. The sheet metal pieces are coated with high-gloss white enamel so they match the look of the glossy plastic pieces. I it is a very clean look. Interestingly enough the front reminds us of the original Thermaltake Armor at first glance although the Stryker does not open up like the Armor did so the impression is very minimal.
 |
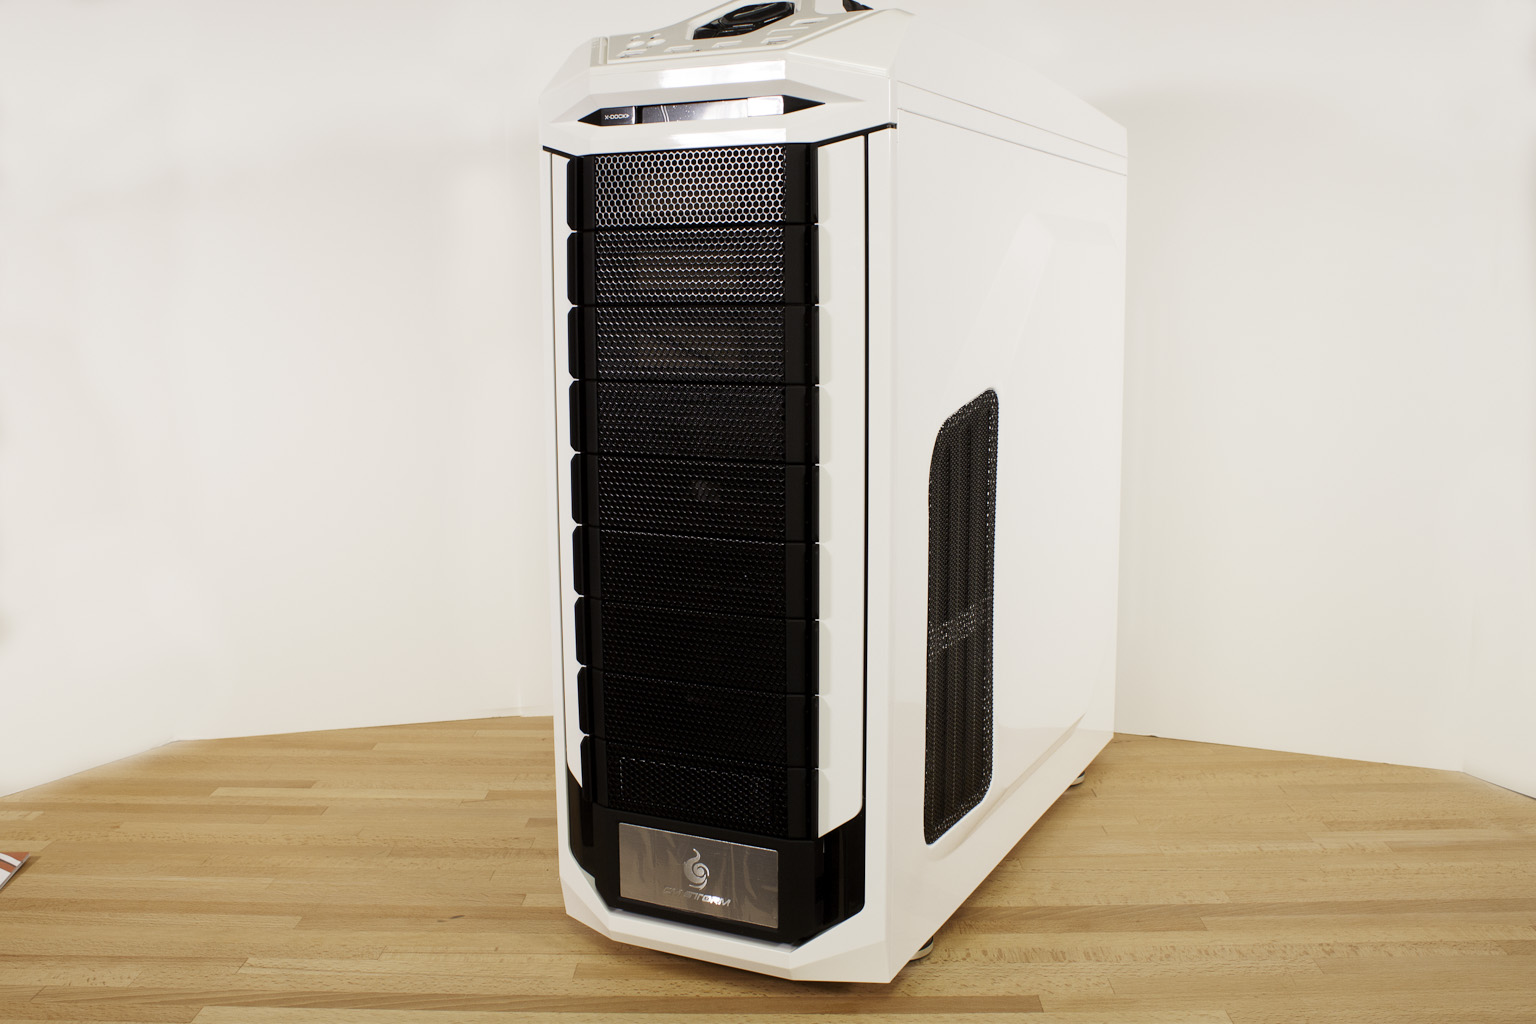 |
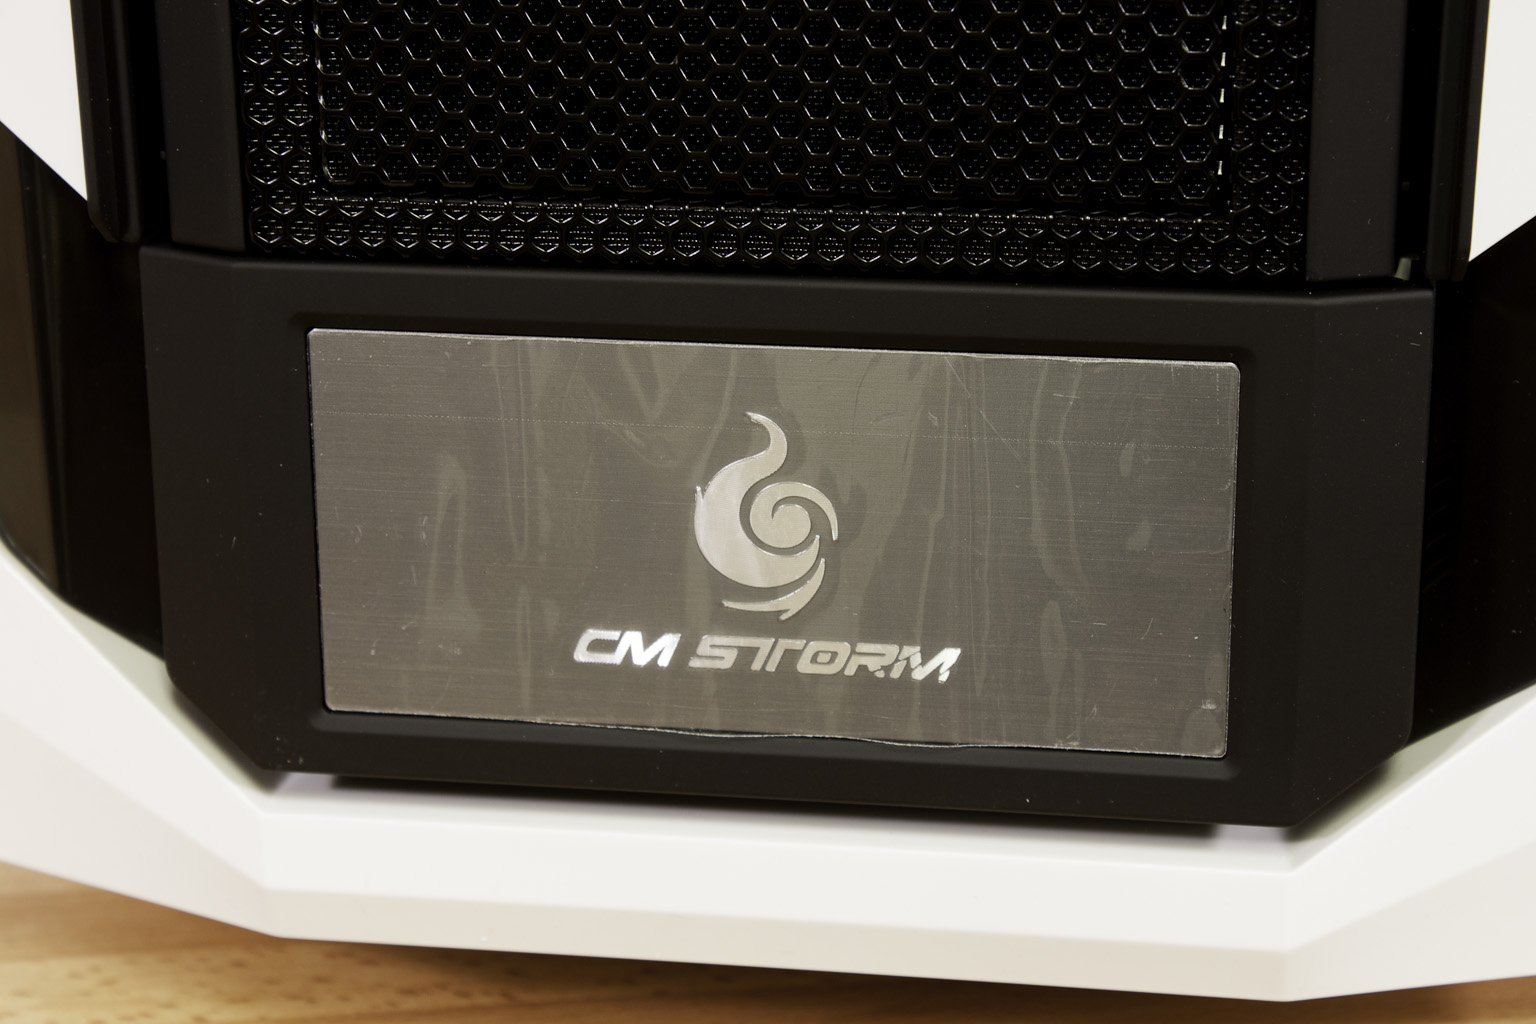
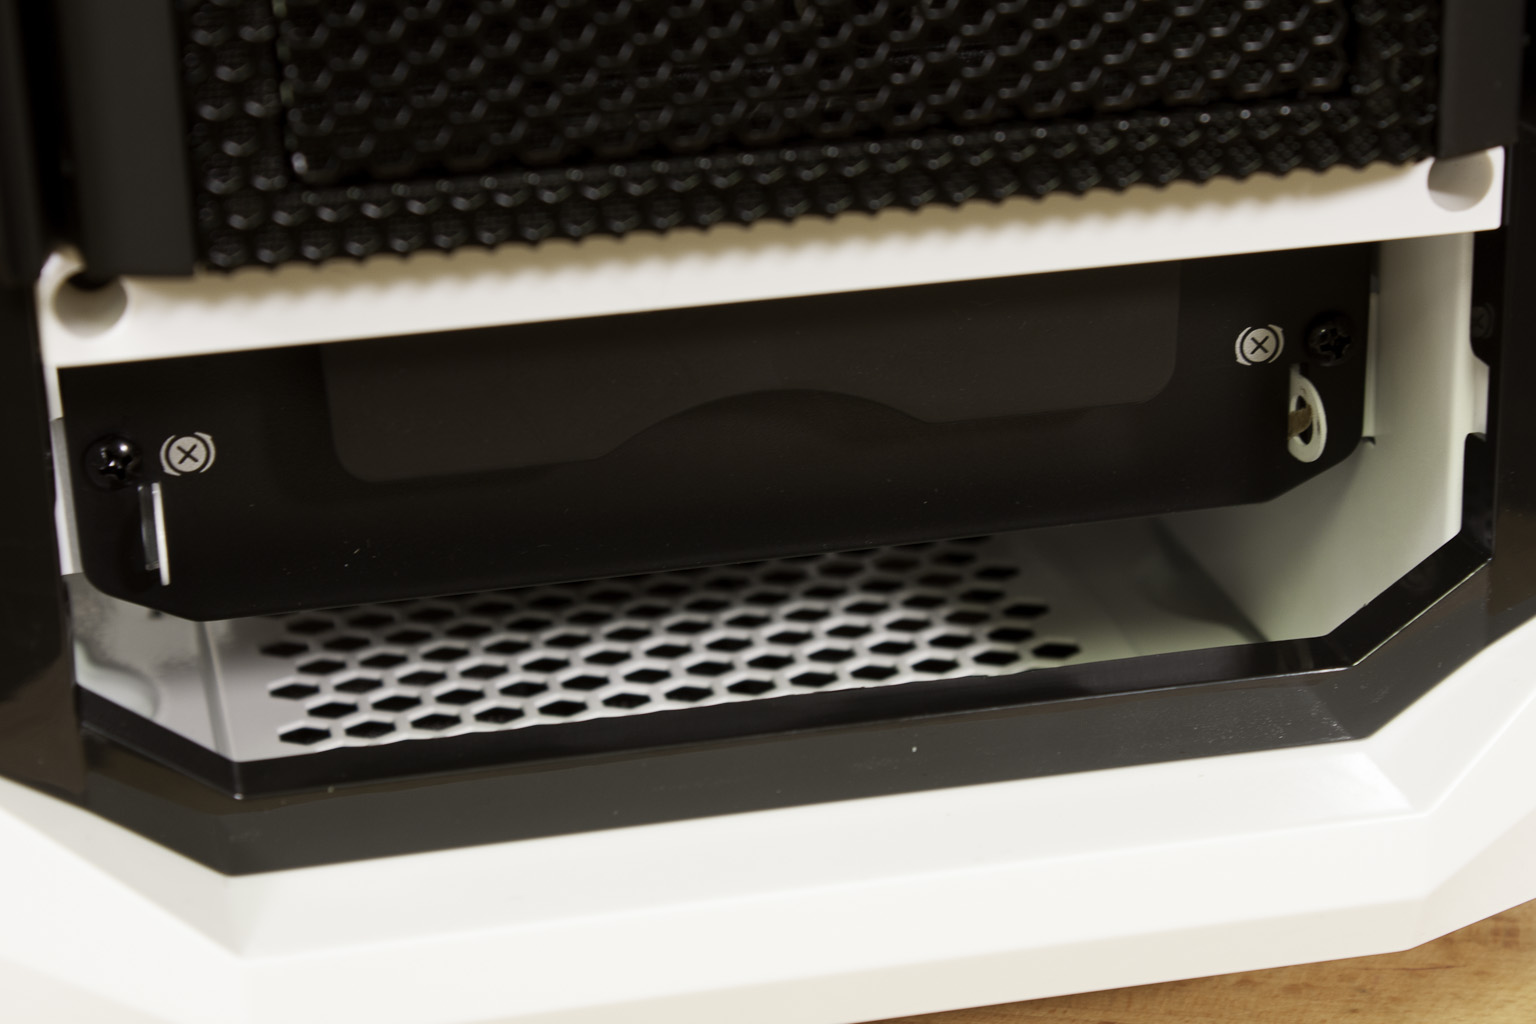
The front of the Stryker features nine 5.25 bays. More than half of these are occupied with two 3.5-inch drive cages which we will talk about in a minute. One of the bay covers has a cut out for a 3.5-inch drive. We are not sure if this was meant for a breakout box, additional front panel headers or just for anyone still using a floppy or Zip drive. It is nice of Cooler Master to toss this in though. At the bottom of the case there is a large CMStorm logo, behind this is a try to keep all of your mounting hardware.
 |
 |
 |
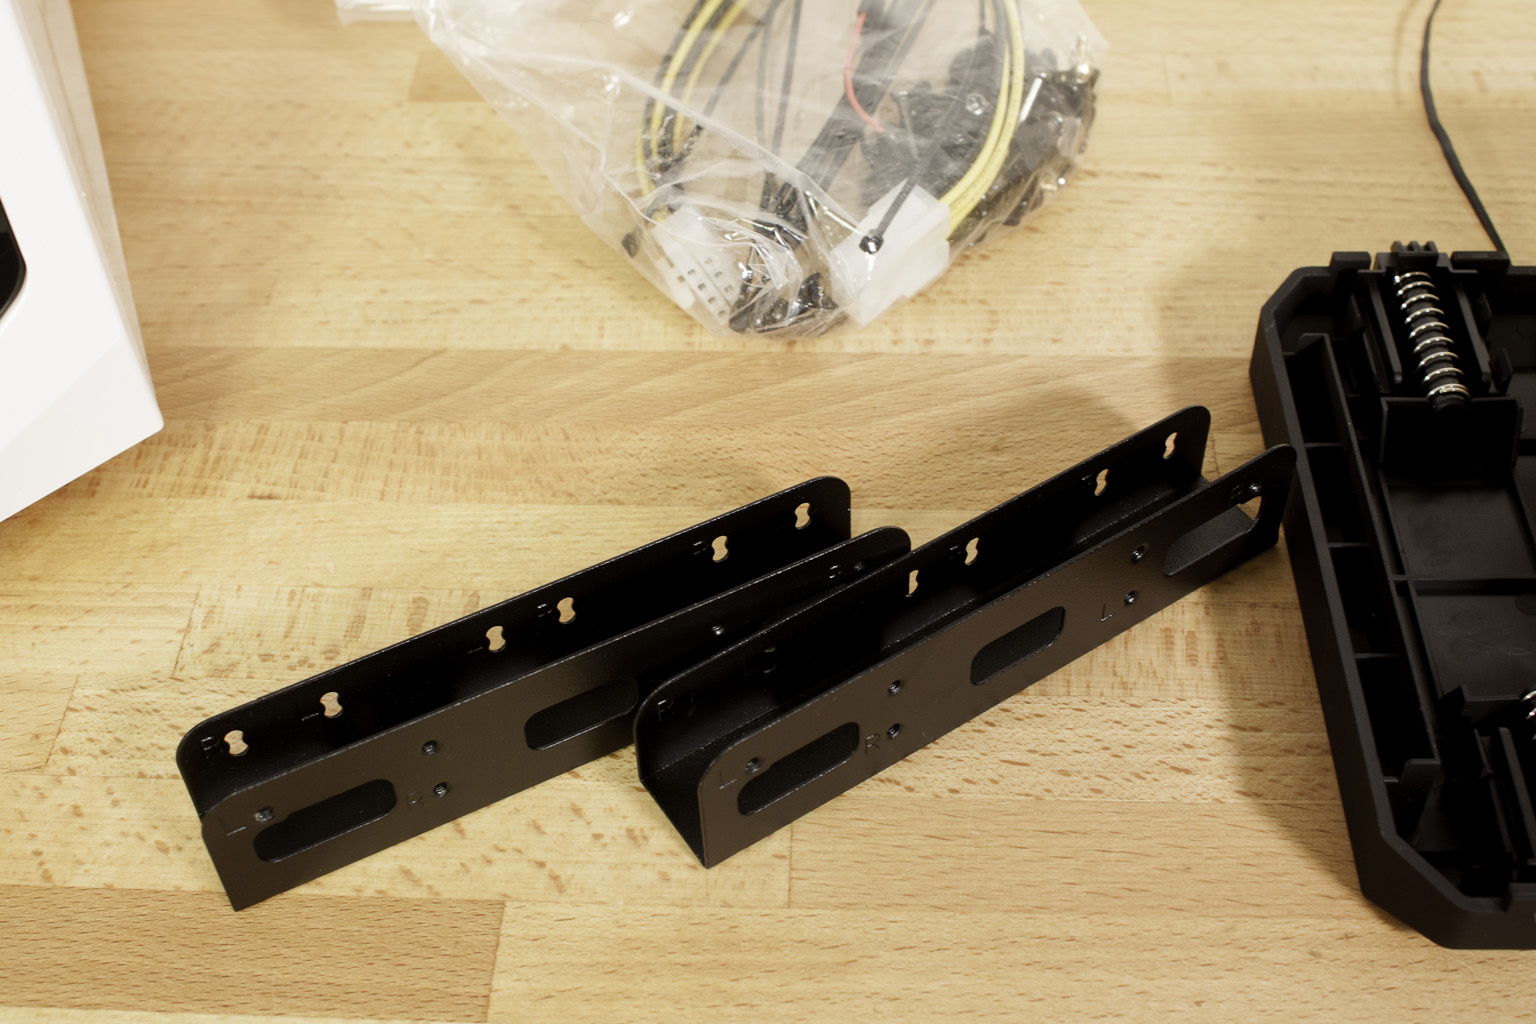 |
The tray is held in place by two small screws and has a lid to make sure nothing falls out. When you first open the tray you will find some of the accessories we talked about earlier. One of these is a great idea on the part of Cooler Master, an 8-pin ATX Aux extension cable. We know we commonly recommend getting one of these for use with motherboards. This inclusion will make installation of even the most cramped motherboard a little easier. You also get a few Zip-Ties for cable management and a set of rails for installing a 3.5-inch drive in one of the 5.25-inch bays.
 |
 |
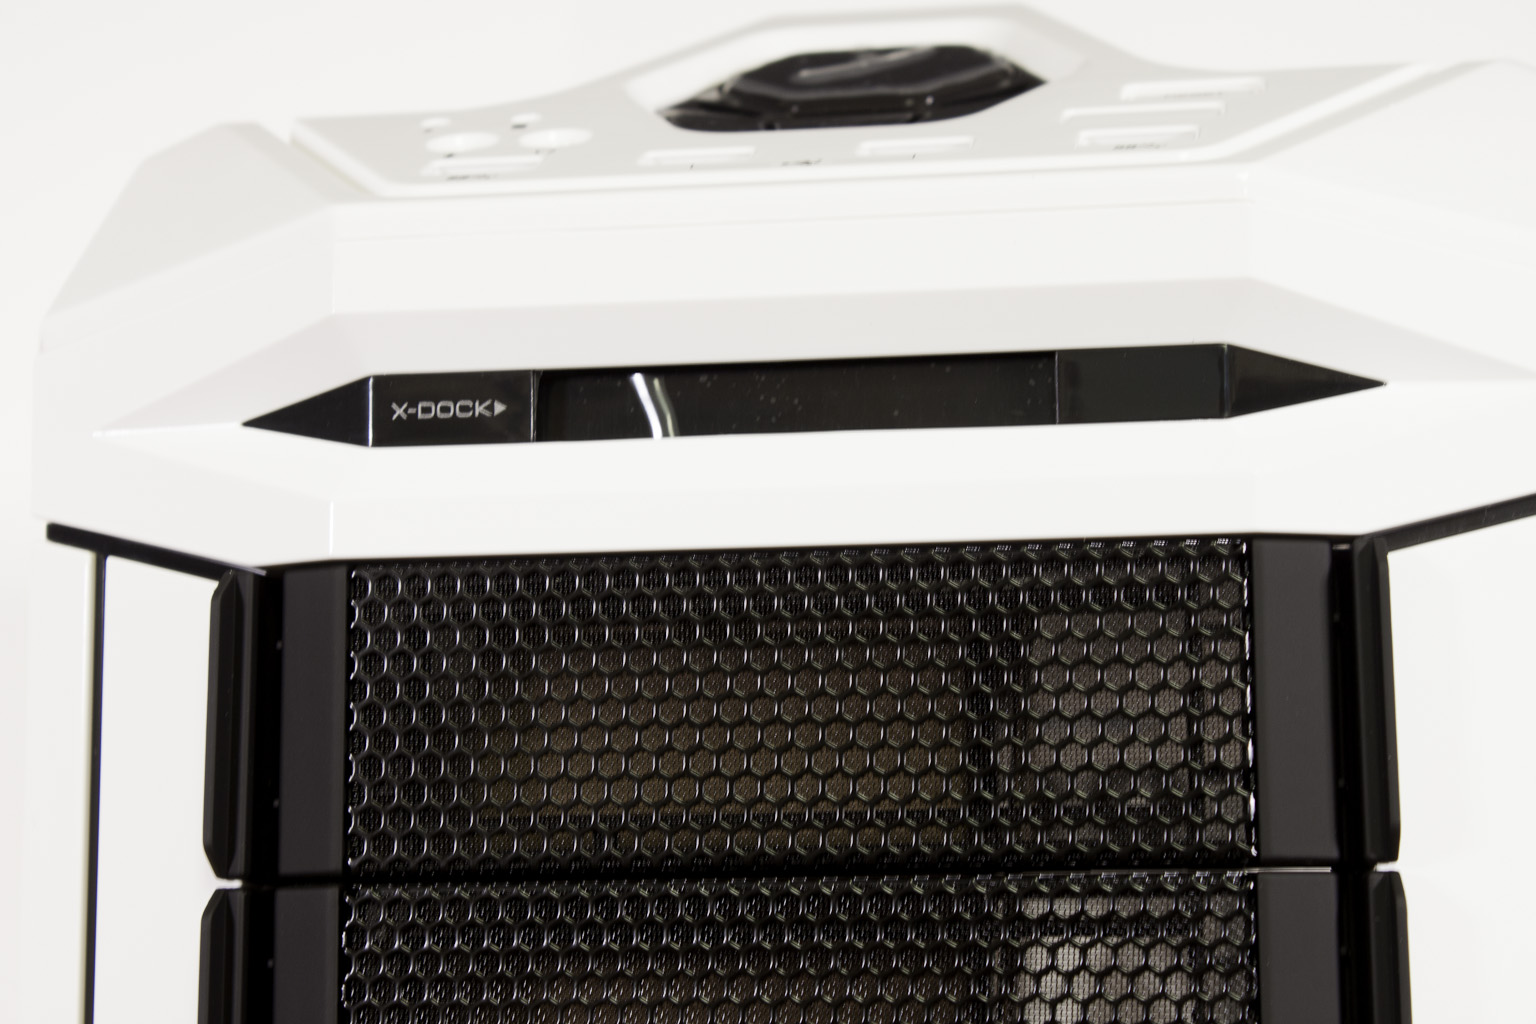
Moving from the bottom to the top we find another nice touch from Cooler Master called the X-DOCK. This handy little slot is the perfect size for a 2.5-inch SSD. It is a neat feature, but we wonder about its real functionality. Considering the cost of SSDs we doubt anyone would buy one just for backup and it is unlikely that you would need or want to swap out a drive that you might use for caching. Where it might work out is if you used this slot as the primary boot slot. You would be able to quickly swap out operating systems to keep things interesting. It might make a mess of any storage drives you have if they are not formatted with a file system that is compatible across all of the operating systems you would be using though. Still it is a feature that does have potential.
 |
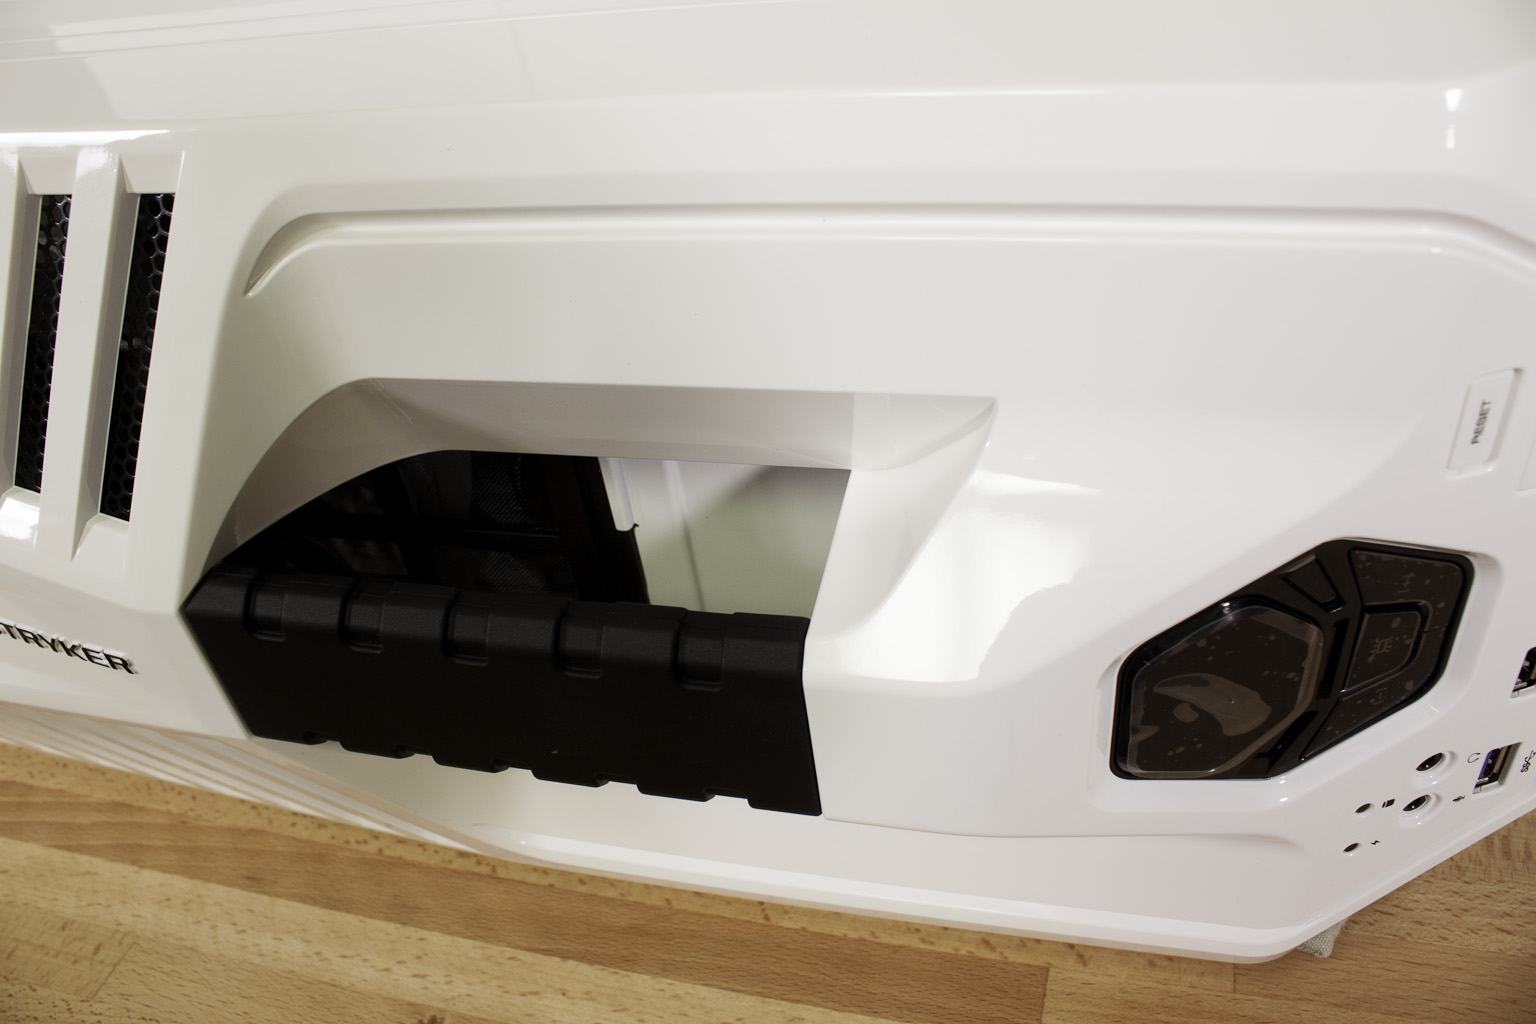 |
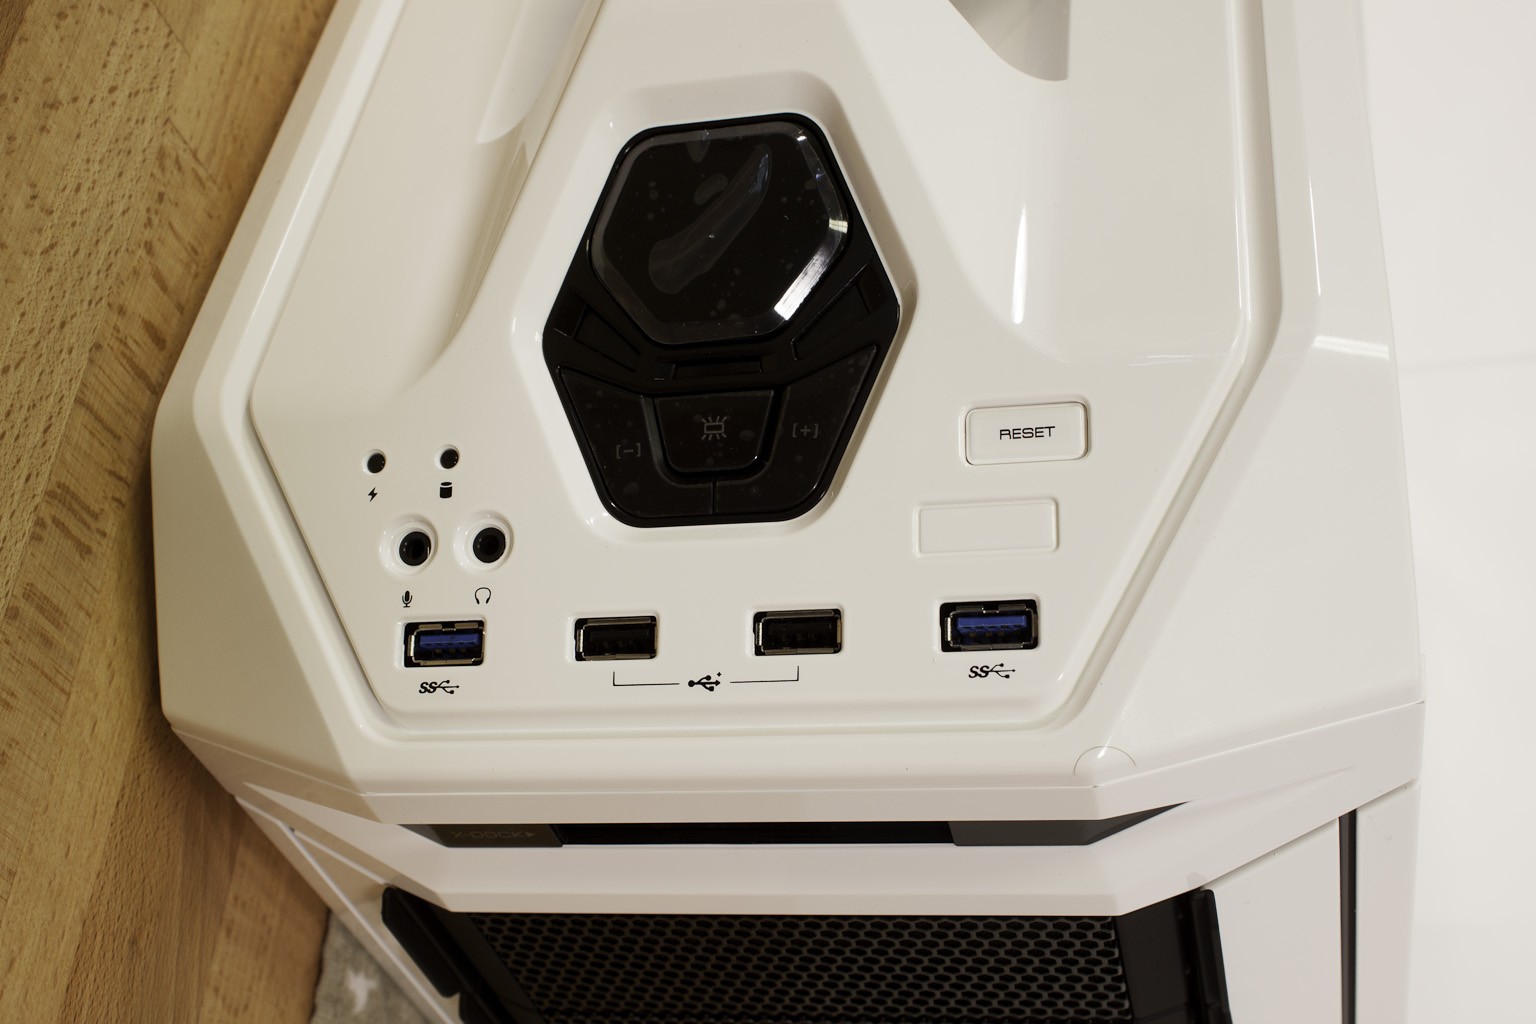
Moving up onto the top of the Stryker we come to the front panel and the controls (we apologize for the perspective). The layout of controls and front panel options are very nice. Cooler Master has arranged the USB ports far enough away from each other that you will not have an issue plugging in multiple devices. This is something that has been an issue with other cases in the past where they try to group the ports to save space. It meant that if your USB device was too big you lost out on the other ports. This is not going to happen with this case though.
The activity lights and audio out ports are also well spaced and located far away from the reset button. This makes accidentally restarting your system when plugging something in less likely. The Power Button is a large pentagonal button which lights up with the CMStorm logo when powered on. There are also three red LEDs below the power button. These LEDs tell you the speed of the fans inside the case. When all three are lit up you are at max speed for the fans. If there is one LED lit then you are at minimum fan speed. The button in the center turns the fan LEDs on and off. In keeping with the white theme of the Stryker the fan LEDs are also white.
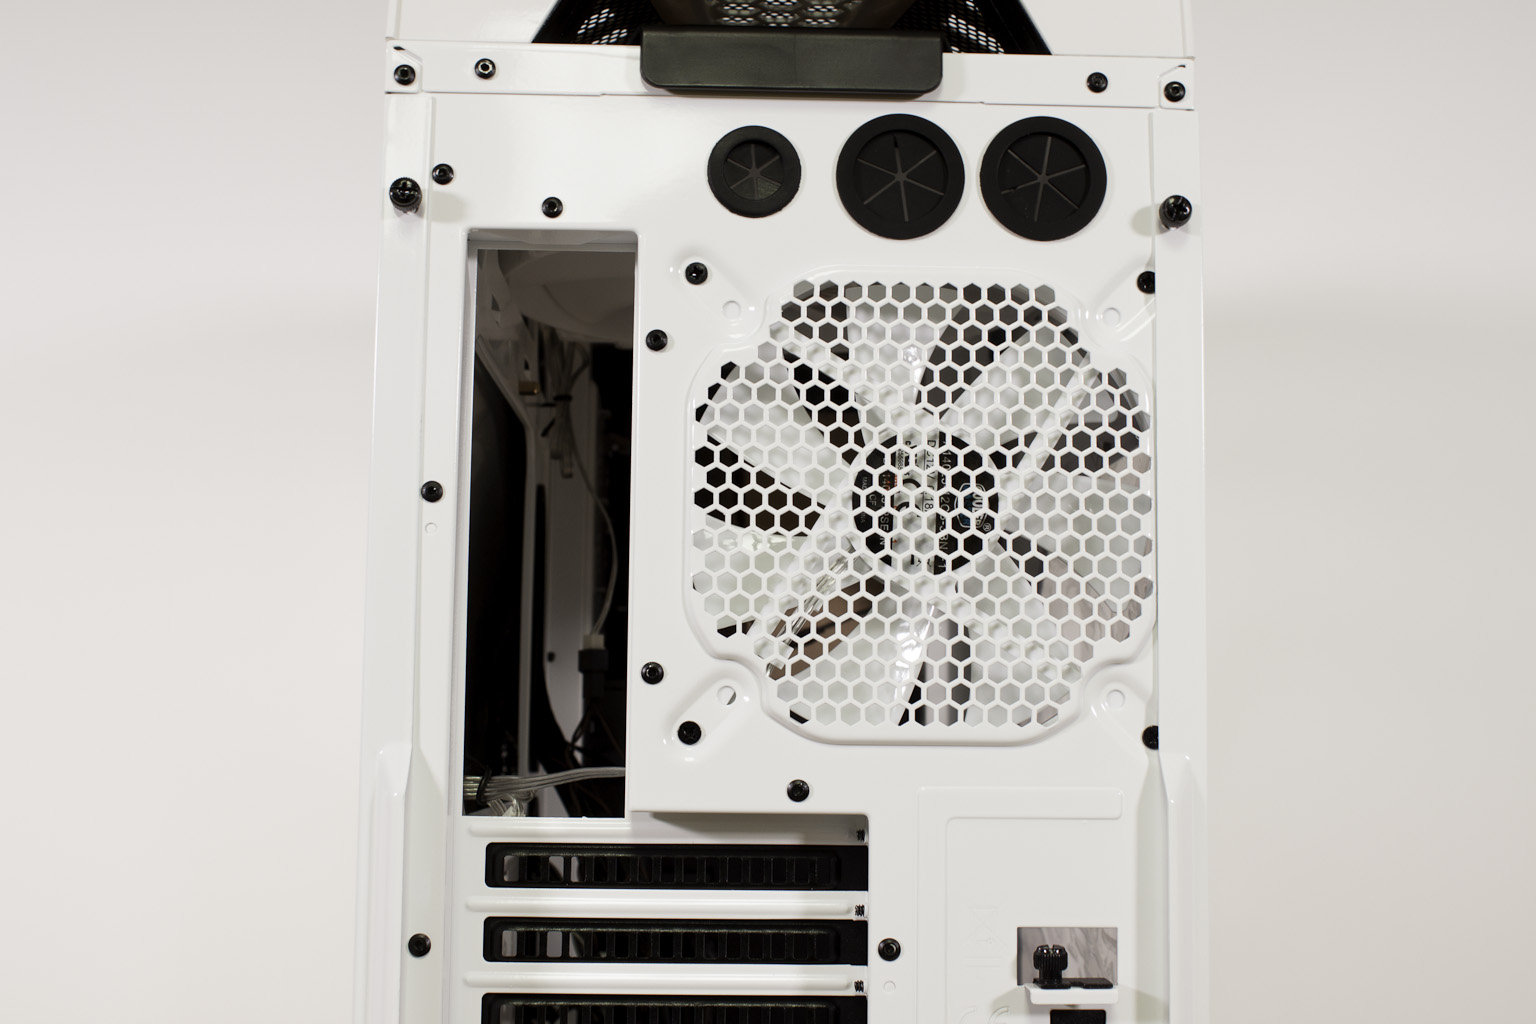
Moving back from the control panel we find the carrying handle. Now, we want to start off by stating that you are not very likely to carry the Stryker with you at all once you see what it is best at. The handle on the CMStorm Stryker is very nice (not that we think you will use it). It has a rubberized grip complete with s cushion under it for your fingers. It allows you to get a good grip even when the Stryker is full of goodies. Behind the handle are vent holes for airflow out of the top of the Stryker (there is a 220mm fan under there too).
 |
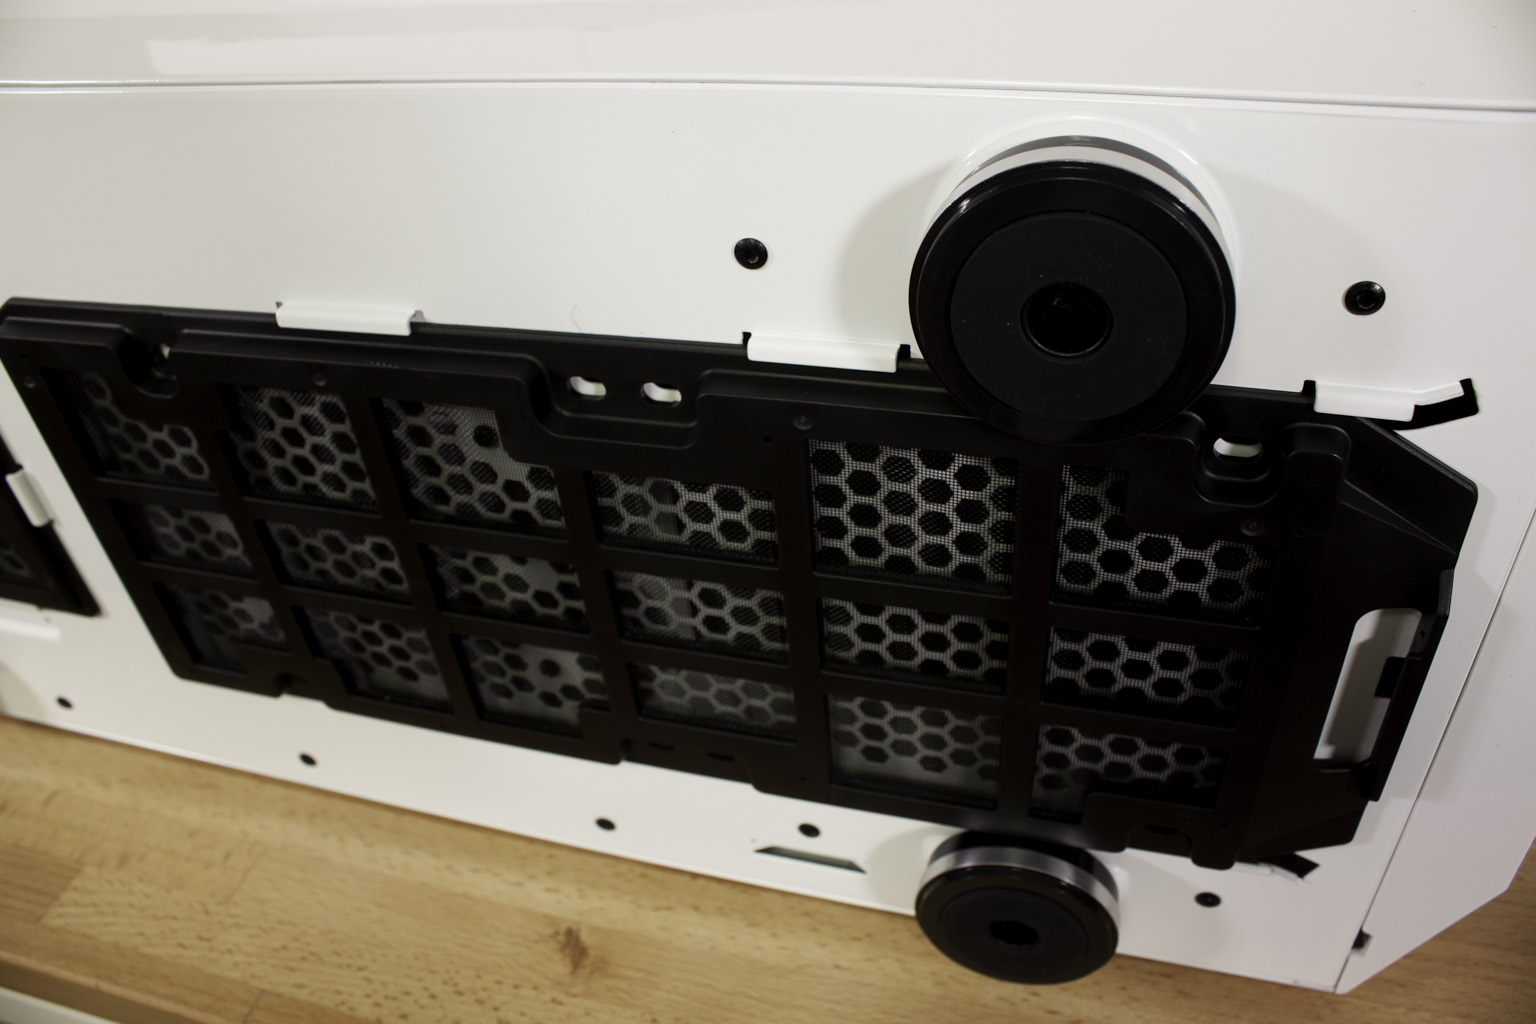 |
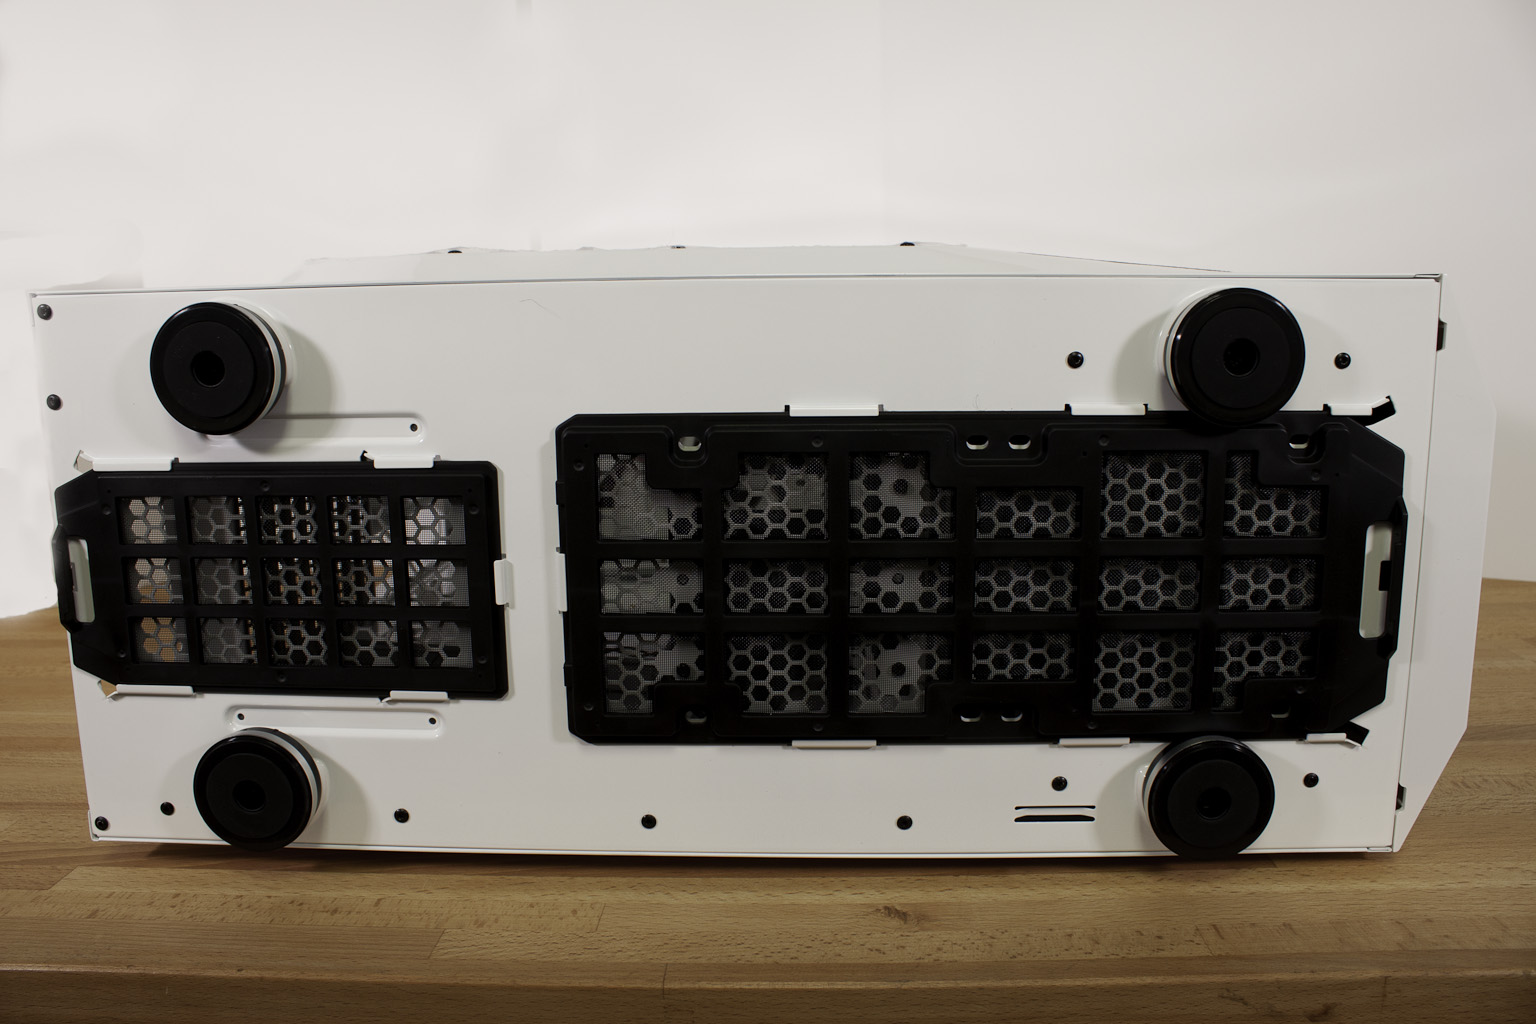
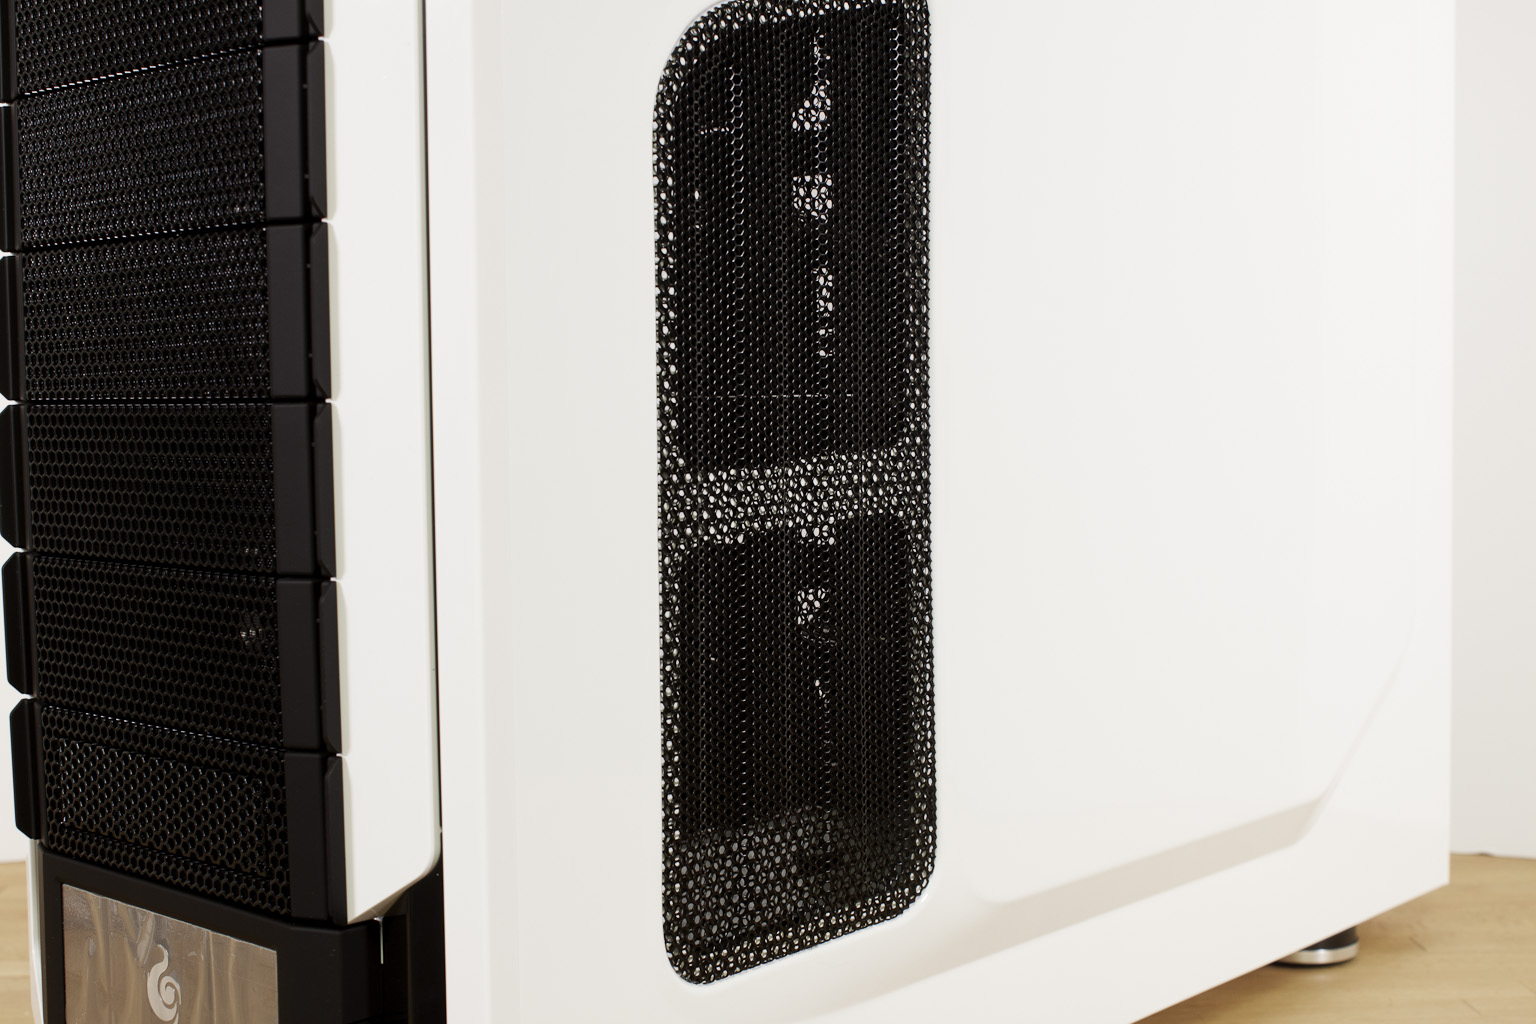
Flipping the Stryker over we get a good look at the bottom of the case and the filters Cooler Master put into help reduce the amount of dust that gets into a typical system. Both of these filters can be removed, but can be problematic since you have to pull them down to unlock them. When the case is on the feet there is not much room to get your fingers in and still pull these down far enough to get them out. The front vent area is very long and looks like it would work with great a radiator. To use a radiator in this area you would also have to remove the accessory box from the case.
 |
 |
 |
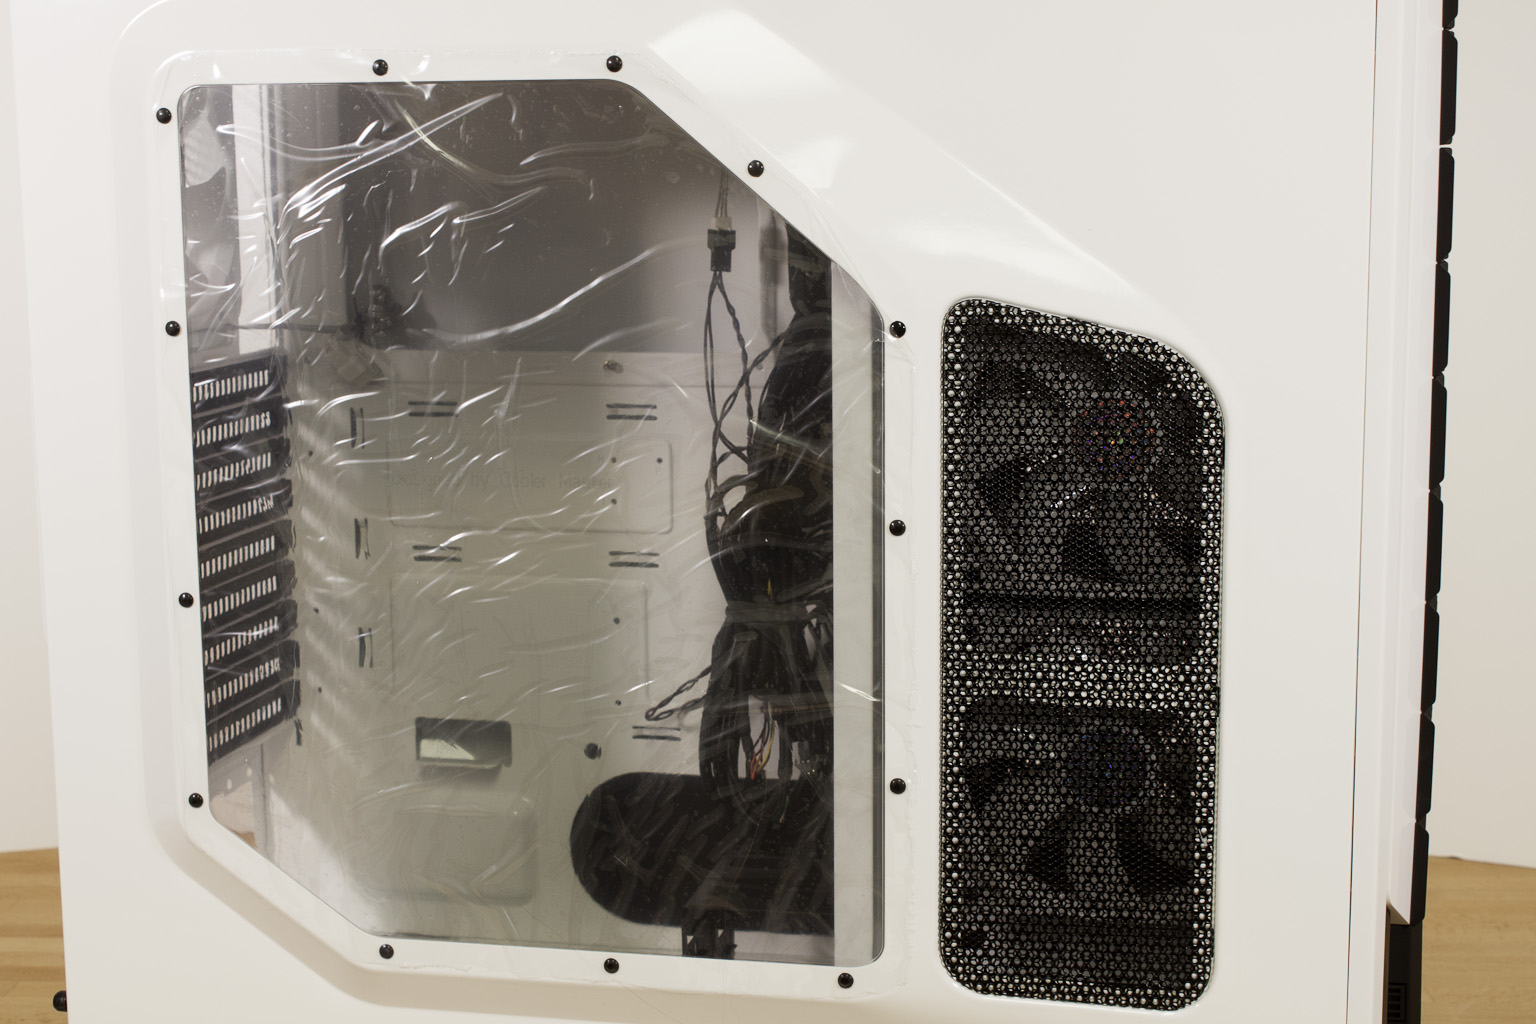
Picking the Stryker back up and looking at the left side of the case we find an air grill and also the side window panel. Both of these are pushed out from the main lines of the Stryker to allow for more room inside the case (for larger air cooler and to help prevent hotspots). The side window is rather large and gives you are nice look at any system you build into it, but is also designed to hide some of the less ingesting details and areas where you might have clutter. The right side of the case is identical to the left with the exception of the window; here the extruded part of the case is to give you more room to hide cables that you do not want everyone to see.
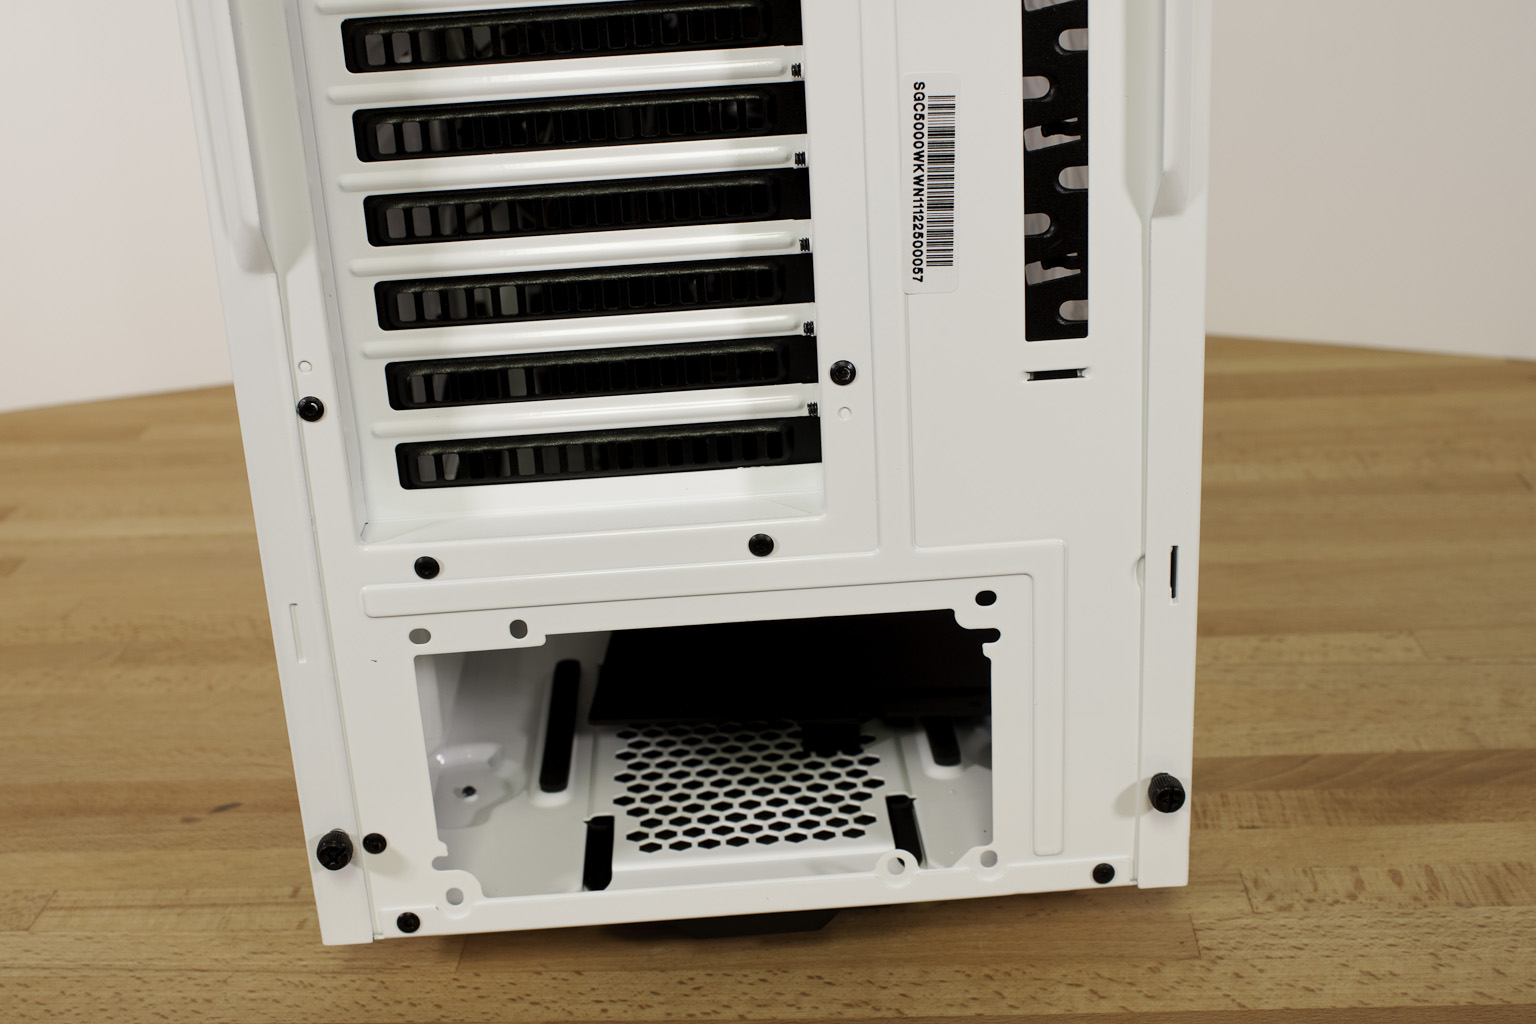
Moving around to the back of the Stryker things look pretty normal. You have a spot of your PSU at the bottom which is supposed to help with cooling. Cooler master has also given you a larger than normal number of peripheral slots (nine total) which gives you plenty of room for three-way and even Quad SLI/Crossfire X systems. Cooler Master has also included their popular extra slot for any rear peripheral devices (like extra USB or SATA ports). This slot can come in handy for making sure you do not run out of space because of wanting to use some of those headers on your motherboard. Toward the top of the back side of the case we find the typical rear exhaust fan and three openings for external water cooling (or an external reservoir).
 |
 |

In this shot you can see inside the ridge at the top of the Stryker and also get a glimpse of the filter that covers the top and prevents dust from getting into the system from this side.
 |
 |
 |
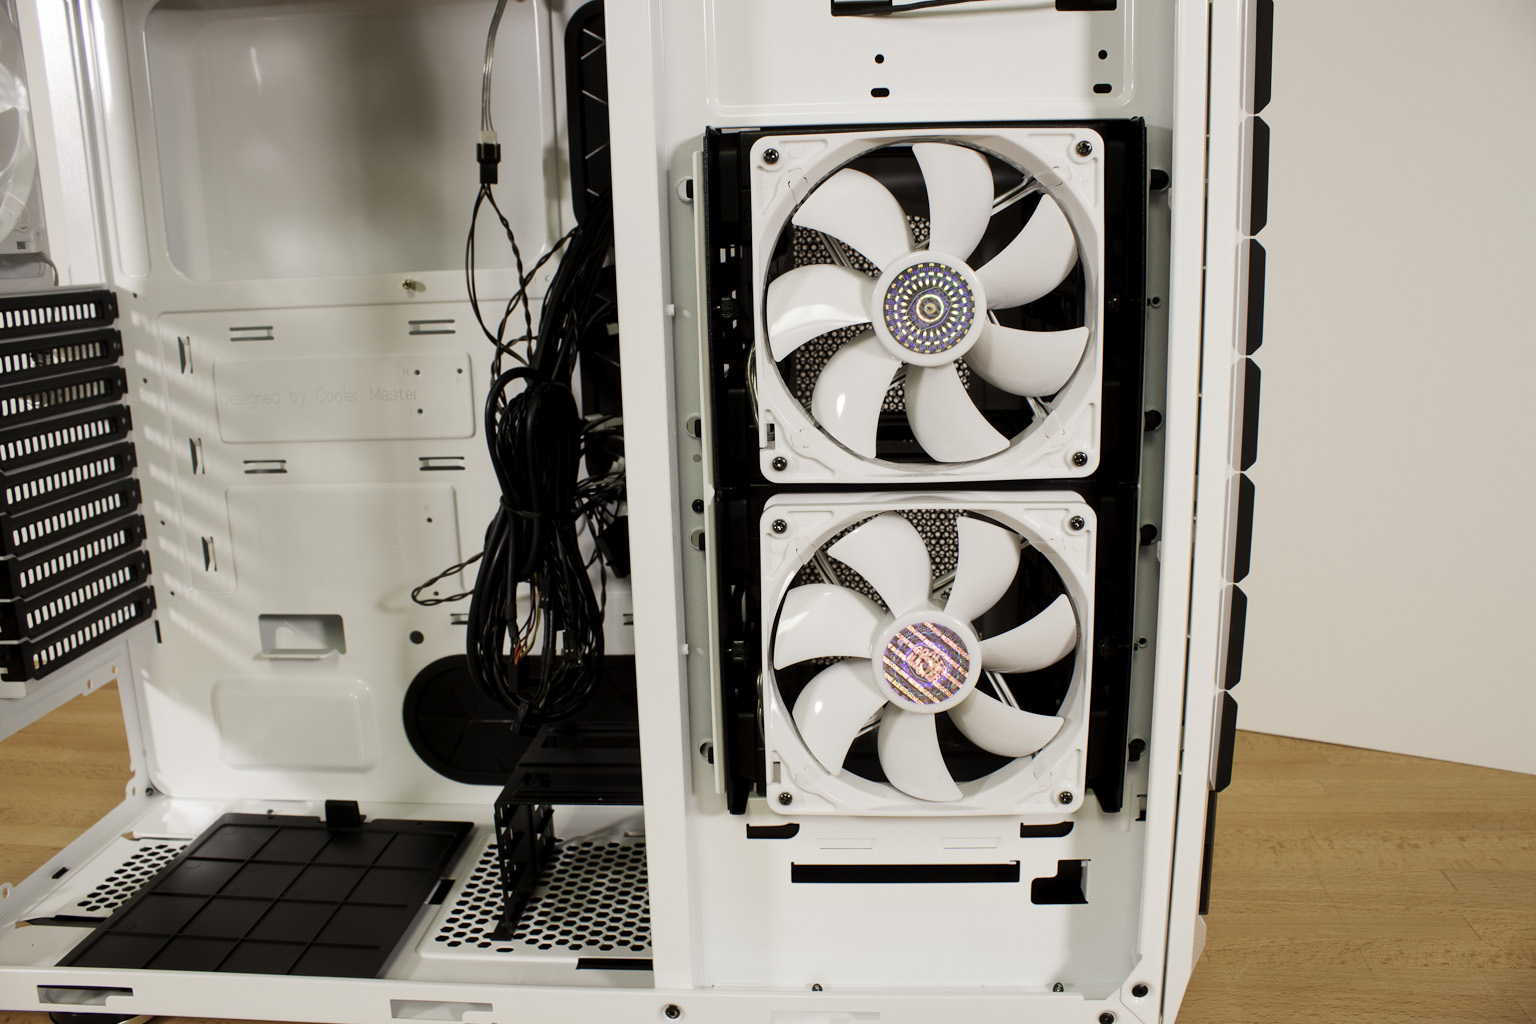
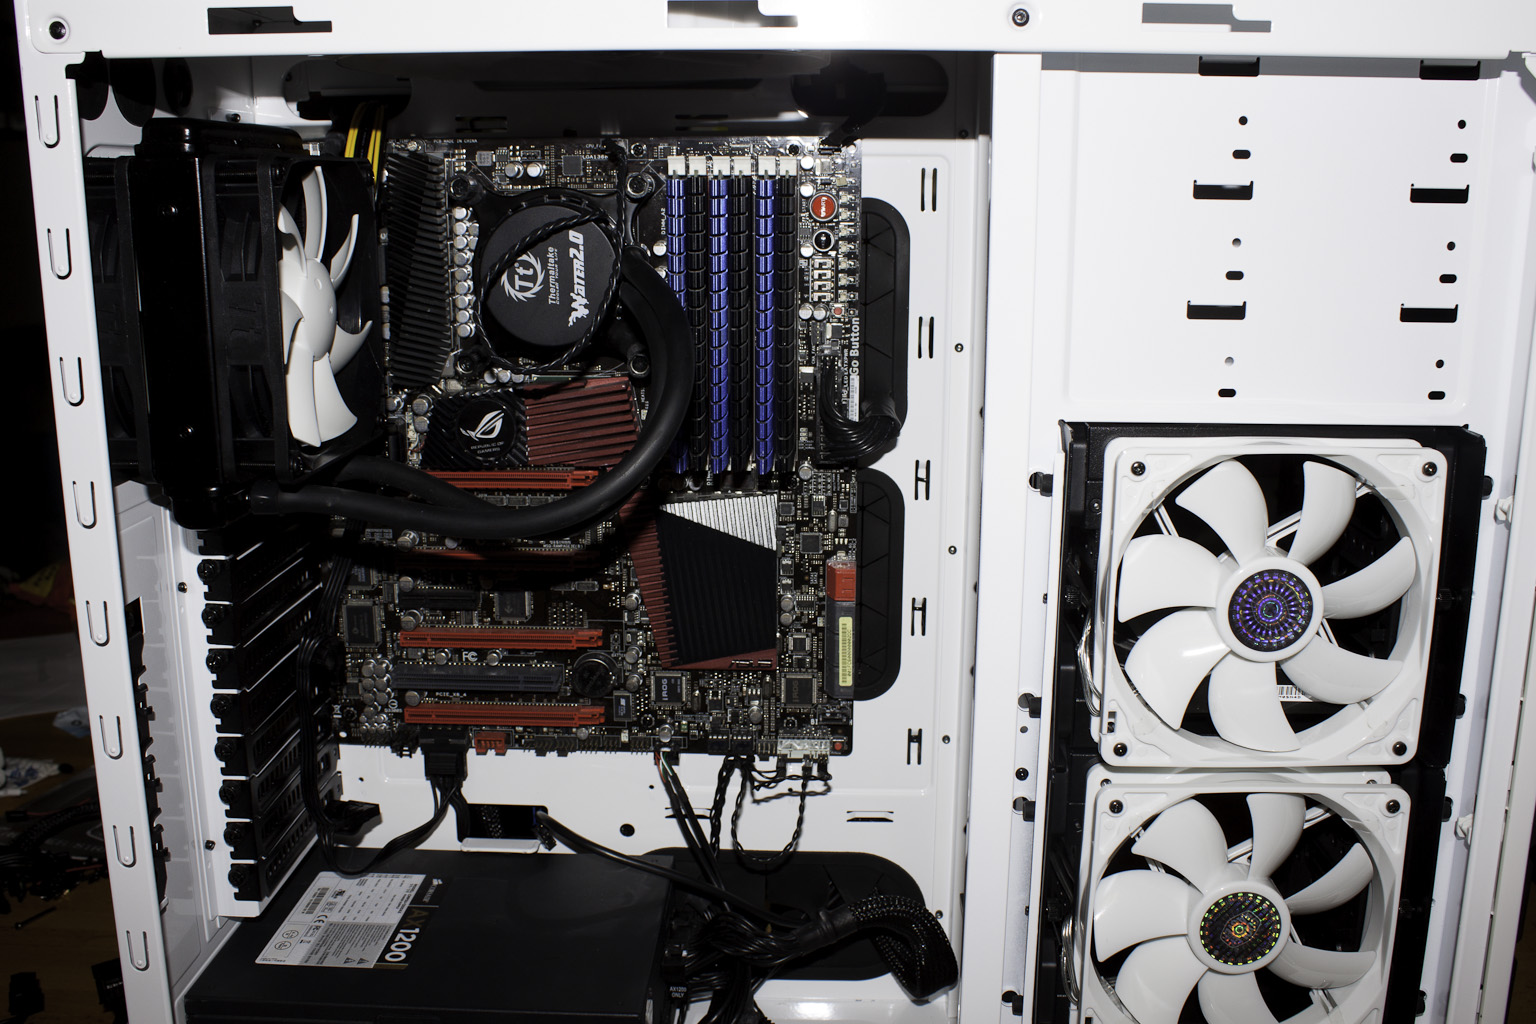
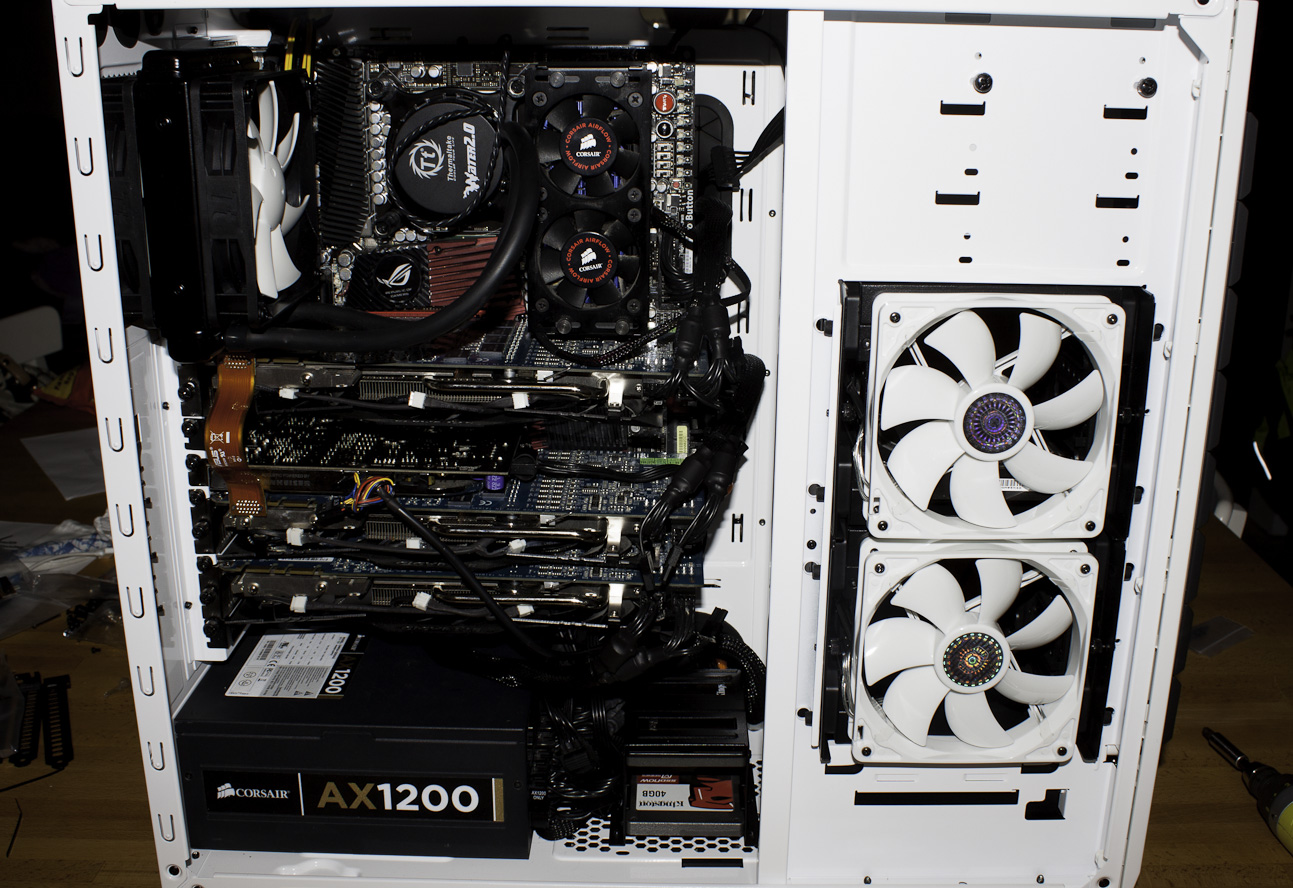
After removing the left side panel we can get a good look inside the Stryker and see what Cooler Master has set up for us. The first thing you might notice are the two 120mm fans, these are on the front of the two HDD cages that can also be rotated for either side or front access. Each cage can fit up to four 3.5 or 2.5-inch HDDs giving you immediate room for 8 drives. You can also remove the cages if you want to use them for 5.25-inch optical drives. Cooler master has provided 8 trays that make installation and removal of these drives much easier. You can also see that Cooler Master has left large openings in the backplane of the case. This allows for the easy installation/removal of larger coolers that require a mounting bracket on the back of the motherboard.
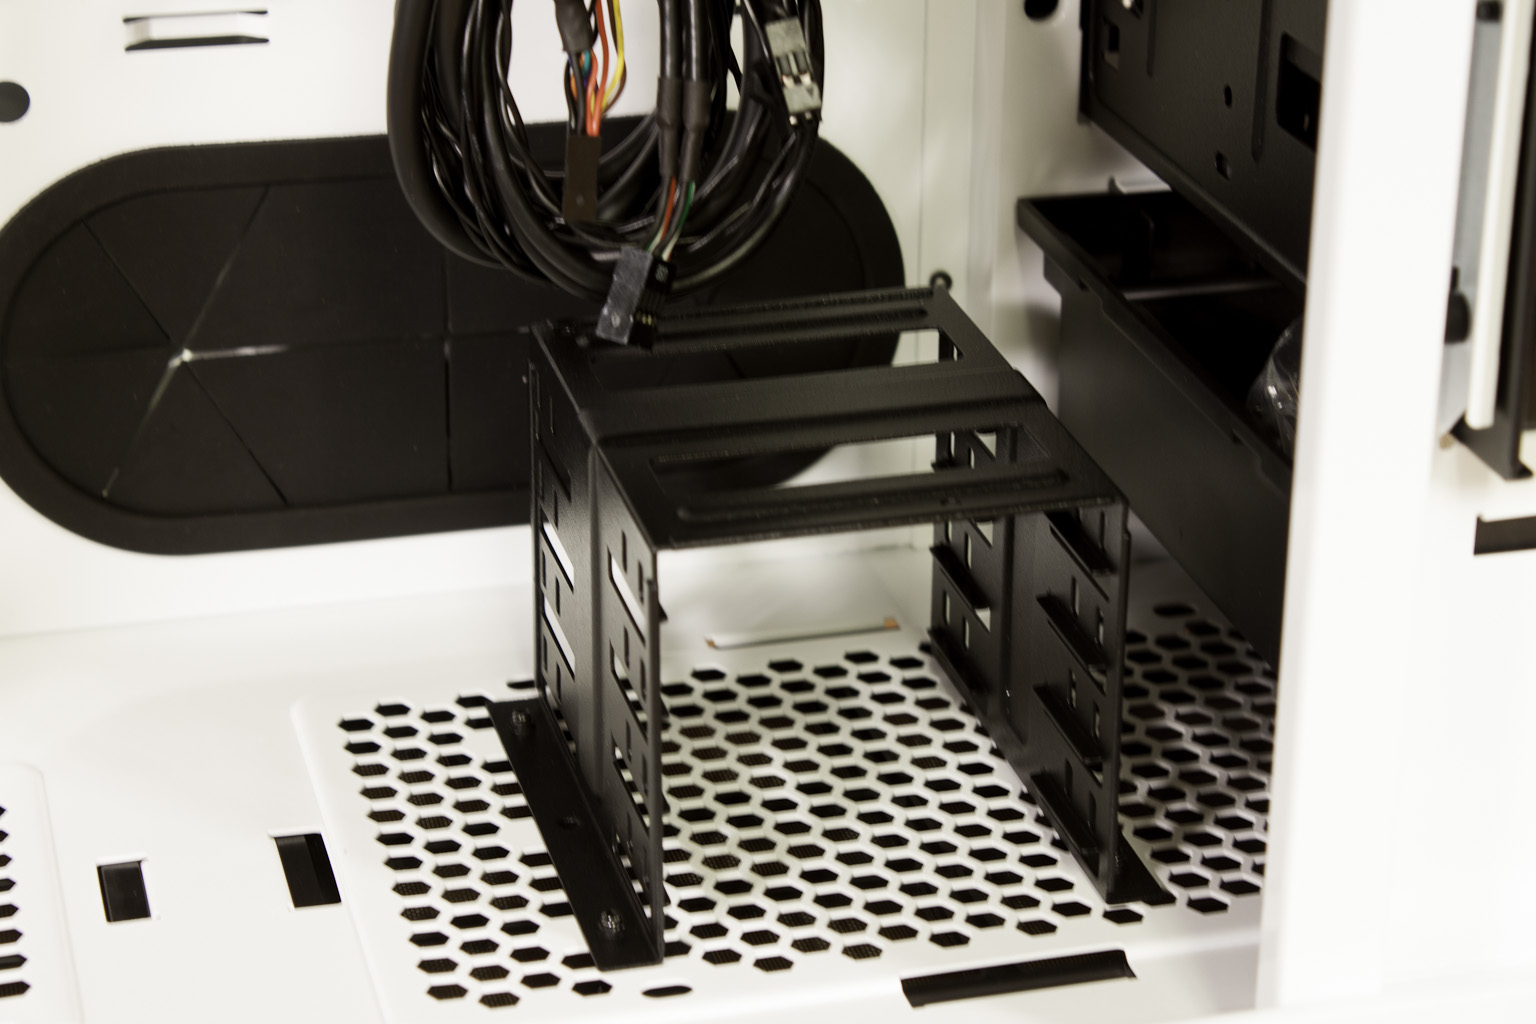
In addition to the 8 slots for 3.5/2.5-inch drives the Stryker has a small cage for four additional 2.5-Inch SSDs. When you add this to the X-Drive at the top you could stack this up with as many as 13 drives. That is a lot of storage to be sure. One thing to note here, if you are planning to use this area for your reservoir you will also need to remove this cage as you might if you use a very large PSU. You will still have plenty of room for drives even with this cage out, so it is not a major loss.
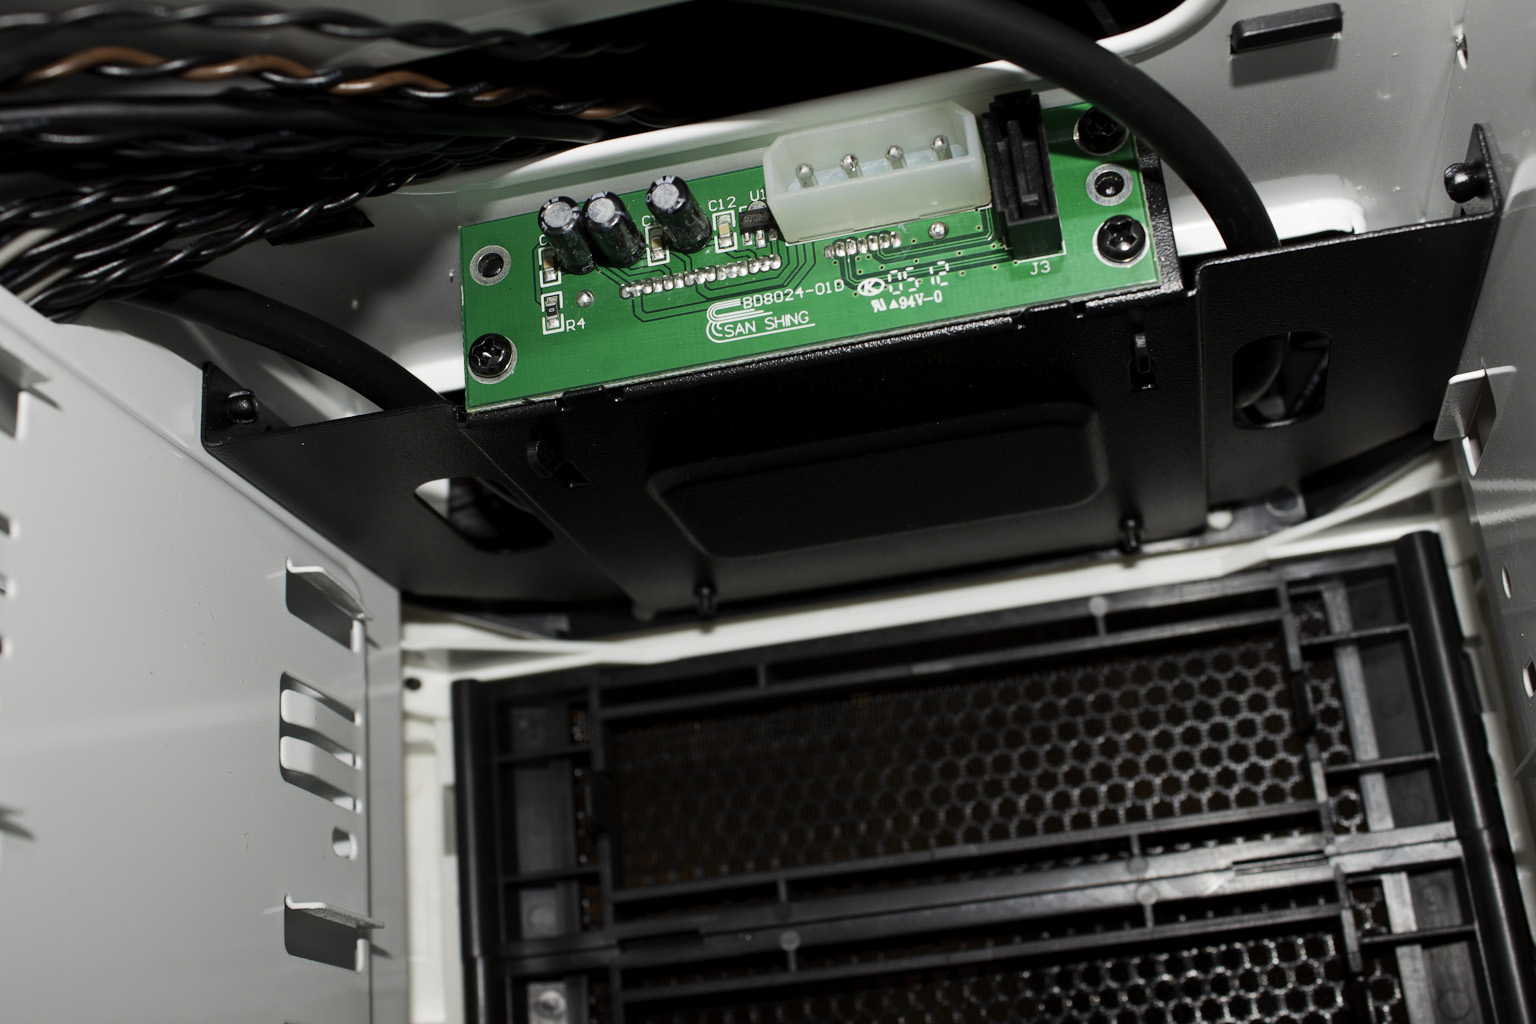
Behind the 2.5-inch cage you can see a pass through with a rubber grommet; this is meant to pass the cables from your PSU through to the back side of the motherboard tray. This will help you keep a clean case and also improve air flow.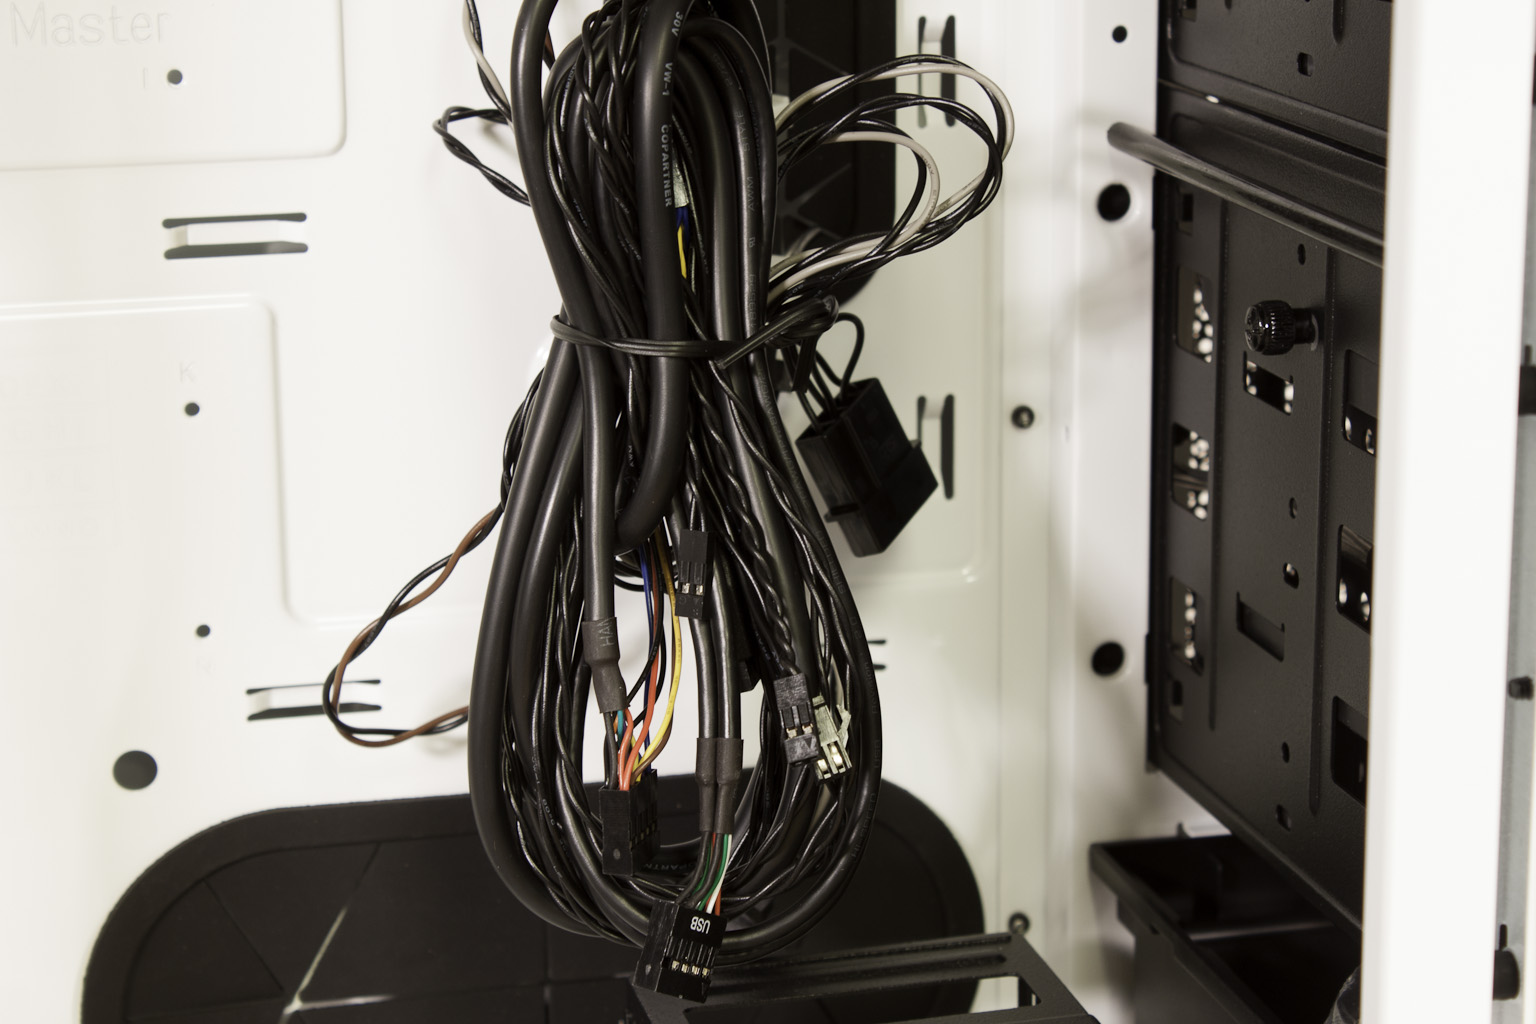
This mass of cables is made up of front panel controls, USB cables, audio, and also fan lights and power. The way it comes right out of the box is very messy but with a few zip-ties and some braiding you can get everything cleaned up and behind the MB tray where it is out of site. To help you keep things even cleaner there are a few openings through the back plane in the Stryker. These will let you pass the cables that are needed while keeping the rest out of the way. One downside to the Stryker which surprised us was the need to use screws to mount your 5.25-inch drives. We would have thought Cooler Master would want to keep with the tool-less designs they have been using, but that was not the case here.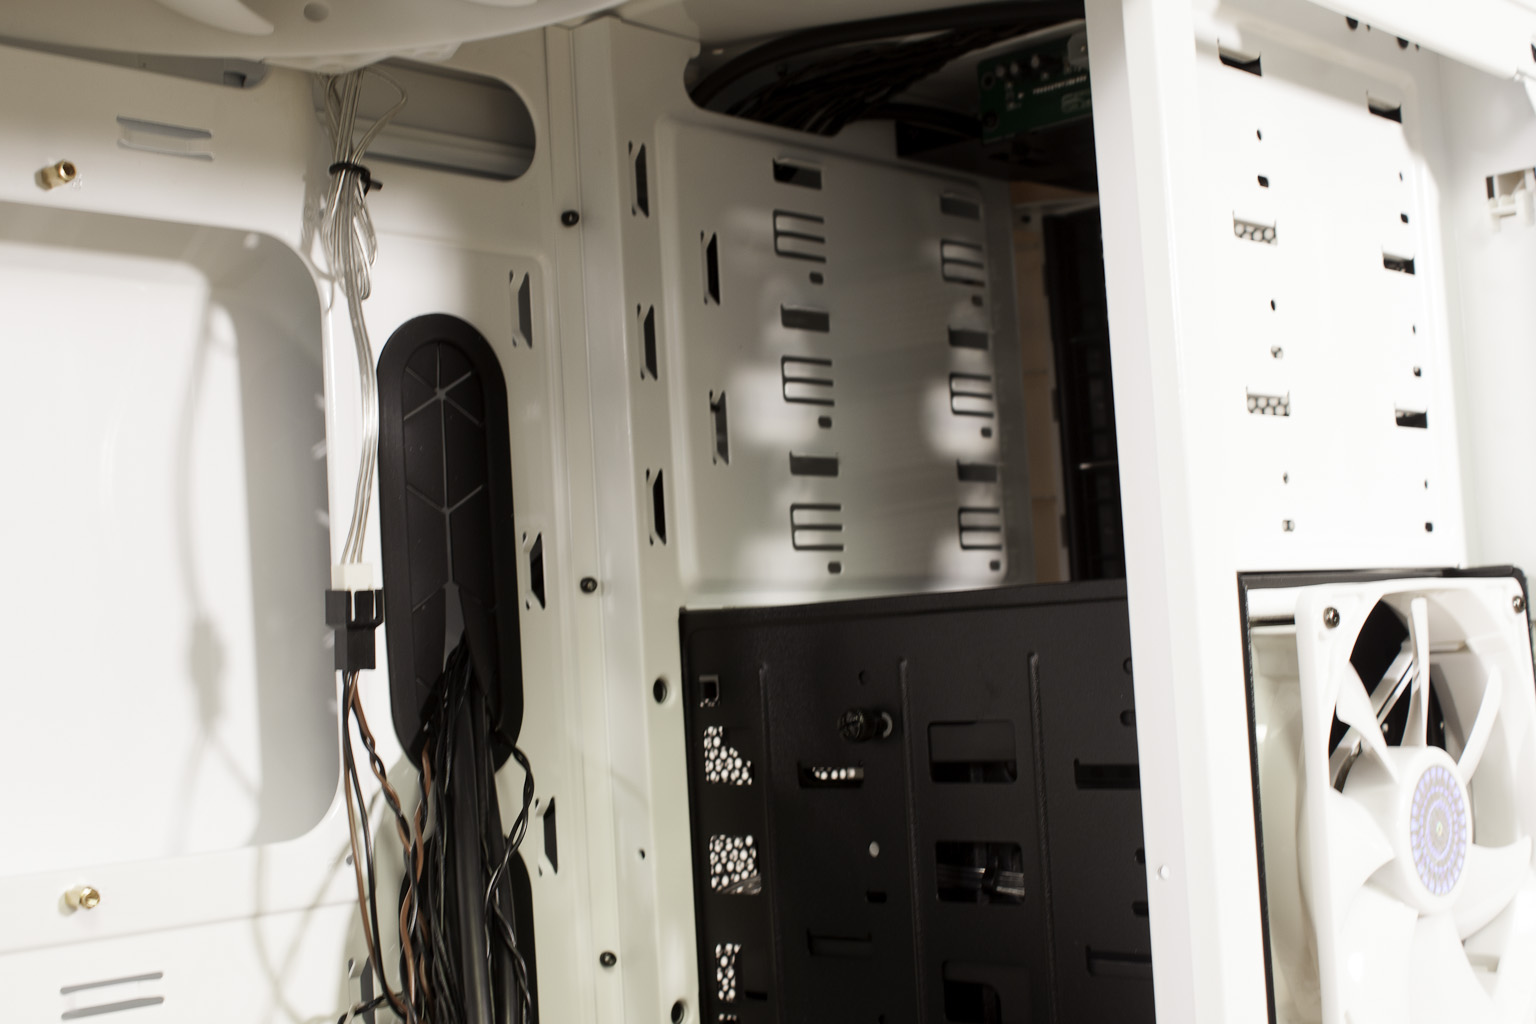
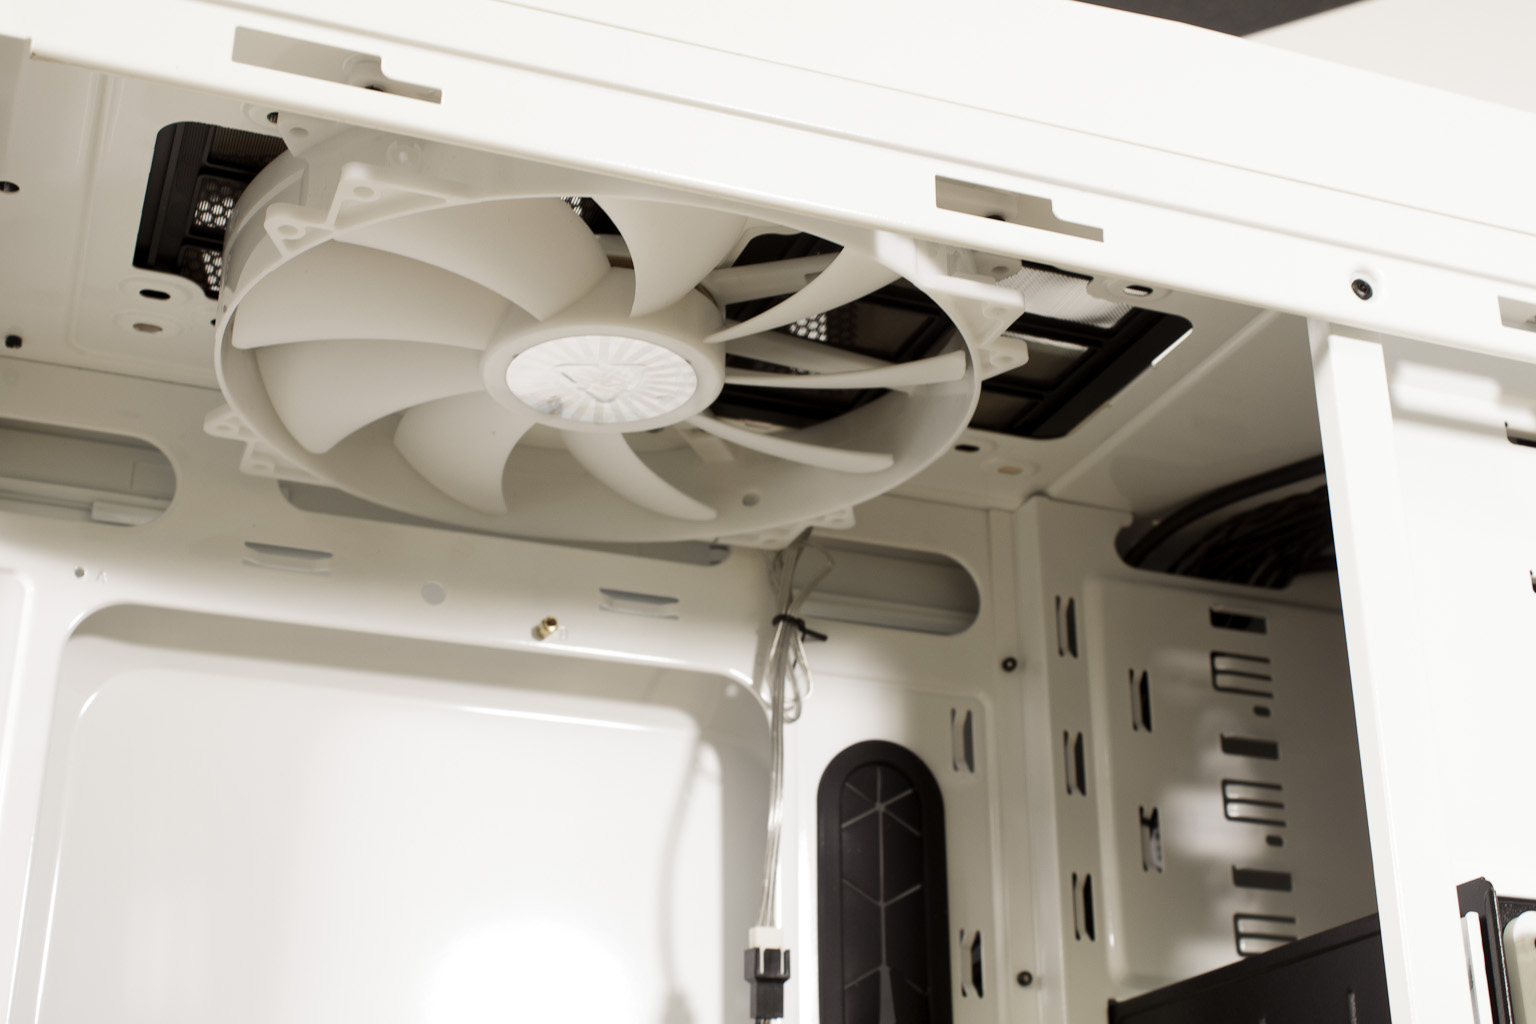
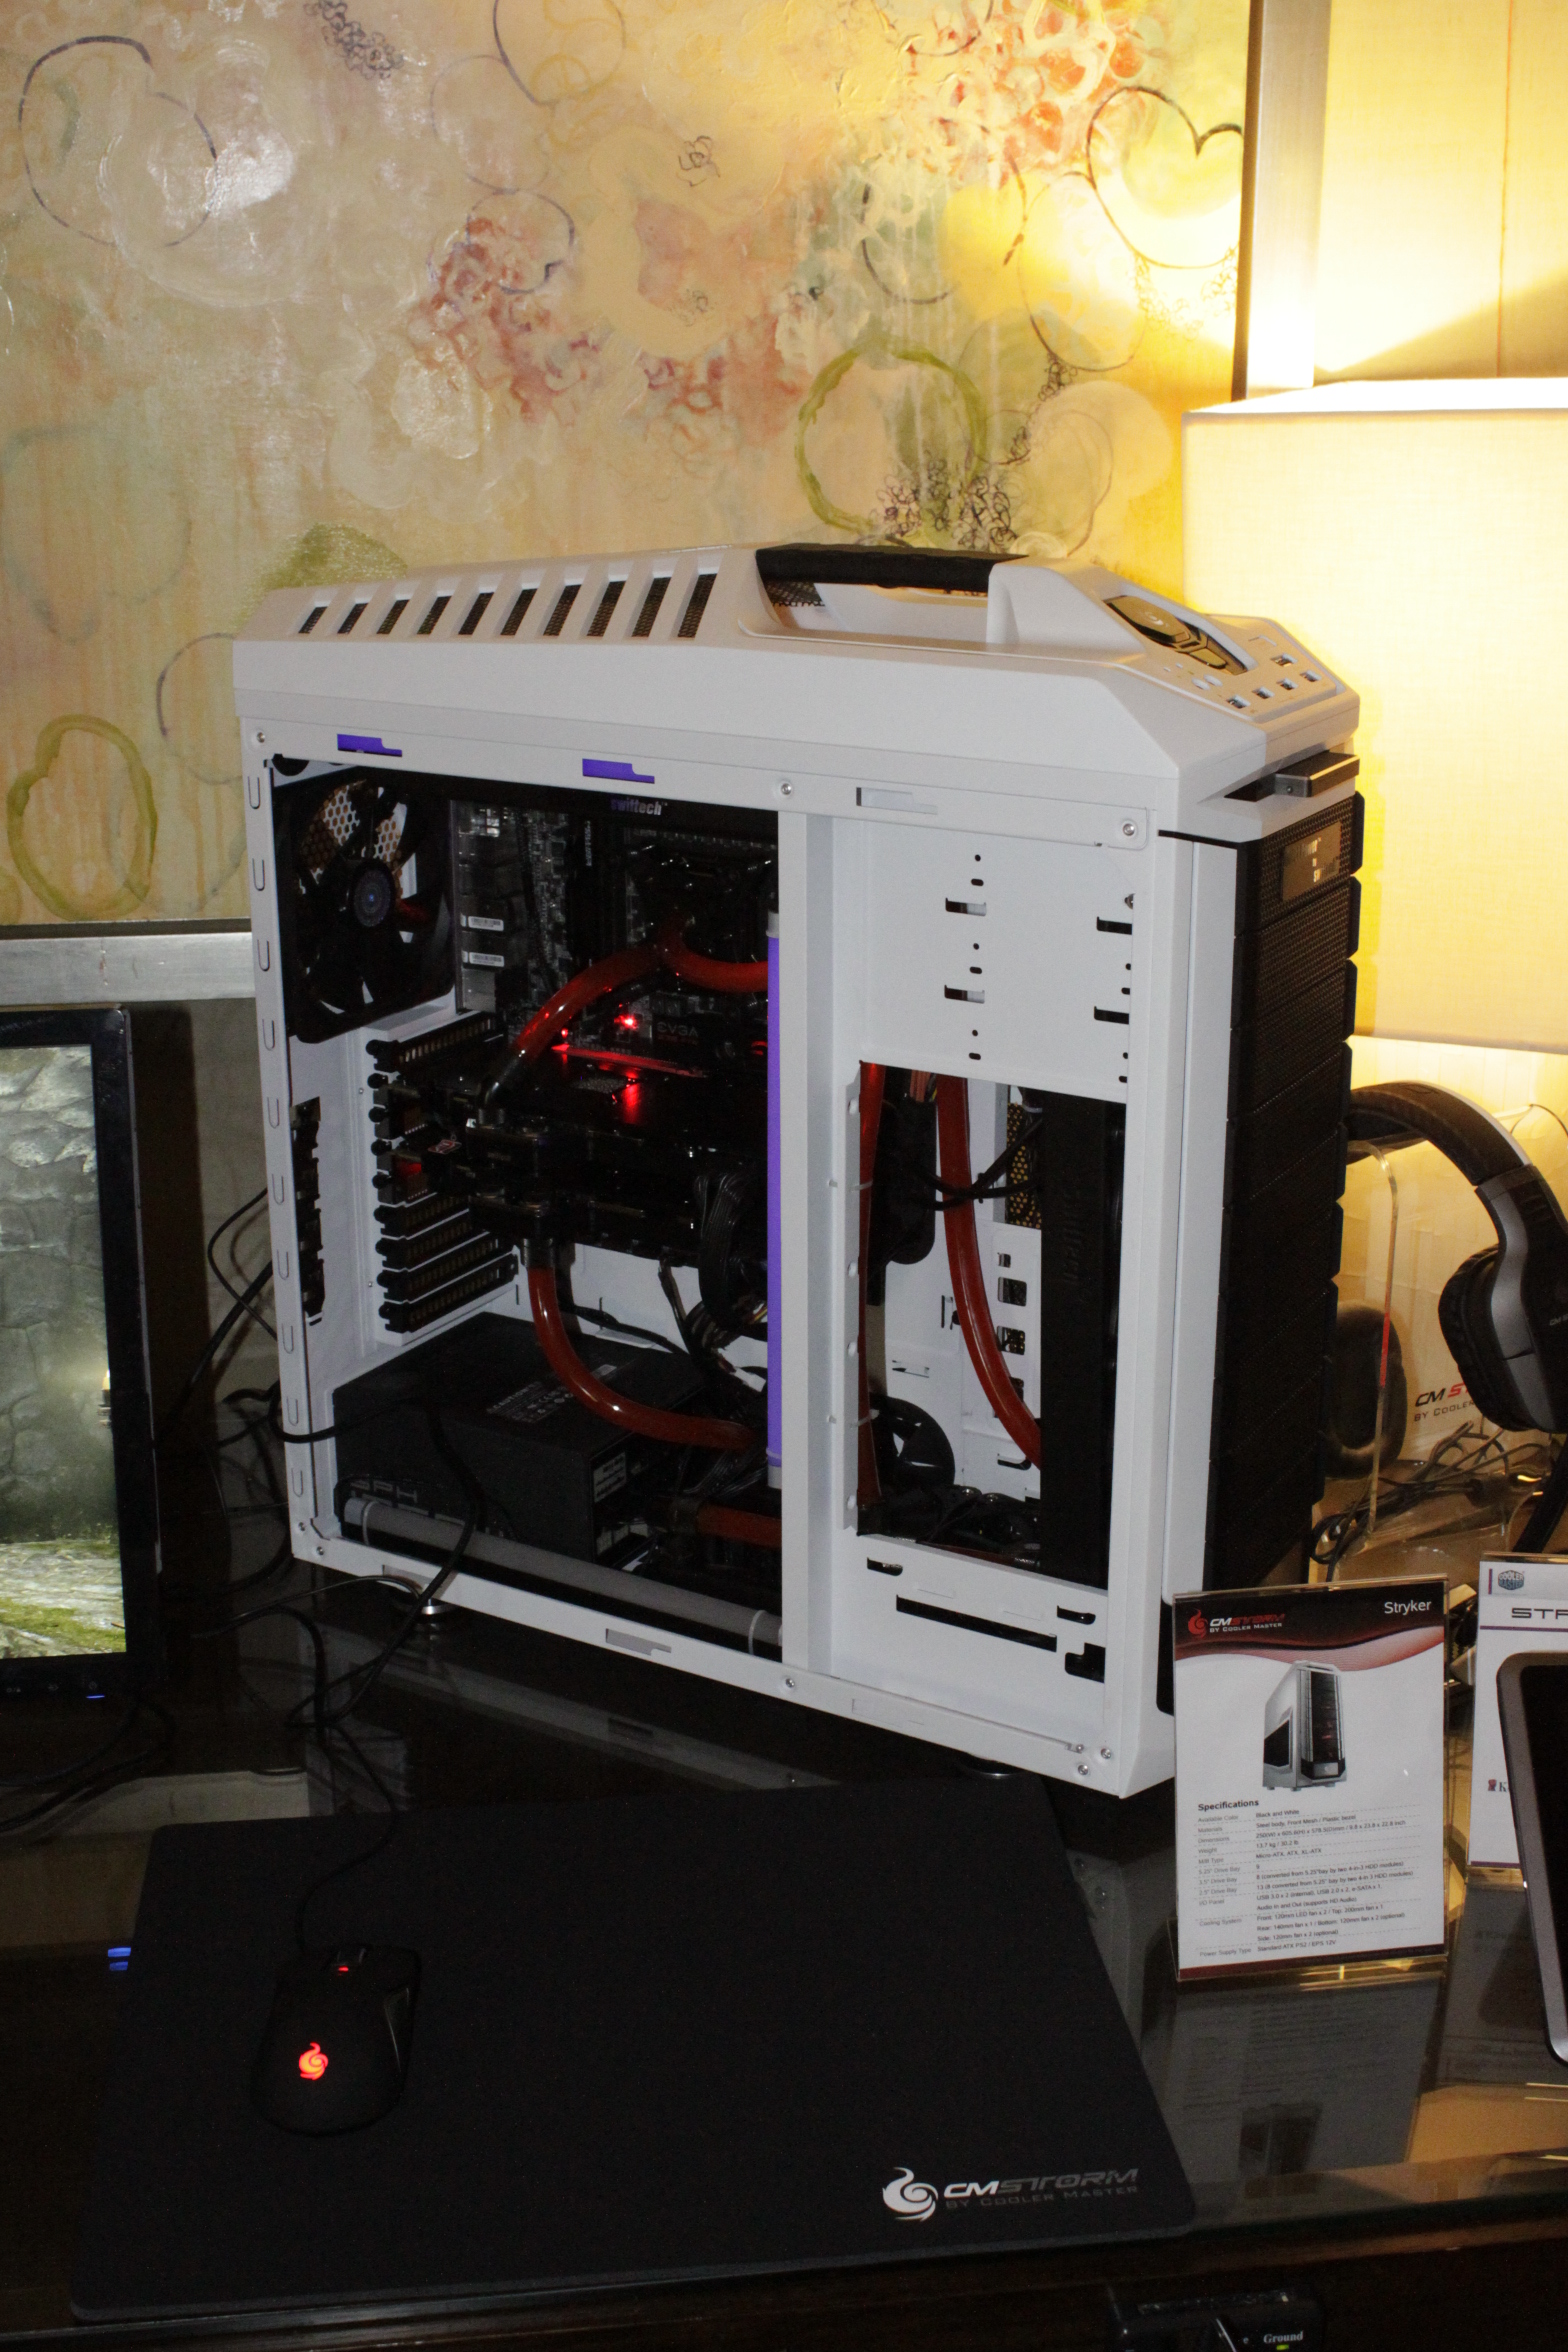
In our final shot inside you can see the 220mm fan in the top of the case. This fan can be removed and replaces by a larger radiator for water cooling. We have to say that the overall design of the Stryker is very nice with more options that many people will know what to do with. Cooler Master has made sure that there is something for almost everyone with the Stryker. Below are two shots of trhe Stryker as we saw it at CES 2012... it is interesting to see what the final product looks like.
 |
 |
Performance -
Like most things that I review I tend to look at more than one aspect of performance. For me a case has to offer several things before it makes the cut. One of the first things it has to do is be easy to work with. It can be the best looking case on the planet, but if you cannot get your parts installed properly well then it is useless. The next thing it has to do is keep your parts cool this is the air flow test. Lastly (in my book anyway) it has to look good.
Ease of Build -
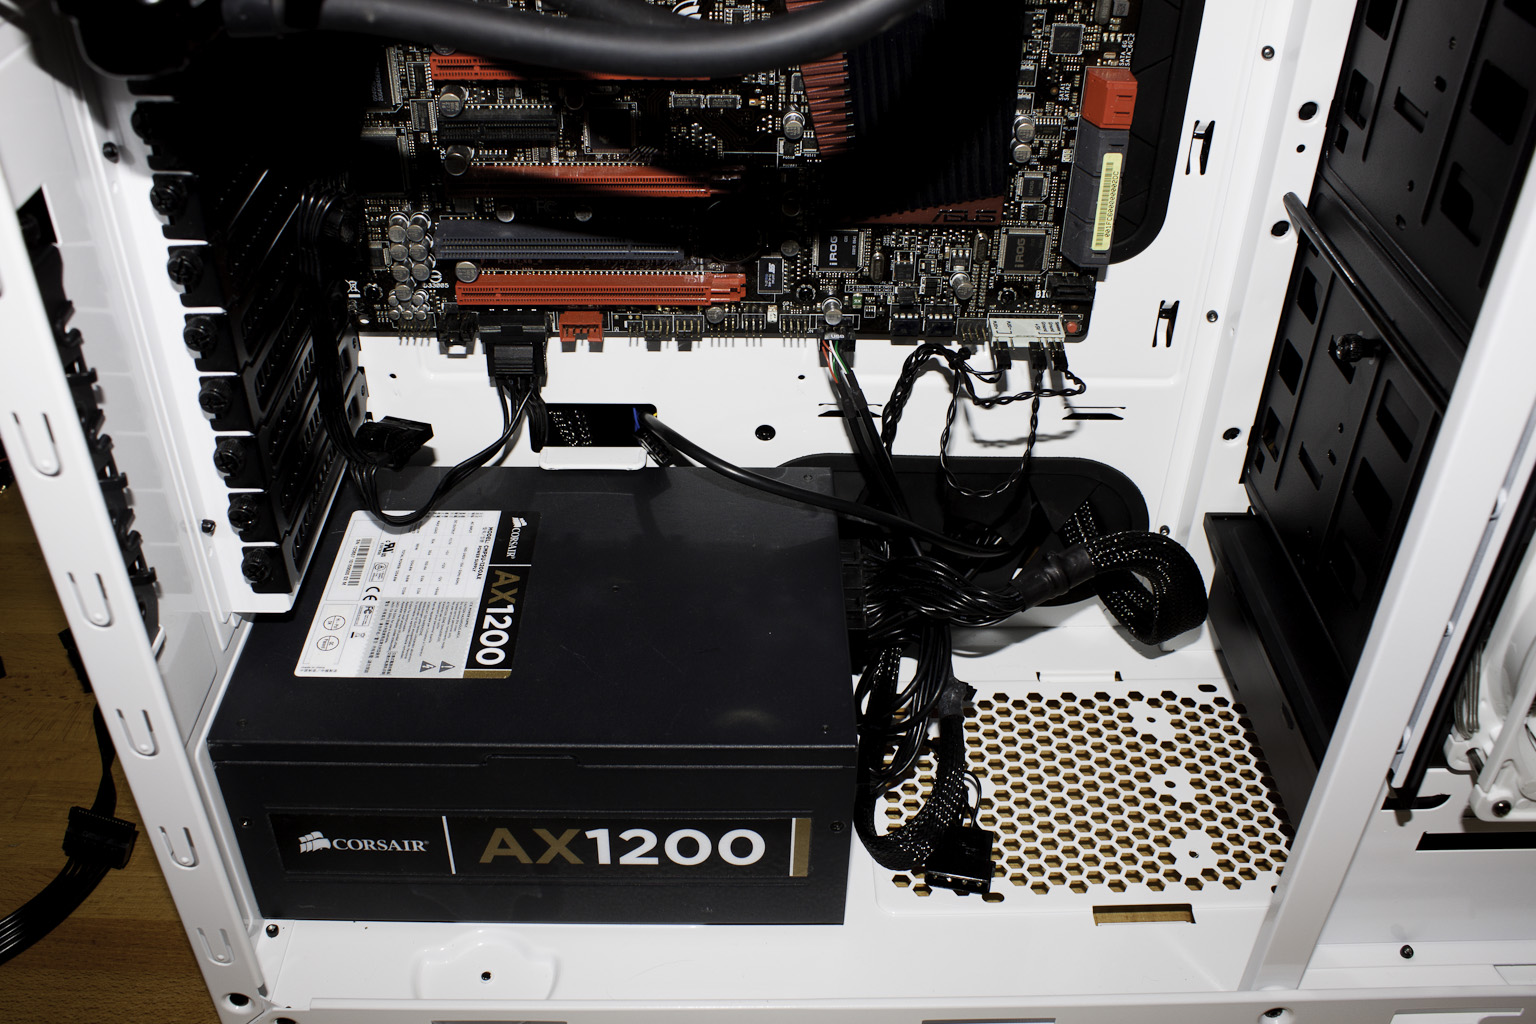
For our build we went with the Asus Rampage III Extreme. It is a board that is a little wider than many and also has full support for four-way SLI and Crossfire. We were happy with the ease of use with the Stryker for the most part and only ran into problems when we tried to keep the 2.5-inch drive cage in the bottom. The Corsair AX1200 gold was so long that the cage actually made cable management a problem. Once we had all of the cables connected and pushed through the back panel opening we were able to get the 2.5-inch cage back inside, but in the end we took it out so that we did not have to worry about damaging the cables.
 |
 |
Overall the build process was quick and easy, there was plenty of space to work with and although our cable management skills are not the best out there we had no problems in keeping things very clean in our build. We can see the Stryker being a truly magnificent case for some of our modding friends out there as it offers a lot of space and potential.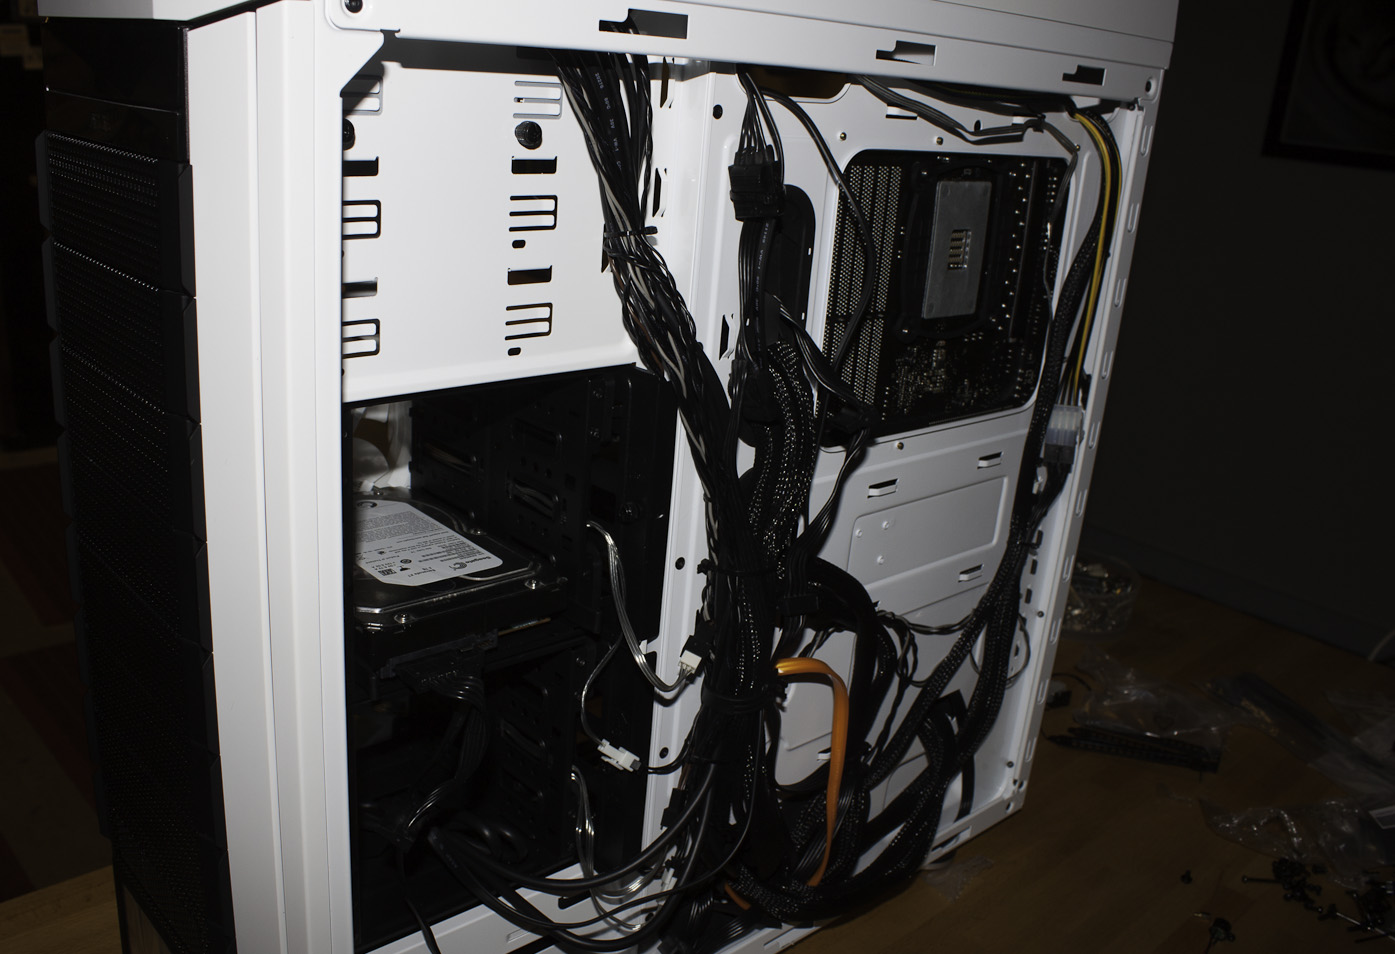
Air Flow -
Even loaded up like our build is we found that the Stryker is able to keep things cool. Oddly enough it also seems to be perfect to help prevent hot air build up around the user. With many cases you send up with a lot of warm air pooled at the back of your case making the vents at the top work harder to try and pull all of that hot air out (which is why vertical cooling works so well). With the Stryker the cross ventilation of the drives helps to pull some of the warm air out of the case making reducing the amount of air that gets pushed out the back of the case and also out the top. It is a much more efficient system and helps to keep internal temperatures under control even in a multiple GPU configuration.
Aesthetics -
Aesthetics is a rough subject; what I think looks good might be unattractive to others. Because of this I usually do not subject you to just my opinion of how good or bad a case looks. I tend to ask a wide array of people and get their input. This should give you a much more broad impression on why people might find this case good looking or not. We use out standard 1-5 (one being terrible and five being awesome) we ask two questions. On a scale of one to five rate the CM Storm Stryker for coolness and then we ask the same question for overall looks. Then we ask for a one or two word statement that best describes the CMStorm Stryker for them.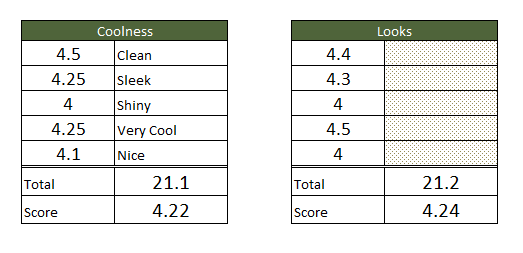
The CMStorm Stryker is a nice looking case as we have already said it caught our eye back at CES 2012 when we saw it in the Cooler Master suite. It has a clean and sleek look to it that we used to associate with all black cases. There is just something about it that stands out. Everyone that we have shown the Stryker to has loved it. Many also agreed with our calling it the Storm Trooper (although Cooler Master does keep correcting me on this). The large Windows on the side and the white LEDs combine to round out the whole impression of style. The LEDs also happen to be enough light to show off the items inside the Stryker without the need to throw more in. It really is one very cool looking case.
Value -
Value is another very subjective topic. What is expensive to some might be a deal to others. You can look at this topic in multiple ways. One is raw price and the other is what you get for the money. Each is accurate and both are correct ways to look at price/value. We tend to look at features, performance and real-property when we discuss value. However, we also take into account the raw cash cost of the item. At $160 plus shipping the Stryker is not a cheap case. You are getting considerably more than many other cases in this price range and also getting a pretty attractive looking case. The addition of the fan and LED controls at this price point and case size are a nice touch as is the ability to drop in up to 13 drives (as long as you are using 2.5-inch drives.). You would be hard pressed to find another case with the flexibility that the Stryker has (support for Quad-SLI/Crossfire etc.) for the price that you can get it for.
Conclusion -
Cooler Master has a hit with the Stryker even with the hit pictures we have dropped before the publication of this review we have had a large amount of interesting in the product. The interest is well deserved as the Stryker is certainly one of the better enclosures that we have worked with and has a price tag that is sure to attract many looking for style, room and good airflow.
There are a few things that we feel Cooler Master might have done better though. The X-DRIVE, while a nice concept needs a little work. Once a drive has been in for a while it can become difficult to pull out as there is only a small amount of the drive sticking out to grip. An eject button here would have been nice as would making a statement on the type of drive support for this port. We found nothing that indicated support for SATA 3.0 as the port is only described as eSATA in all of the documentation we saw at the time of this review. Cooler Master could also have included mounting hardware for the 5.25-inch bays instead of the thumbscrews to make the build a little easier just as they should have made the bottom filters easier to pull out for cleaning.
Still even with these issues we find it hard not to like the CMStorm Stryker. It truly is a nice combination of performance, style, flexibility and price. If you are looking for your next enclosure then this one might be it. It certainly has replaced the case we were using for our main system and look mighty good under our desk.
For its combination of performance, flexibility, style and price we are happy to award the Cooler Master CM Storm Stryker with our Gold Key Award.
Discuss this in our Forum
