Once in a while we get the chance to see something new though, the birth of a new company and thus an unknown approach to the marketplace. We were recently contacted by one such company called Raijintek and asked if we would like to test their range of CPU coolers and fans. Of course I jumped at the chance. I love the opportunity to play with the newest toys.
Raijintek has only been around for a few months as of this writing, and their products are not yet available in the North American market but they are on their way. They haven’t started small either, with a full lineup of CPU coolers and fans at present and plans in the works to branch out into the realms of chassis, power supplies and mobile accessories. They were kind enough to send us four of their CPU cooler lineup, from the low-profile Pallas to the gargantuan Nemesis cooler. We will be doing a series of reviews on these, starting today with the Pallas.
What Raijintek has to say about the Pallas:
“Pallas, Raijintek’s140mm high end low profile CPU cooler, is designed for most desktops, especially for HTPCs and narrow enclosures. With a total height of 68mm including the 14013 PWM fan. Pallas is designed by German engineers for presenting its greatly enhanced airflow and surface for heat dissipation, combined with full nickel plating and the super slim 14013 PWM fan. Pallas also supports Intel and AMD modern CPU sockets and platforms.”
Tech specs:
Heat sink:
Dimensions [WxDxH]: 153 x 150 x 68mm
Weight: 420g (heat sink only)
Base material: Copper base
Fin material: Aluminum alloy - solder-free fin assembly
Heat pipes: Six @ 6mm each
Fan:
Dimensions [WxDxH]: 140 x 150 x 13mm
Voltage rating: 12V
Starting voltage: 7V
Speed: 650 - 1400 RPM (PWM controlled)
Bearing type: Sleeve bearing
Air flow: 56.55 CFM (max)
Air pressure: 1.24mm H2O (max)
Noise level: 28 dBA
Connector: 4 pin with PWM
Life expectancy: 40,000 hours
Packaging and initial impressions:
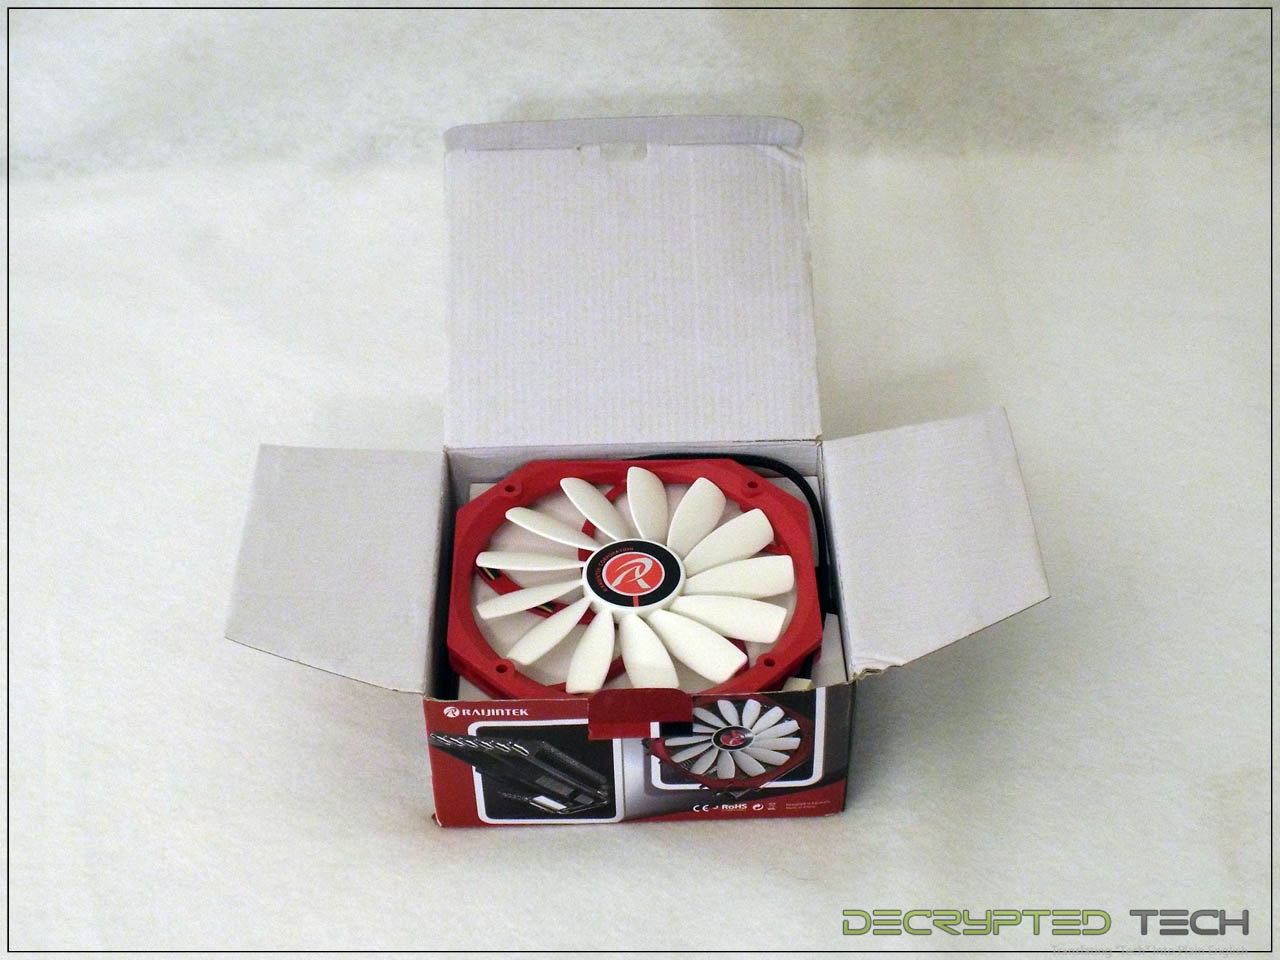
As always, I was amazed at the size of the box they were able to fit this cooler in. I swear there must be a school engineers go to where they learn how to package product in as small a space as possible. The exterior of the container gives us the name of the product as well as several of the specs listed above, an excellent step if these are to be sold on a shelf in a brick-and-mortar store.

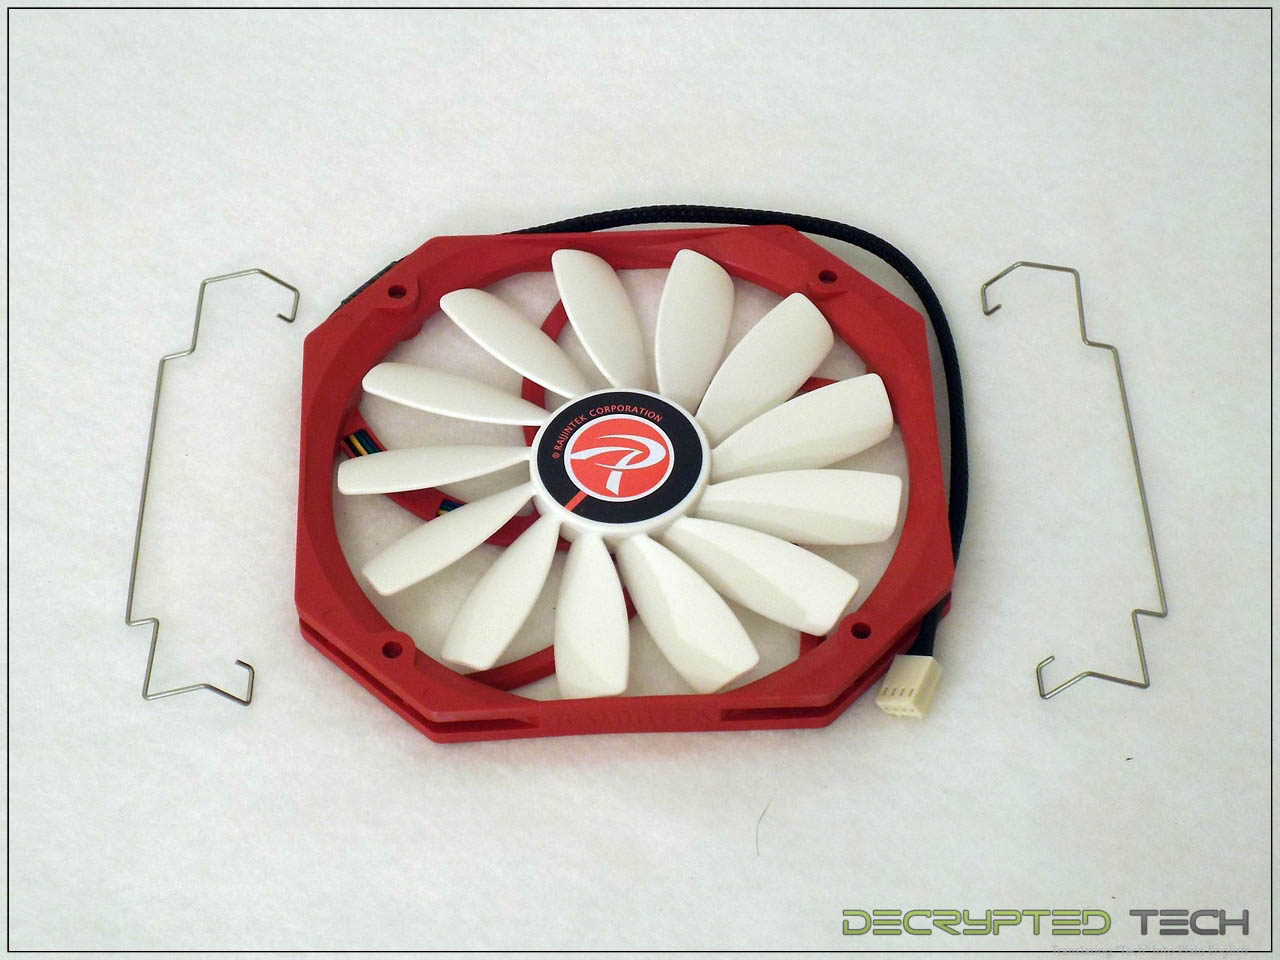
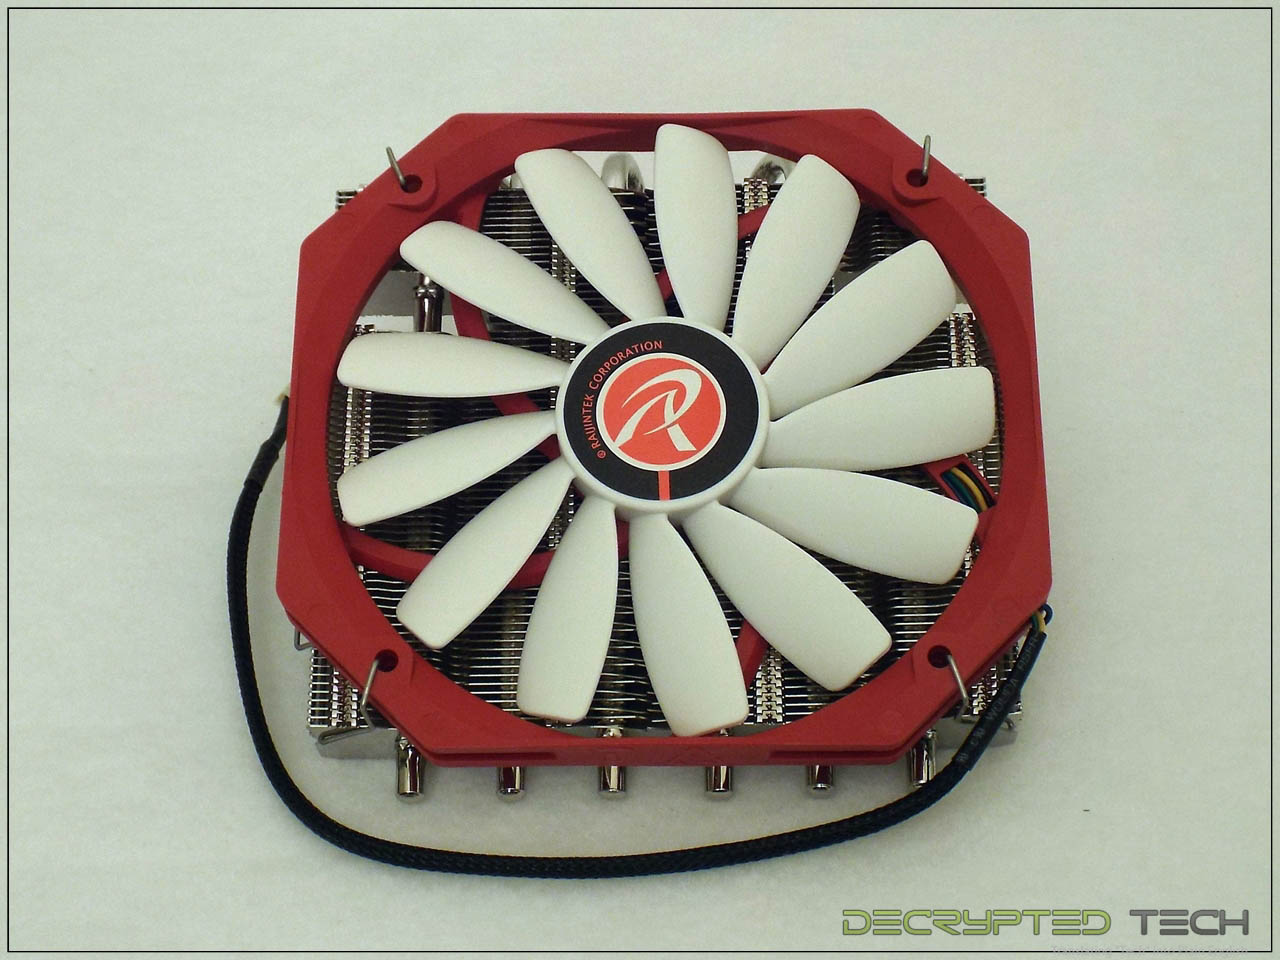
Opening the box the first thing we see is the slim 140mm fan. Personally I love the design of these fans. With the multitude of blades and the cut corners they really look different. It should be noted that the mounting holes are spaced for a 120mm mount, not the expected 140mm. This should make this fan useful in many more applications.
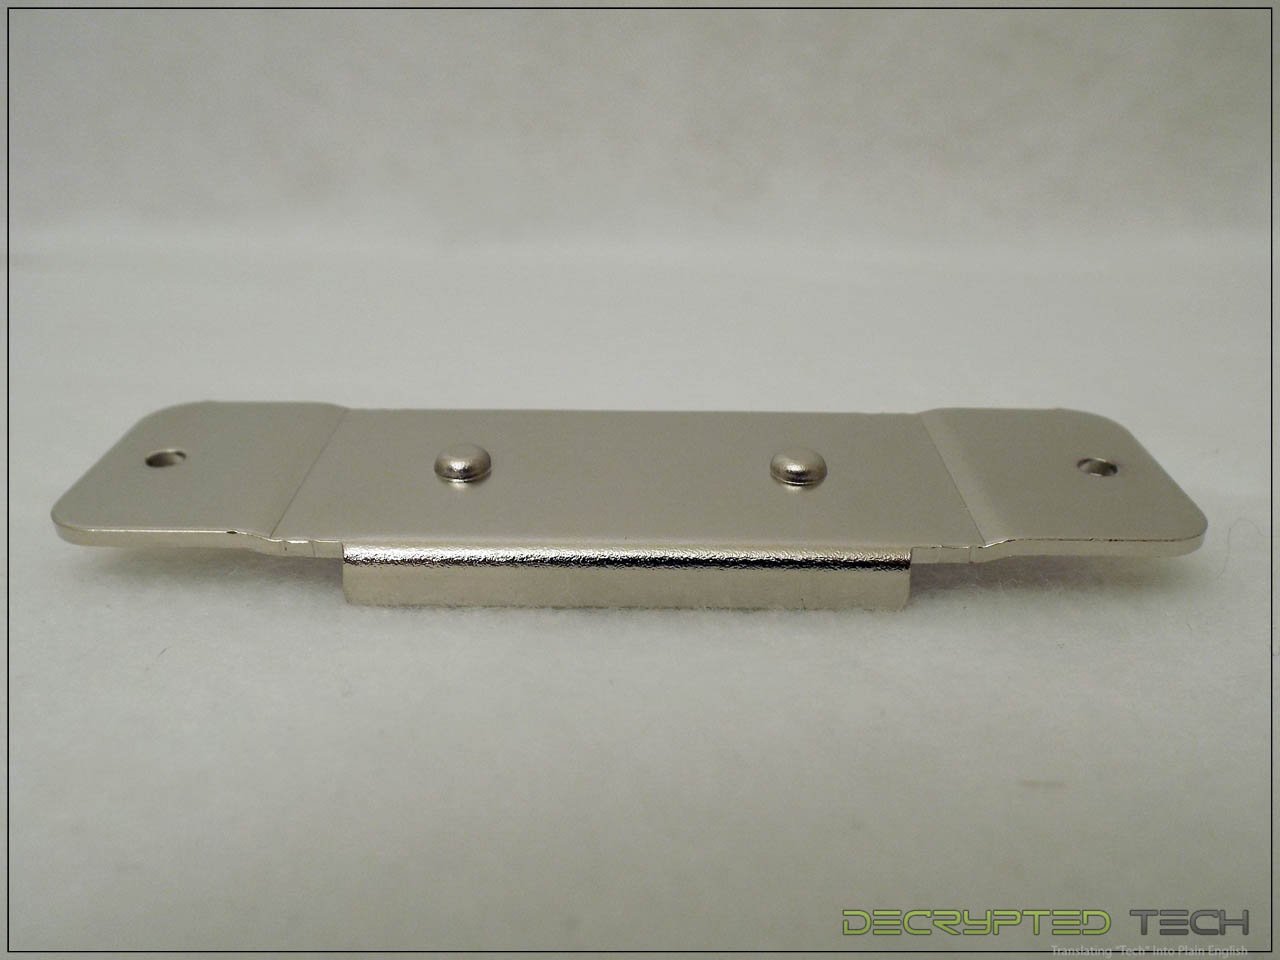
Universal backplates are the norm these days, and the Pallas is no exception.
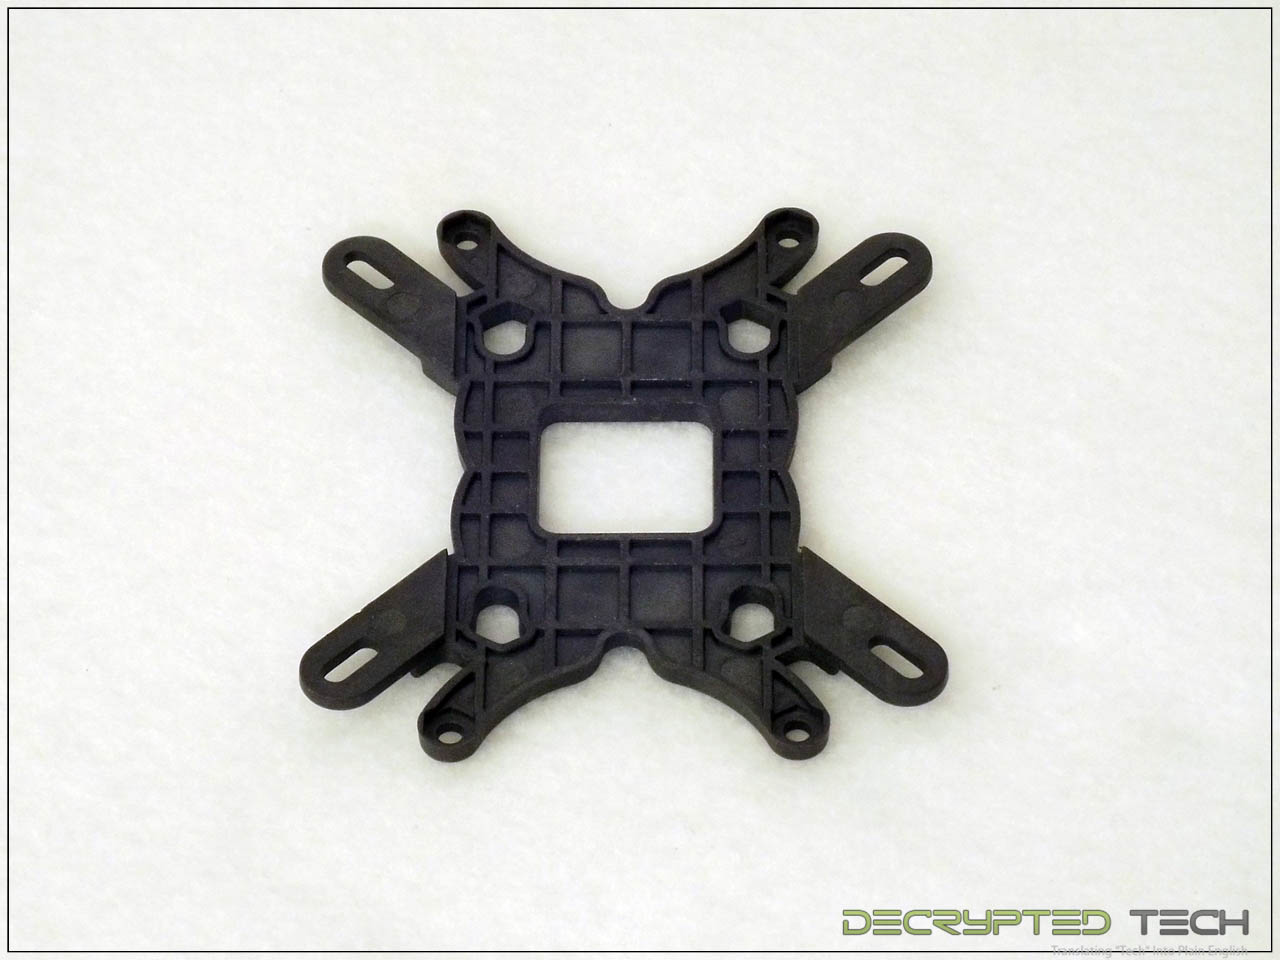
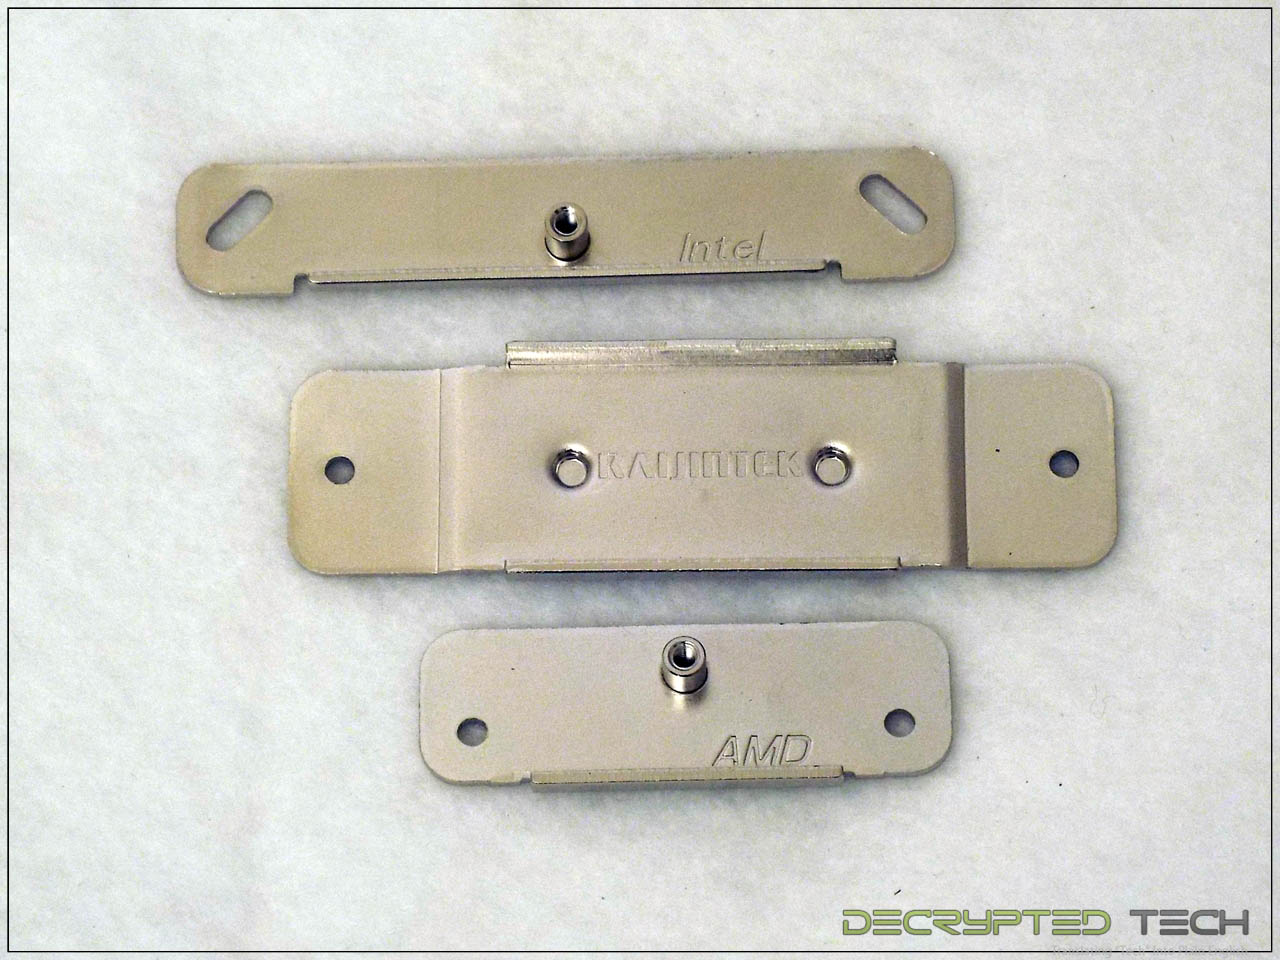
The Pallas comes equipped with a single retention bar for the cooler and two sets of mounting bars for Intel and AMD mounting options.
 |
 |
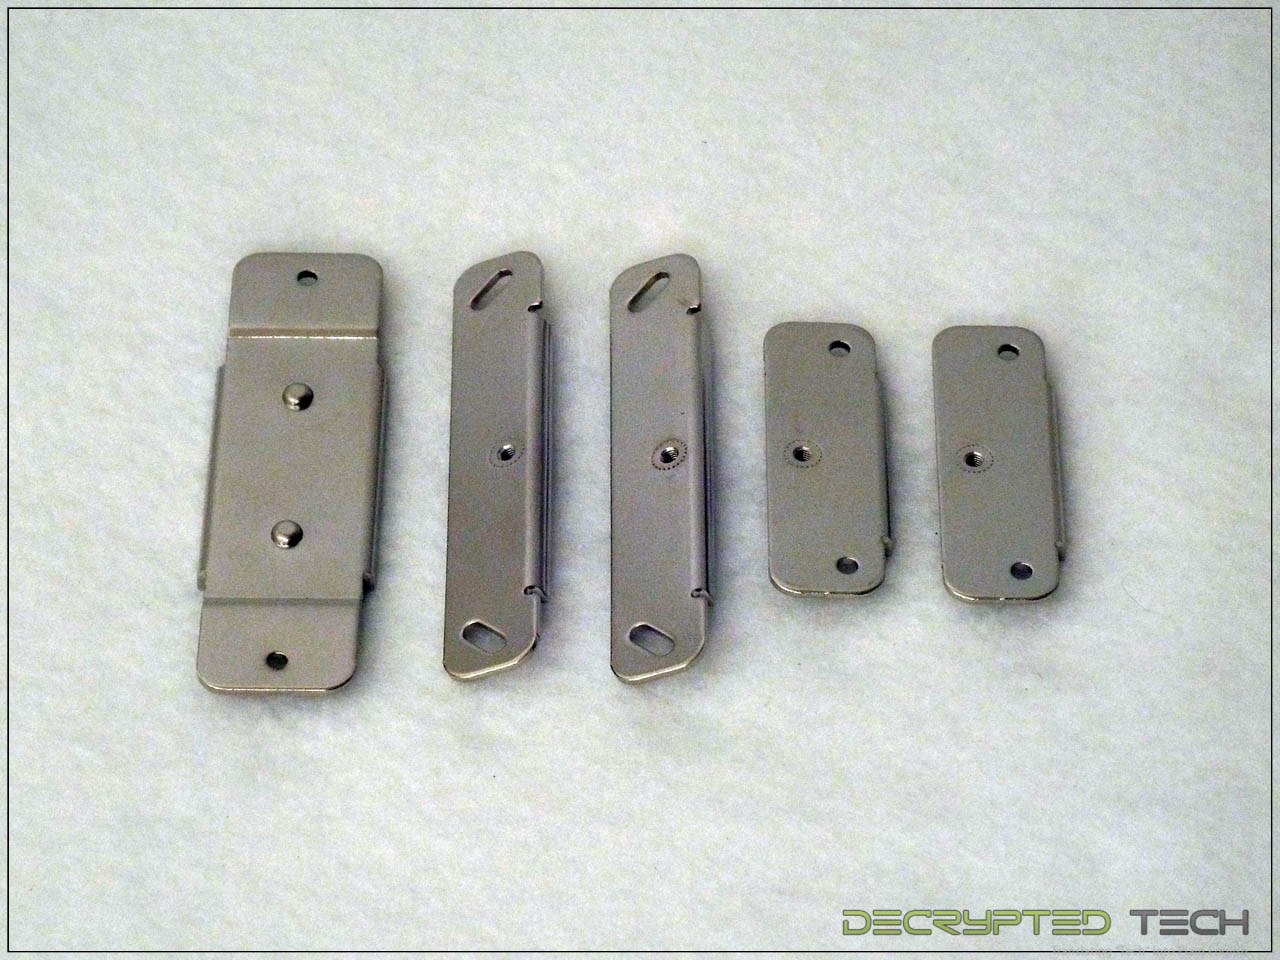
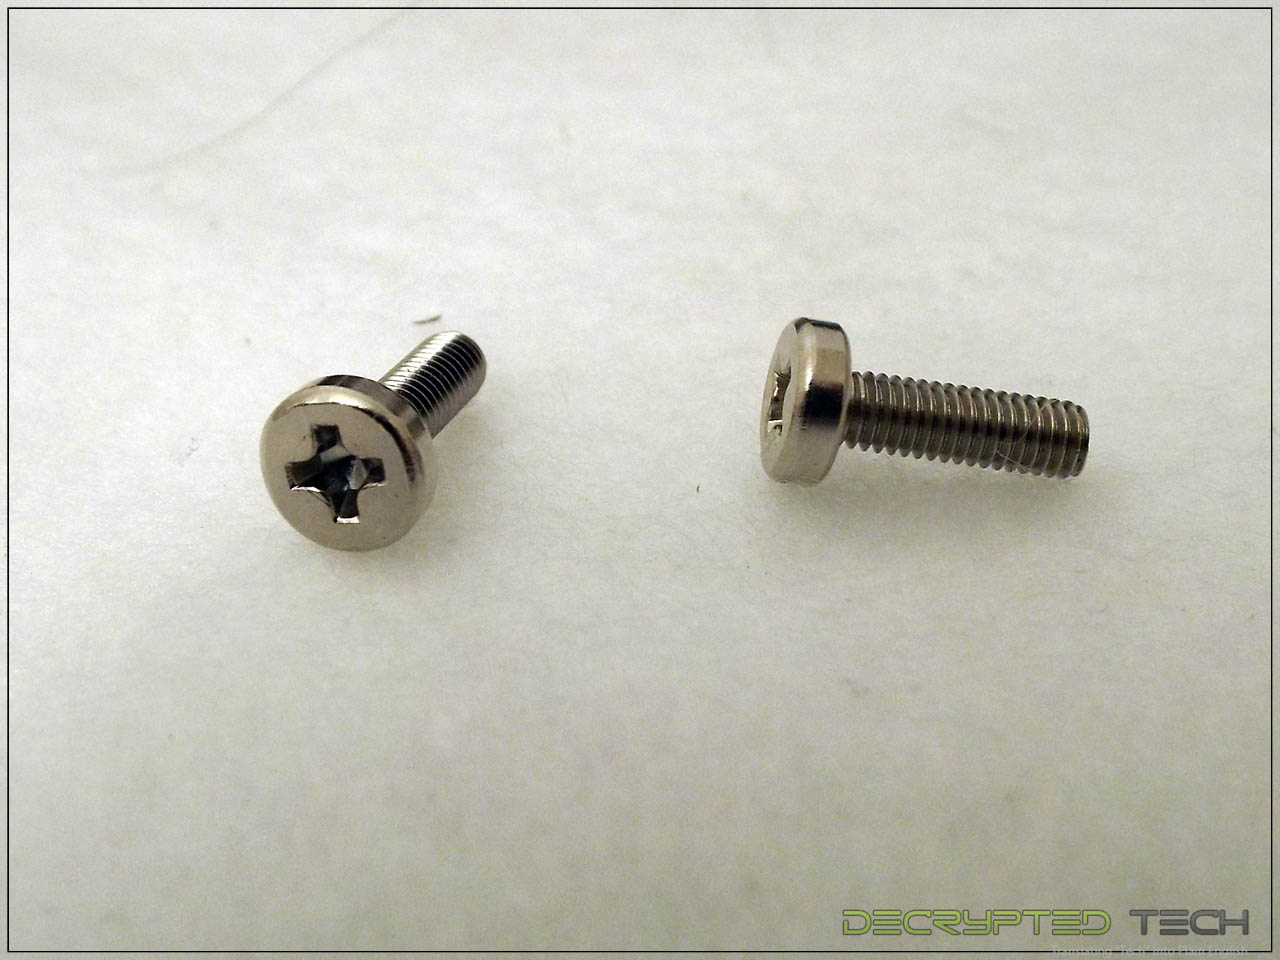
Next up is the smaller hardware needed for the mounting process.

Since the Pallas has no mounting holes for the fan, it comes equipped with thin wire fan mounting clips, also fairly standard in this type of cooler.
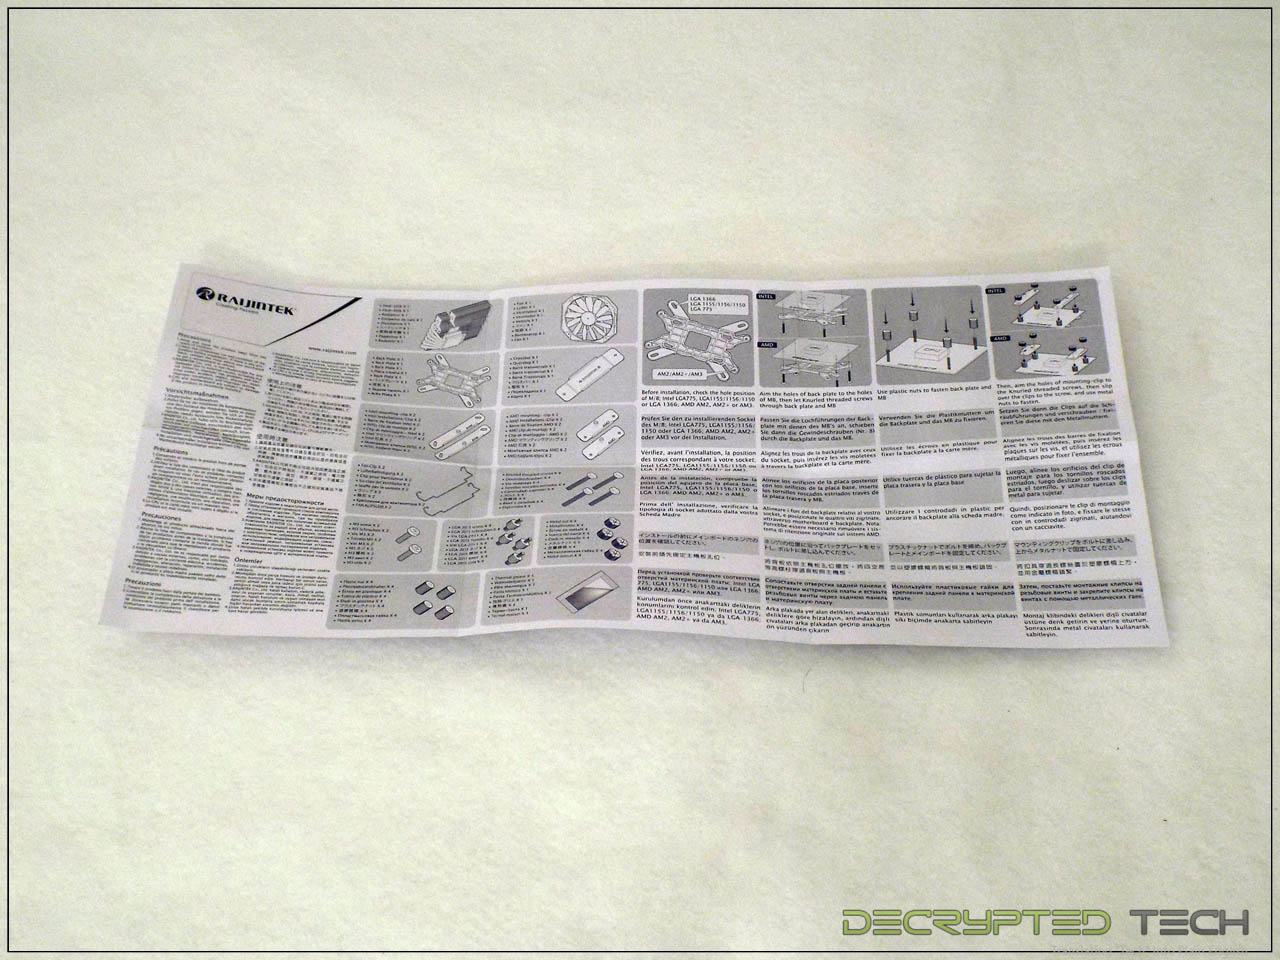
The instructions for the Pallas, while still contained on a single folded sheet in tiny print, are actually better than most. The English translation is well done and the illustrations are clear.
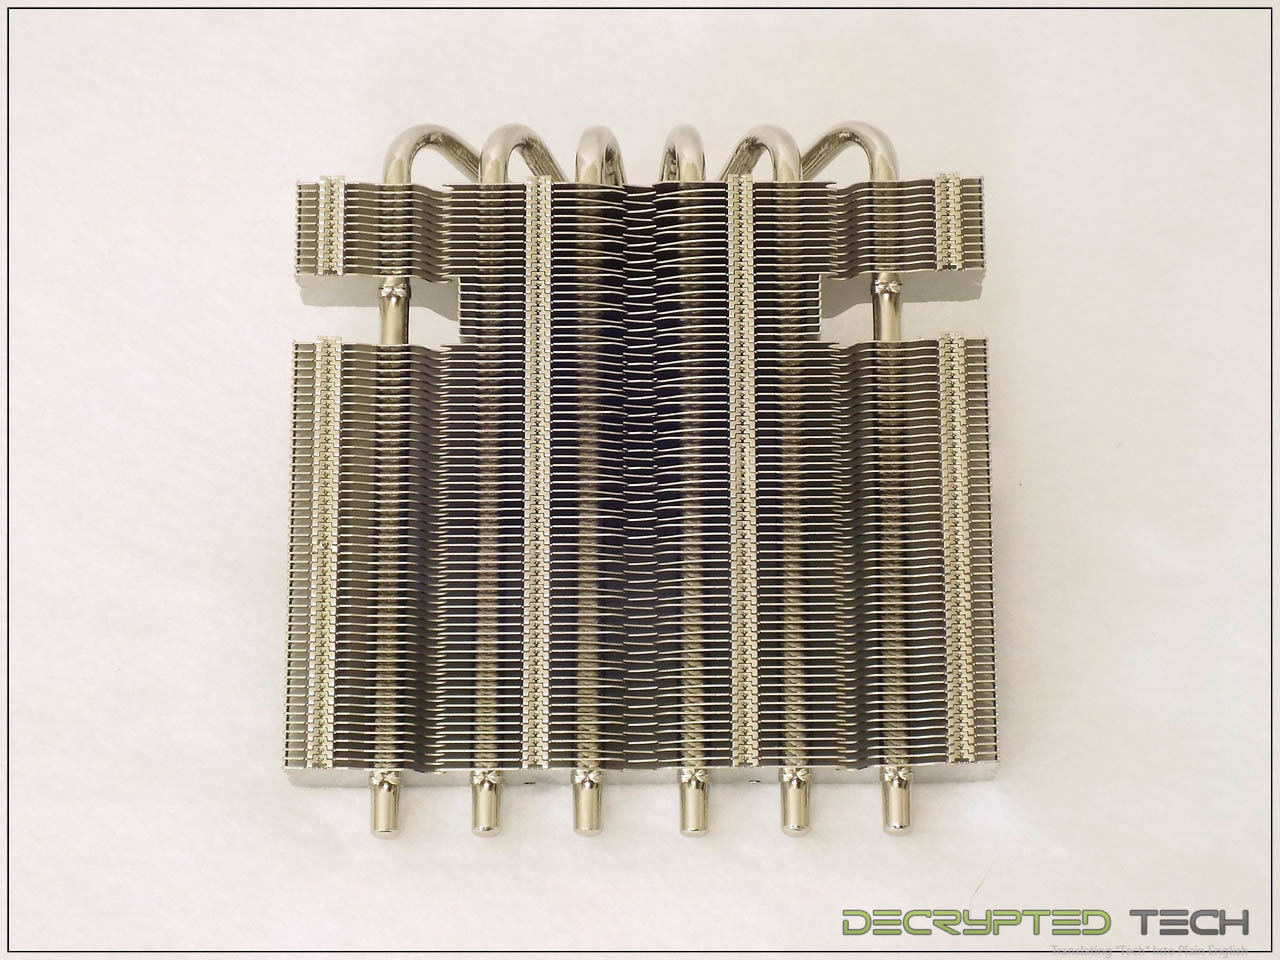
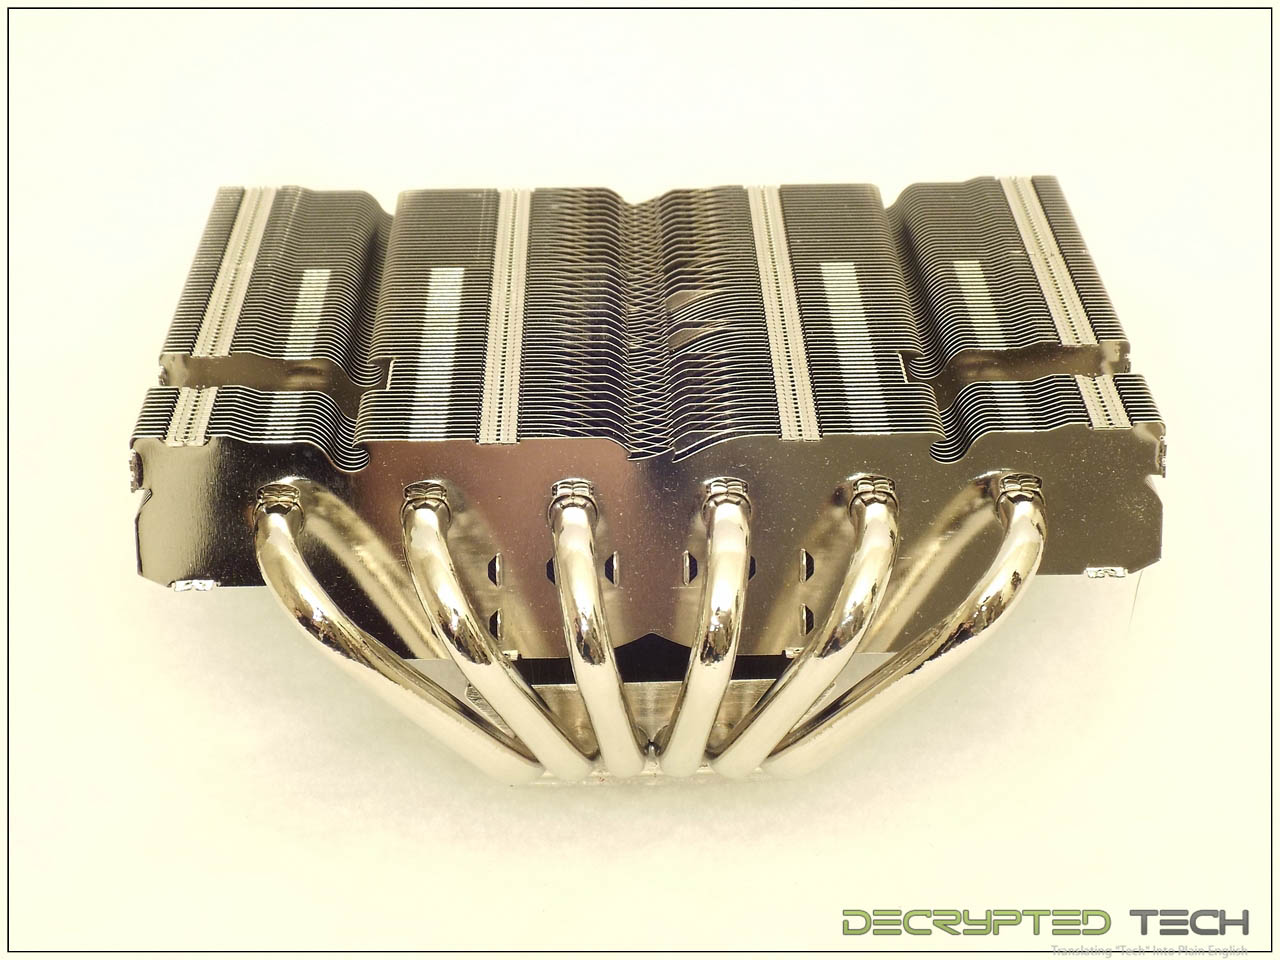
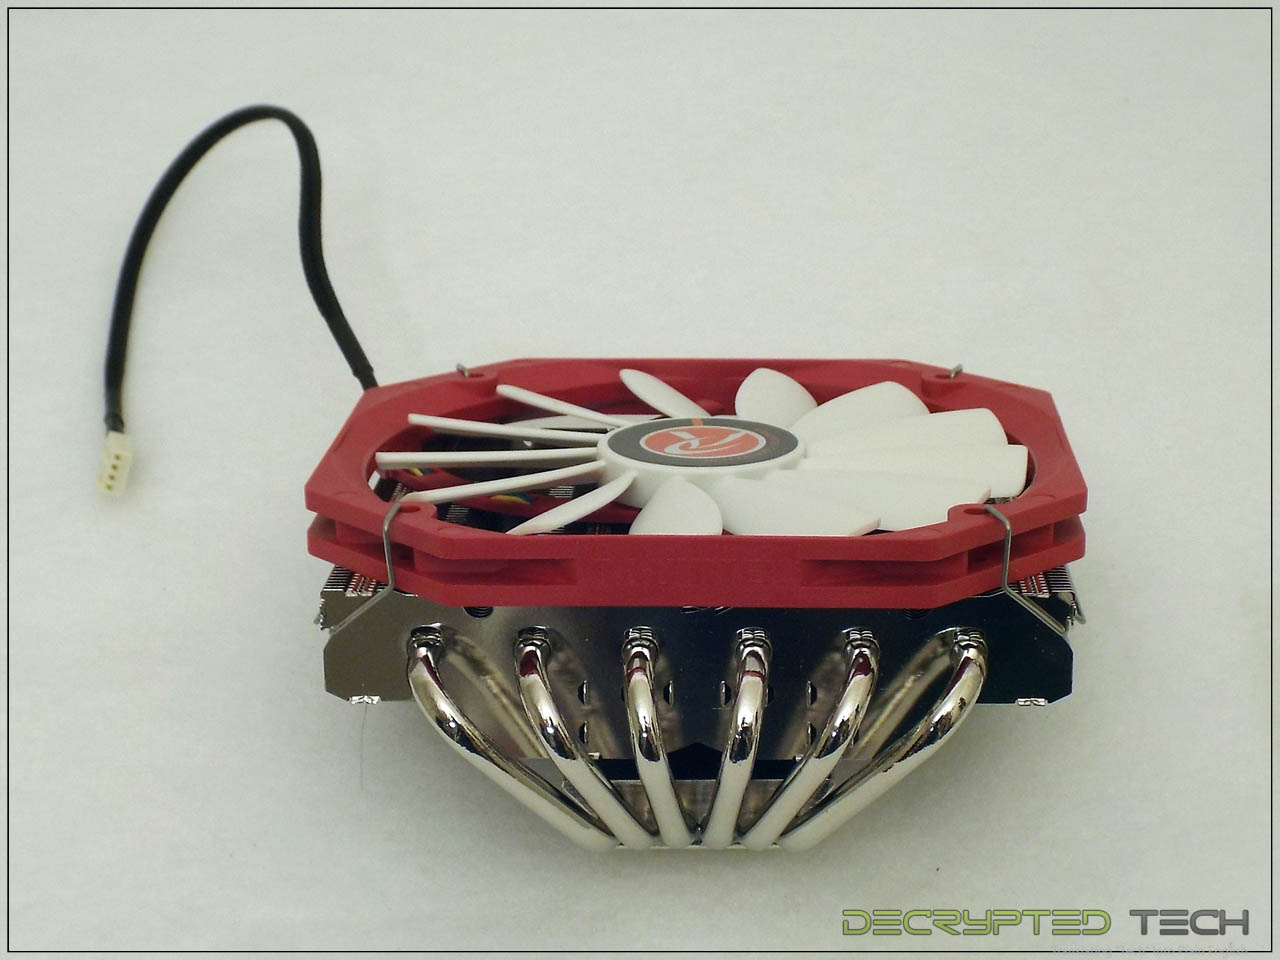
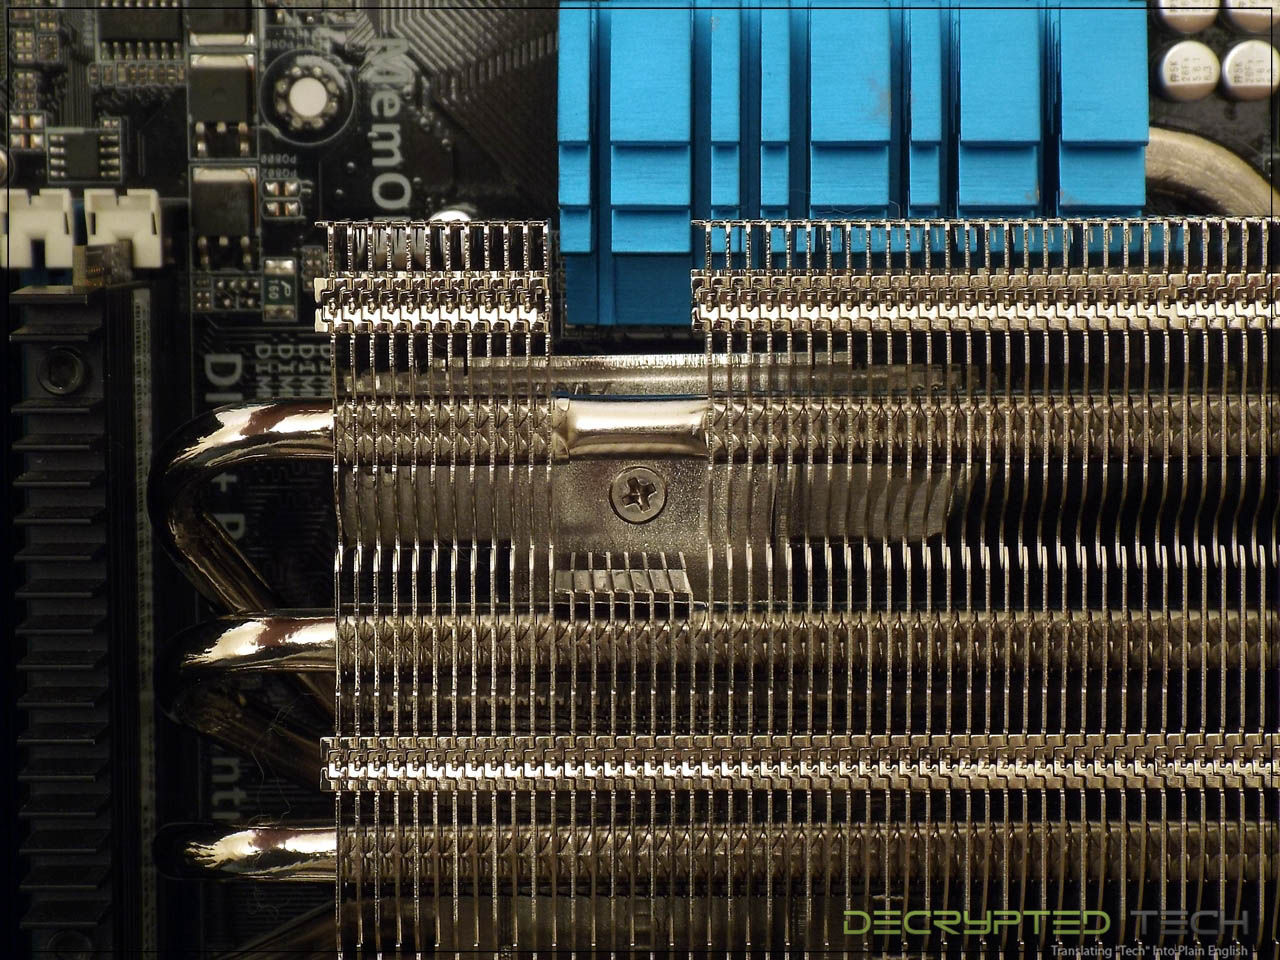
In our first look at the cooler itself we can see the entire assembly is very shiny, the fins are reasonably thick and perfectly straight, and even the ends of the heat pipes are well rounded and aesthetically pleasing. Nothing throws off a nice clean-looking cooler for me than the crushed look on many heat pipes. Raijintek hasn’t even opted for a cover here, those are the actual ends of the pipes. Clearly appearance is important. I have to say that I did wonder about the gaps in the fins toward the upper edge of the cooler. Surely it would look better without those.
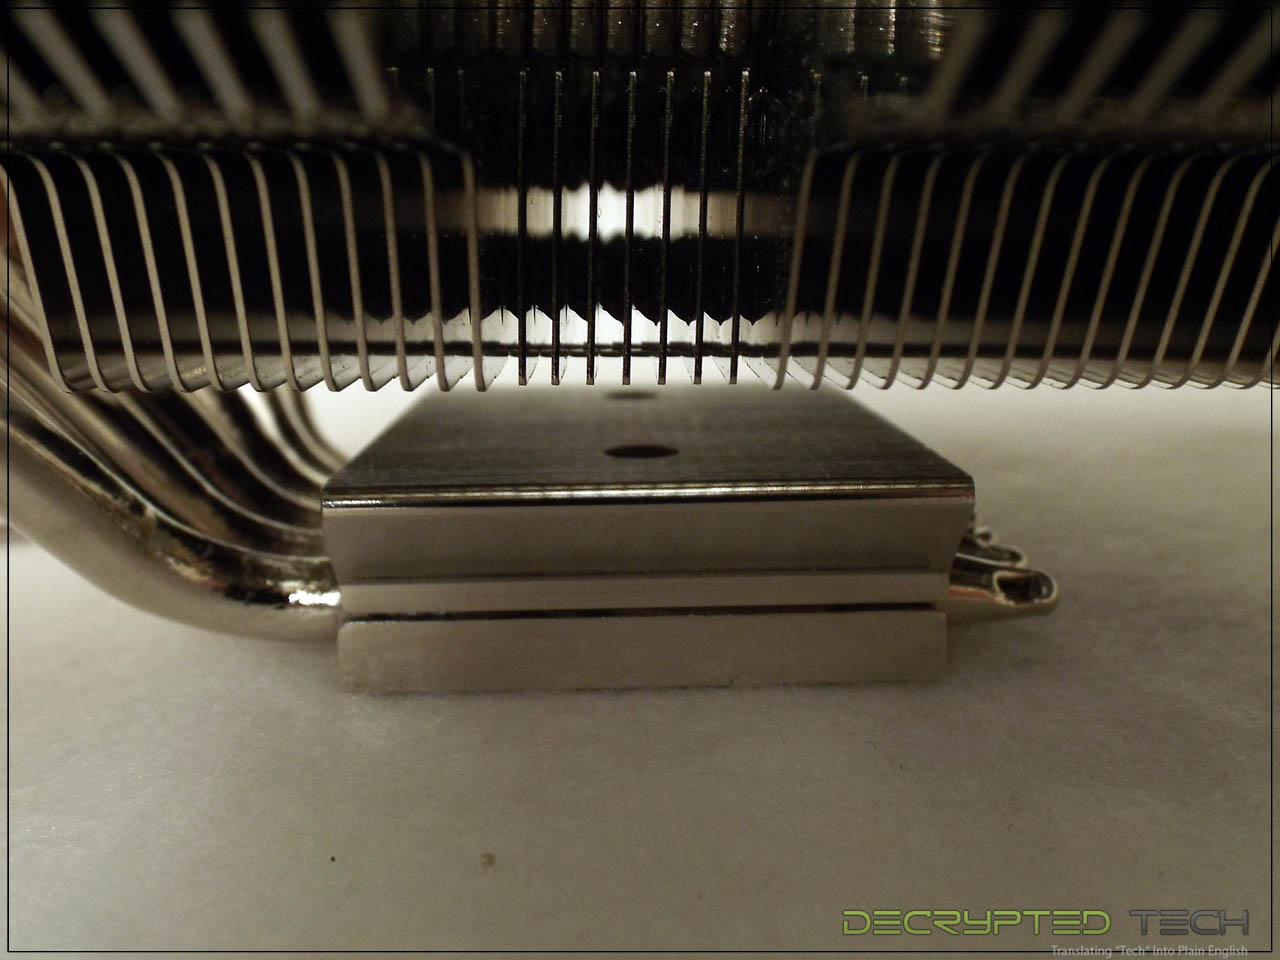
From underneath we see the same evident build quality and the standard protection film for the contact base.

The bend side of the heatpipes shows this shiny appearance even extends here.
After peeling the protection film off of the contact base I was very impressed with the finish here as well. As far as my machinist’s square is concerned it is perfectly flat in all axes also.

I wanted the chance to mount the fan before the cooler was mounted to the test bed, to see how difficult it was. While the directions are clear, these clips are very tight. I was able to get the fan mounted and unmounted without damage of any kind but I was not looking forward to installing it on the board.
 |
 |
Installation:
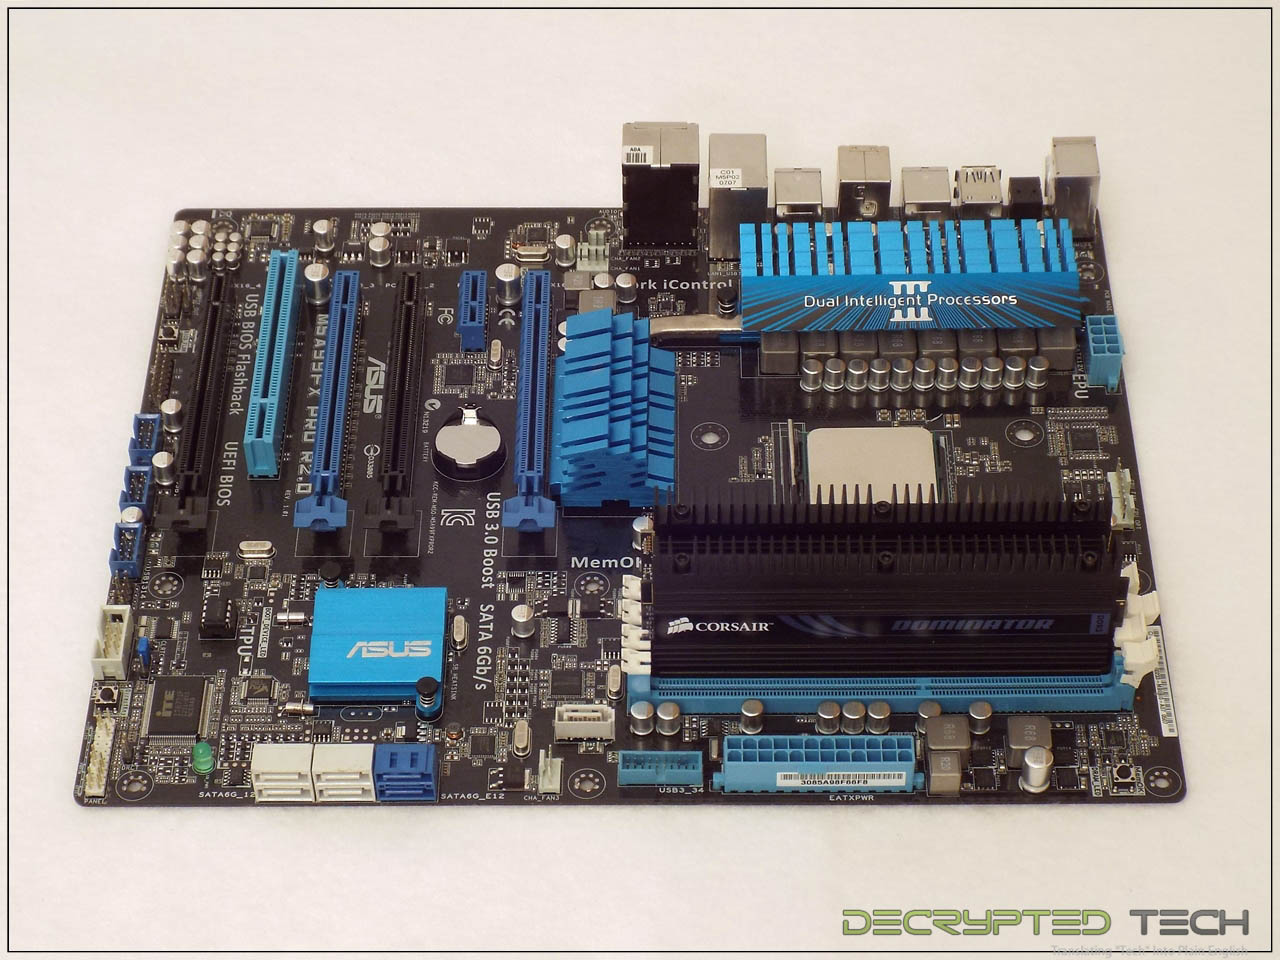
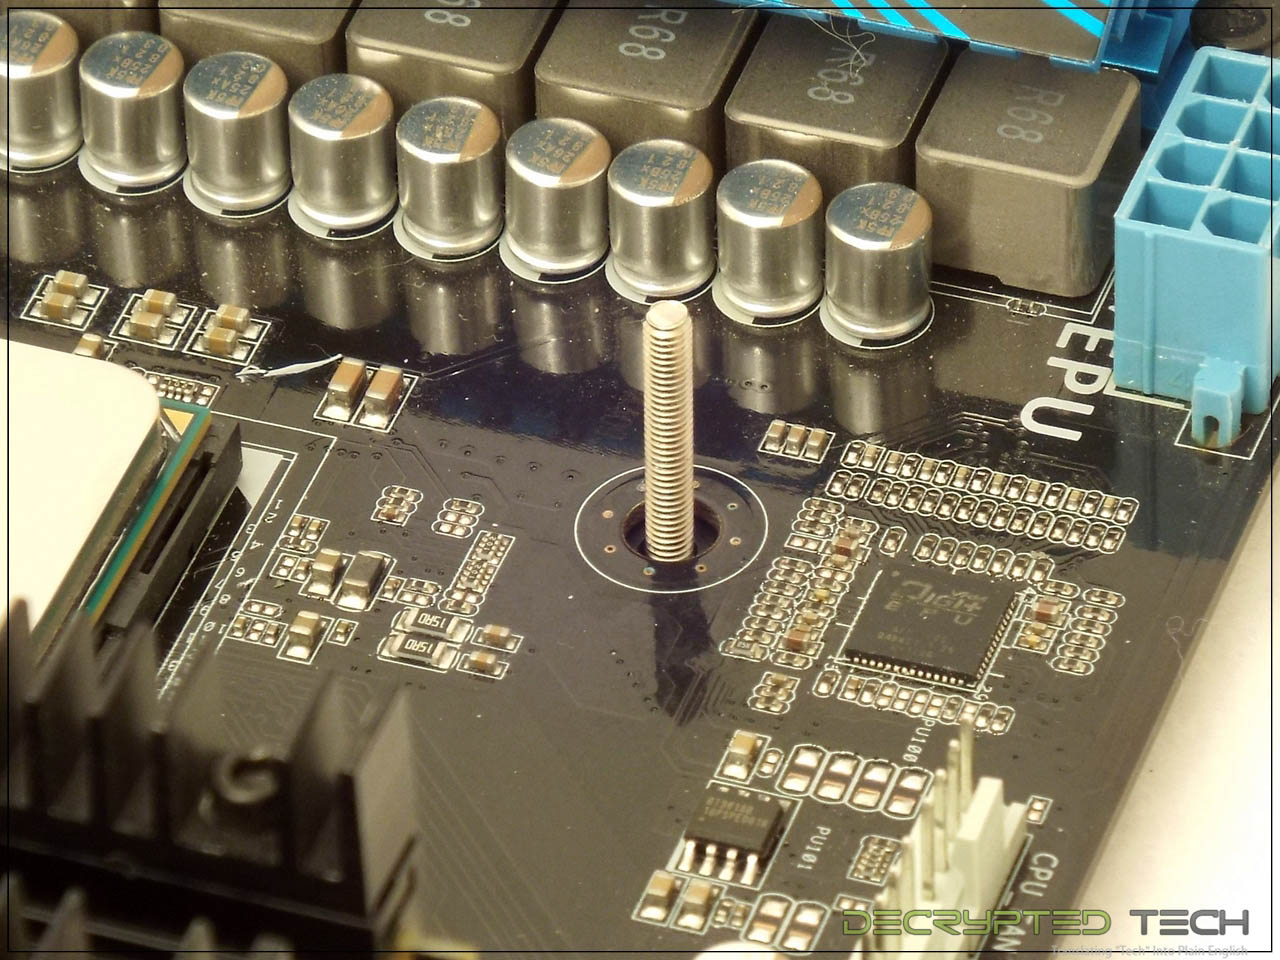
My test system uses the Asus M5A99FX Pro motherboard coupled with a Phenom II 1100T processor and 4GB of Corsair Dominator RAM. The combination of heatsinks on the this board and on the memory serve to test clearance issues on most coolers. If it will fit in this setup, chances are it will fit in yours but as always, your own research is strongly recommended.
For the AMD setup, the holes in the universal backplate that have flats to hold the mounting screws in place are used. I wish the designers at Raijintek had included some kind of retention clip to hold these screws in place during installation, as we saw in the Gamerstorm Lucifer from Deepcool. It’s a small thing but it certainly lowers the frustration level when you don’t have to hold those screws in place while proceeding with the next step of the install.
Once the mounting screws are in place the backplate is set behind the motherboard with the screws in the holes for the stock retention plate. Another trend I’ve seen a lot of is the use of undersized screws like these. I am not a fan of this much slop between the mounting screw and the edge of the mounting hole. In a cooler like the Pallas the effect should be negligible but this happens even in coolers weighing in at 1.5kg. Something as simple as adding a small shoulder to the mounting nut to fill that hole would eliminate this problem.
The next step in installing the Pallas is to secure the mounting screws with the included mounting nuts, which also serve the function of spacers, setting the rest of the assembly at the correct height above the CPU socket. The nuts included with the Pallas are plastic, and one of them stripped during installation, though no tools were used. It did remain tight and seemed to cause no negative effects but it should be noted.
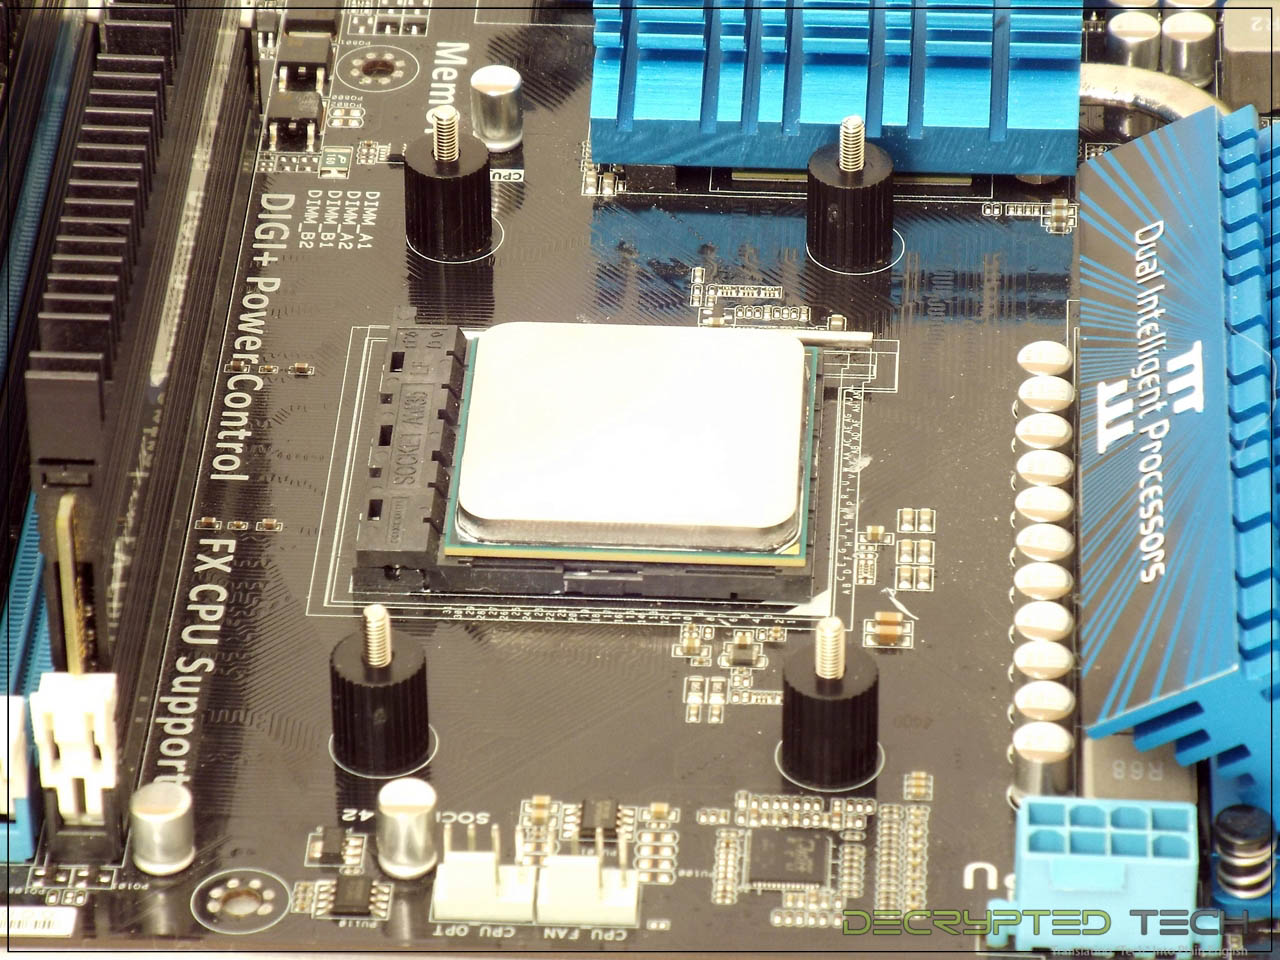
The AMD mounting bars are set in place over these spacer nuts next. I should note that these bars (both the AMD and Intel versions) are very thick metal and very sturdy. Seems an odd contrast to the plastic spacer nuts.
Finishing off the mount preparation are four thumb screws. These also have lines for a screwdriver if extra security is desired, though no mention is made of this in the instructions.
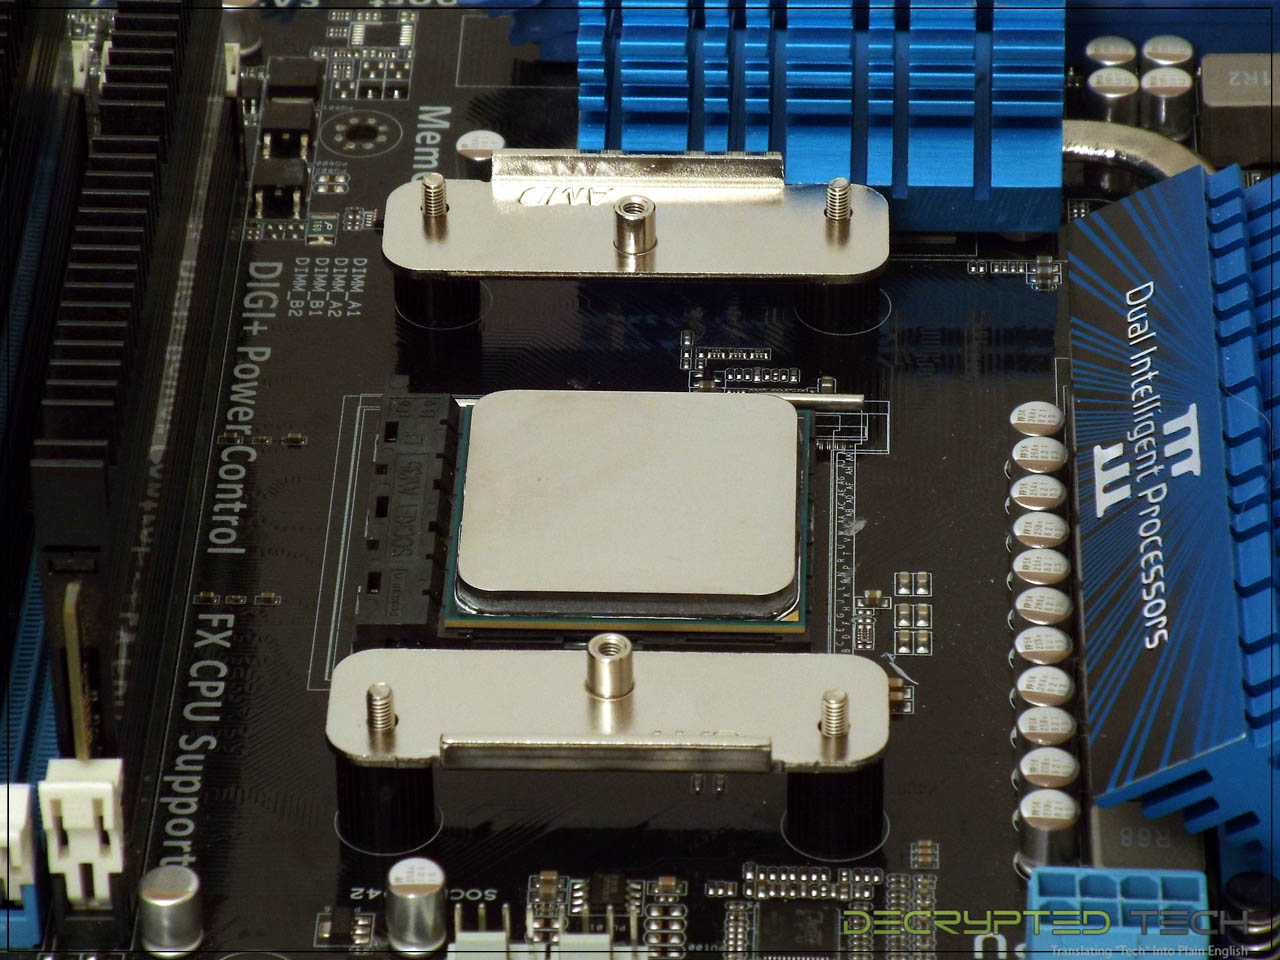
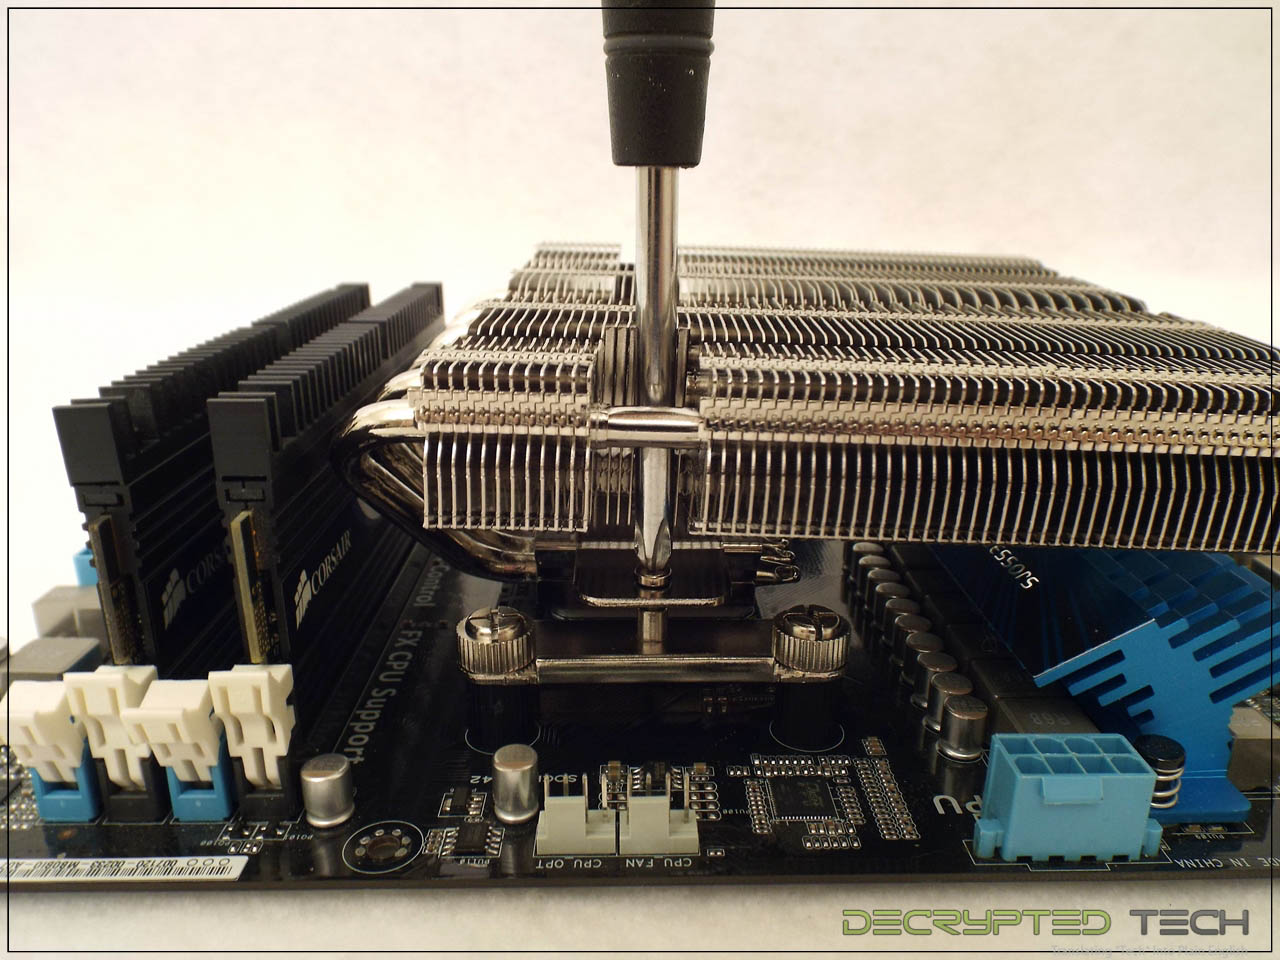
Looking at the top of the base on the cooler itself, we can see an excellent design point that I wish I had seen in other AMD coolers. The top has two small shallow holes in it with rounded bases. The final piece of the installation is another metal bar that goes across this area. That bar is made with two small raised areas that fit into these holes, thus ensuring perfect placement on the cooler every time. Since this part of the install is likely to be done blind due to the placement of the cooler and surrounding obstructions this is an excellent addition.
 |
 |
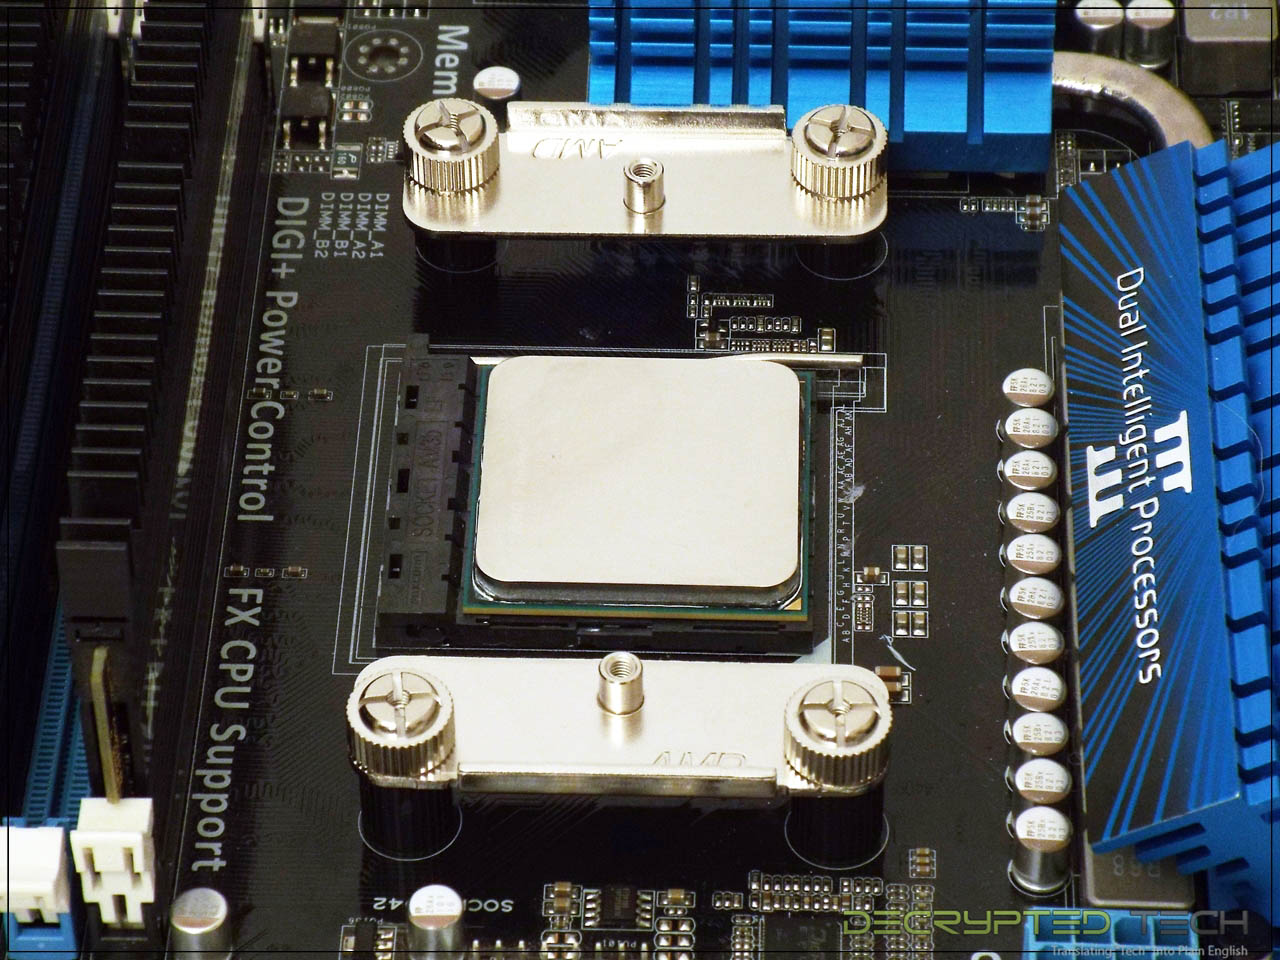
Once the thermal paste of your choice has been applied the cooler/cross bar assembly is set in place, and the holes on either end lined up with the holes in the mounting bars to either side and secured with the included Phillips-head screws.
Now we see what those cutouts in the fin area are for. They line up perfectly over the screw area and allow for easy access to the mounting screws. Excellent design.
 |
 |
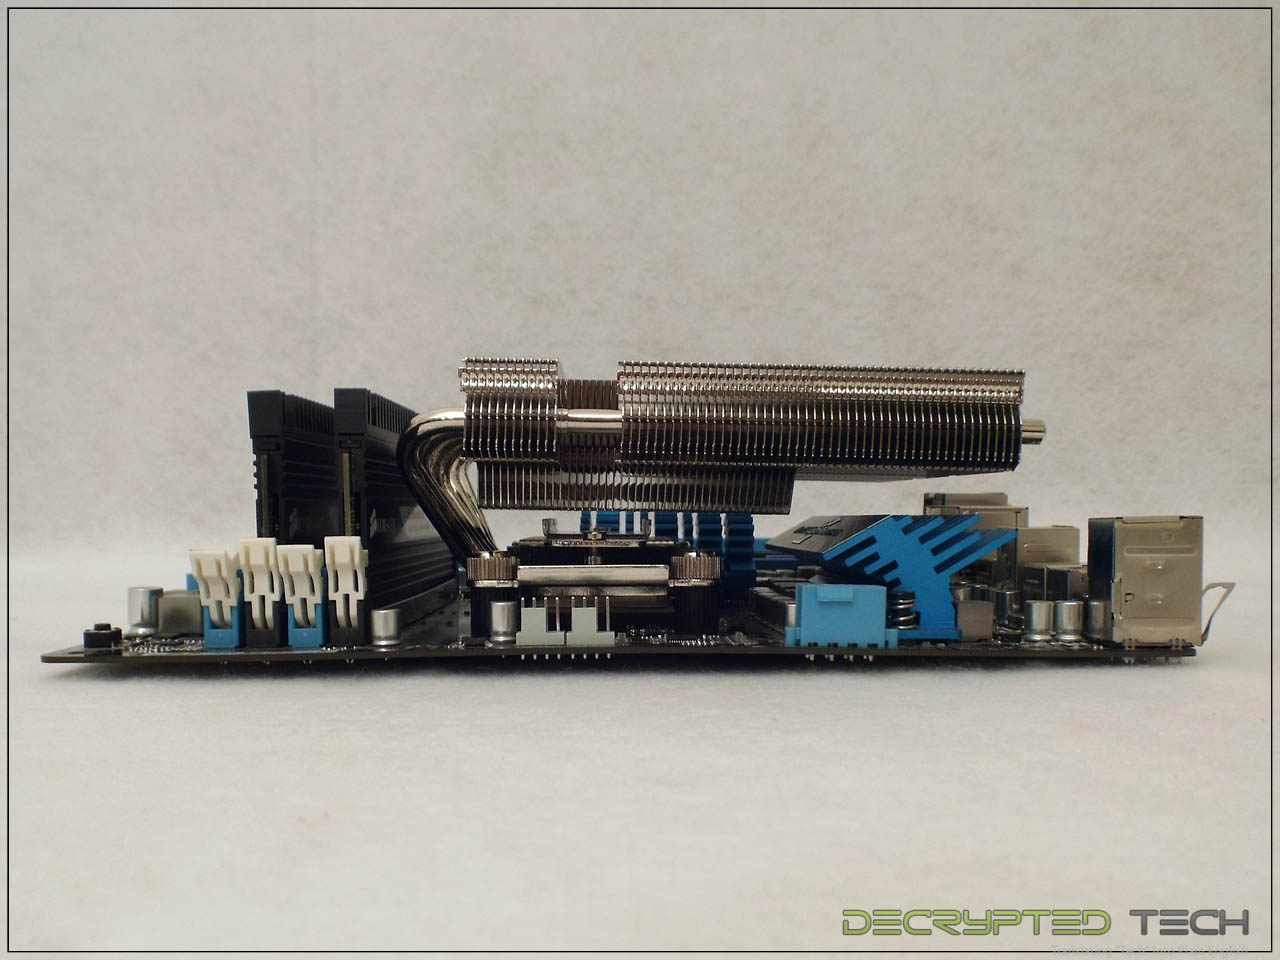
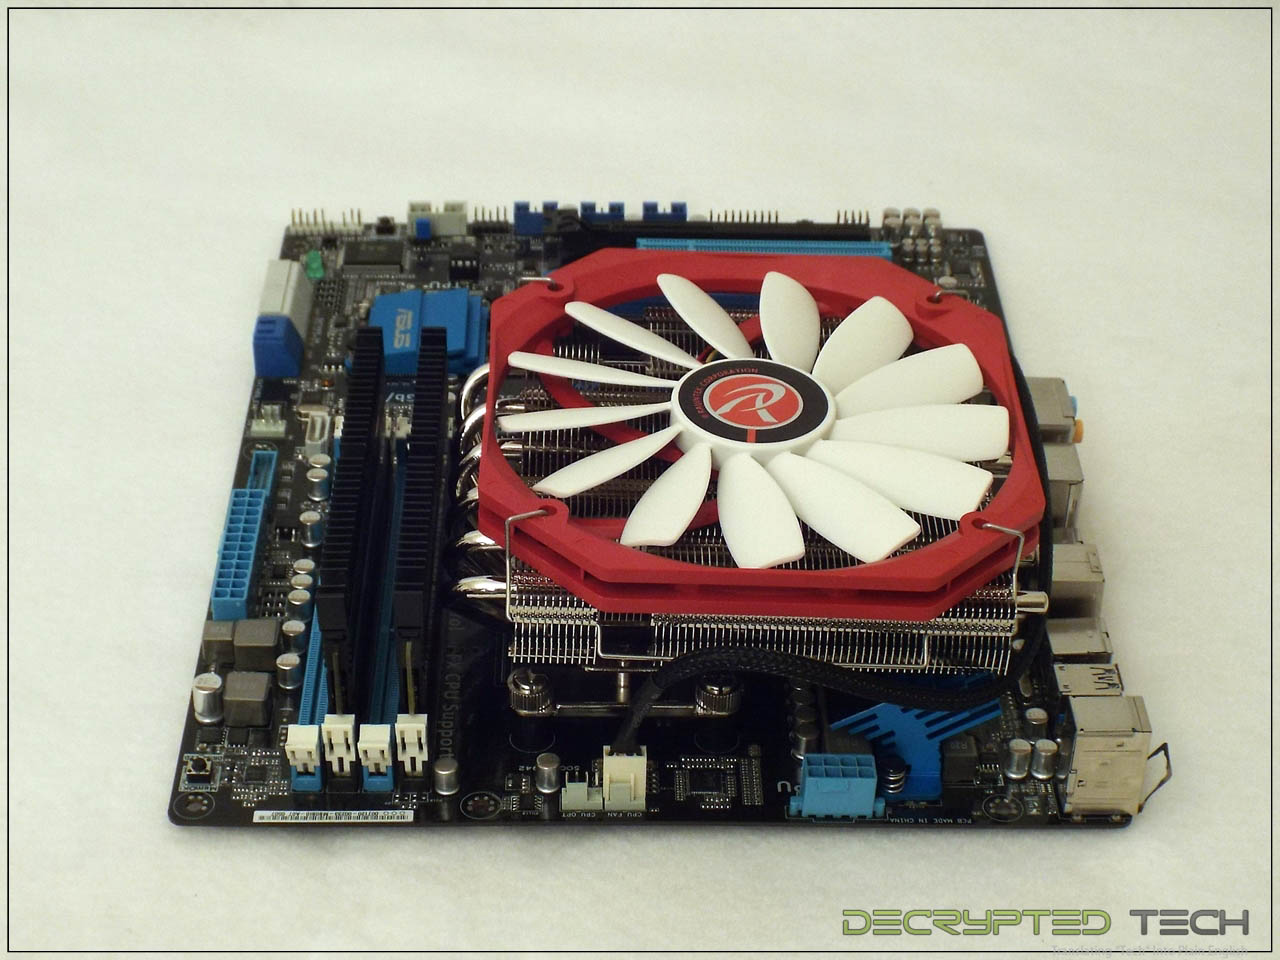
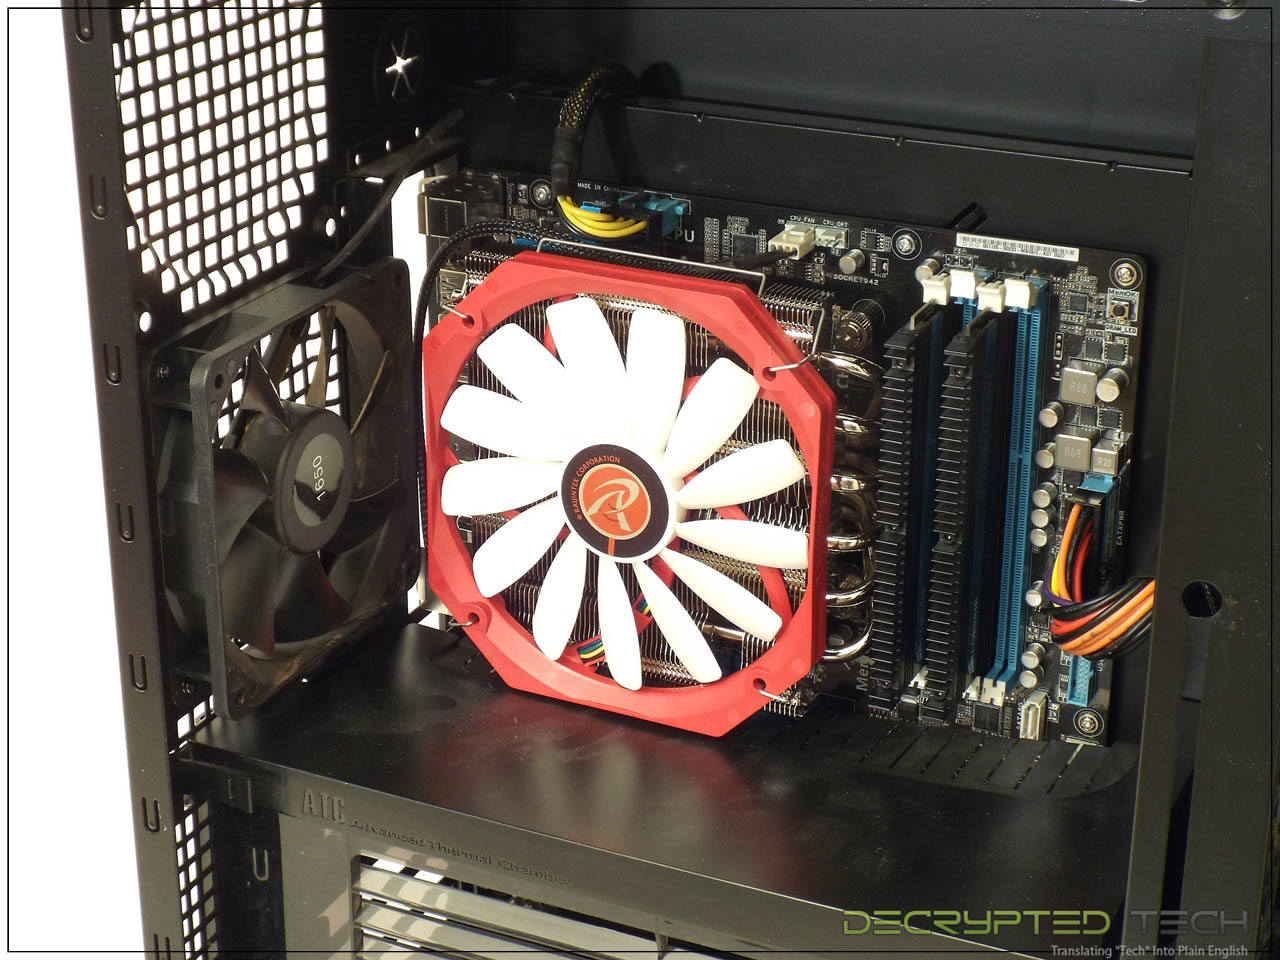
The Pallas cooler fully mounted. With the low clearance of the cooler there was only one option on orientation due to the memory. Even without the heatsinks on this tall RAM it would have been impossible to mount it any other way. As it stands though clearance is fine, even leaving enough space below the cooler for the VRM heatsink to benefit from the air flow provided.
Installing the fan with the cooler in place was more harrowing than standalone installation due to the force required to get the final fan clip in place, but it took less than a minute and the fan is definitely secure.
 |
 |
 |
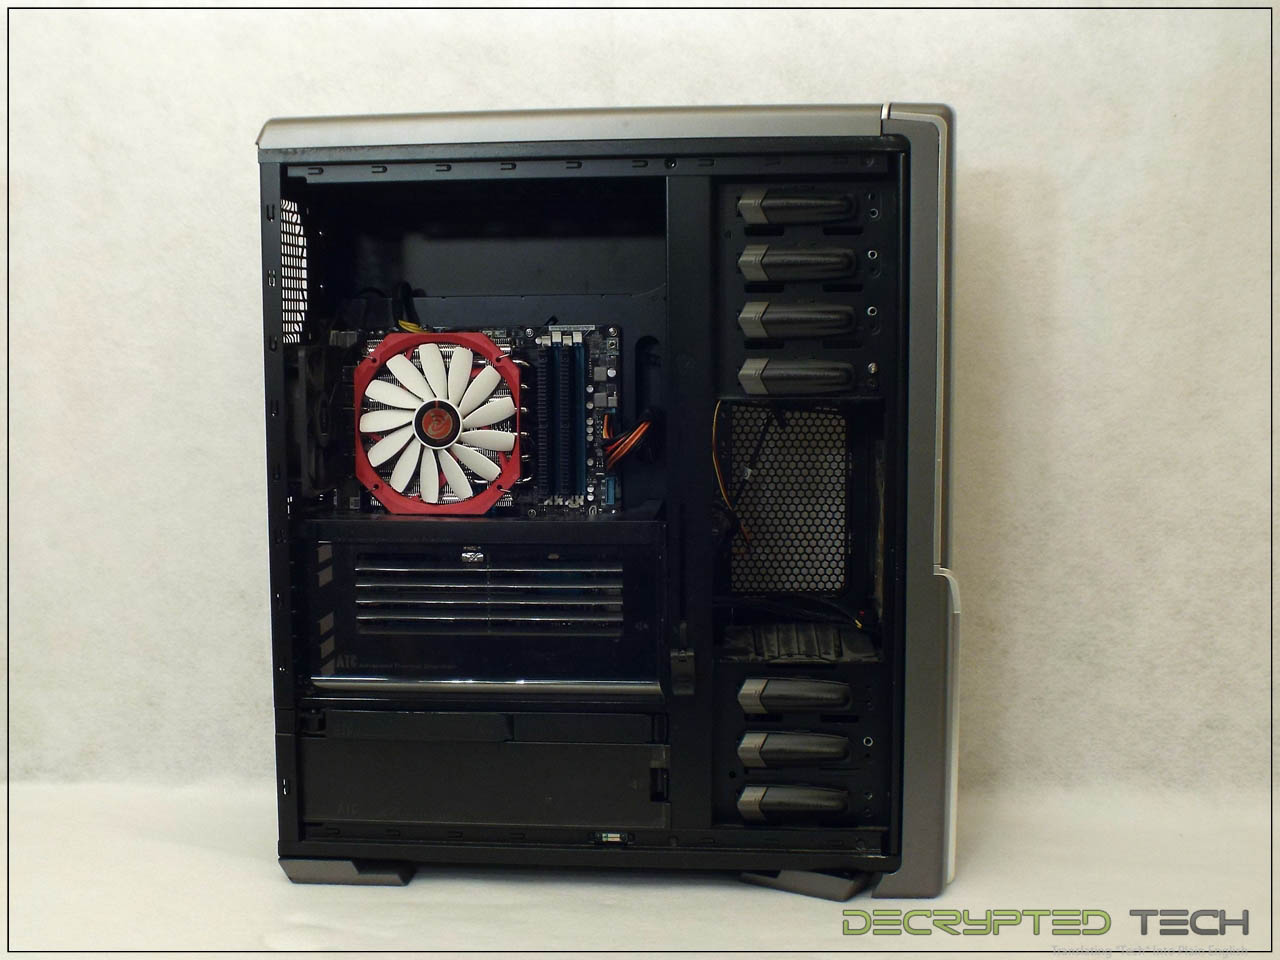
As mentioned, the Pallas is primarily designed for smaller chassis so it looks a little lost inside the cavernous test bed of the Thermaltake Spedo Advance full tower case, but it also has a clean look that I like and should have no problem with air flow for our testing.
 |
 |
Testing:
In order to keep test results equal across the board, all cooling testing is done with the following setup, conditions and methods:
Test System:
AMD Phenom II 1100T at stock 3.3GHz (125-watt TDP)
Asus M5A99FX Pro mainboard
4GB Corsair Dominator DDR3 RAM
Windows 7 Ultimate 64-bit
Radeon HD4870 video
Thermaltake Toughpower Grand 850-watt PSU
Thermaltake Spedo Advance full-tower case
120mm intake case fan (x2)
120mm exhaust case fan
Ambient temp in the testing environment is brought as close to previous testing levels as possible and recorded at the beginning of the test. For this test ambient was 24C and remained stable within .2 degrees for the duration of the testing.
Before testing begins, BIOS power/performance settings are set to "balanced" mode and the system is allowed to idle for 30 minutes to get a stable idle temp.
Stress testing is done with OCCT 4.4.0, running 30 minutes on each set, with large data set and a 1-minute idle time recorded at the beginning and end of each test. If a cooler has multiple modes (high and low fan speeds, for instance), the test is run for each mode and all results recorded.
Tests are performed using Noctua NT-H1 thermal interface material for equal comparison with other cooling solutions.
For acoustic testing all case fans are connected to a Sunbeam rheobus fan controller and their speed is lowered to the point that they are inaudible.
This is obviously a high-stress environment for any cooler, with a 125-watt six-core processor being loaded to 98% or more across all six cores. So how did the Pallas low-profile cooler fare in this torture?
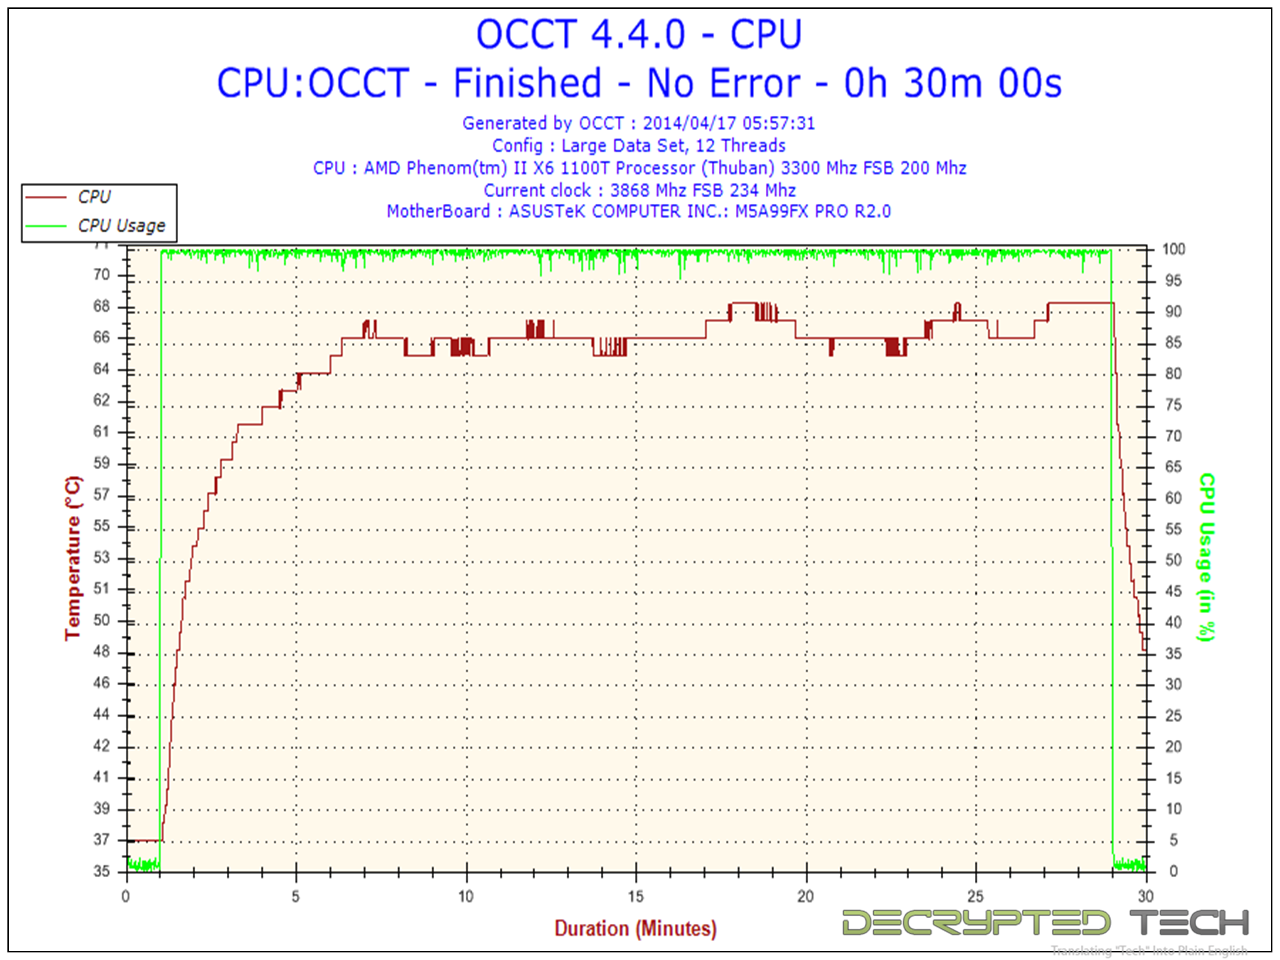
Much better than I had anticipated. Honestly, I didn’t think this small cooler could keep this thermal load below the shutdown threshold of 70 C. While it did come close on a couple of occasions it managed to maintain temps just under 68 though most of the test. While this is hotter than I would run my machine obviously, this is again an extreme test and an excellent showing by a cooler of this size.
Noise levels:
The 140mm PWM fan on the Pallas is effective, as we see from the test results, but how quiet is it? Again, I was surprised by this little cooler. Being as slim as it is I expected it to be very noisy when it had to generate the air flow needed to keep this load in check, but the truth is it was very reasonable. Acoustic performance is the most subjective part of any cooler review and your mileage will vary, but while I could definitely hear the fan doing its job it was a very low hum, perfectly acceptable for an office environment. Even with this kind of load I would have no problem with the noise level with this cooler on my desk.
Conclusion:
I was pleasantly surprised by the Pallas low-profile CPU cooler at more than one point. It has its drawbacks but just about any cooler will. Fit and finish are exemplary, installation was easy, performance is better than expected and noise levels are perfectly acceptable. With the information I have I would be more than happy to put one of these coolers in a HTPC system in my living room. The only thing that keeps me from being able to give it the Editor’s Choice award is lack of information on its price and availability. Price is obviously a huge factor in determining value and recommending a product. Bearing this in mind, if the price turns out to be in the range of $40-$50 USD I would absolutely recommend this cooler. As the price increases there are other competitors out there with similar offerings that should be considered.
[Ed - After speaking with Raijintek we have confirmed that the price we be 50 US $ cooler including VAT. Raijintek will start selling in the US and Canada right after Computex.]
Check back soon for the review of the next cooler from Raijintek, the Themis EVO.
 |
Tell us what you think in our Forum
