Reading time is around minutes.
The Cooler Master HAF XM -
After you get through pulling off the outer plastic and toss the Styrofoam away you get to what you are really interested in; the HAF XM. According to Cooler Master HAF stands for High Air Flow. We would completely agree with them when it comes to the HAF line up. The XM appears to follow that same styling and design although the air flow looks to be more limited (perhaps more targeted).
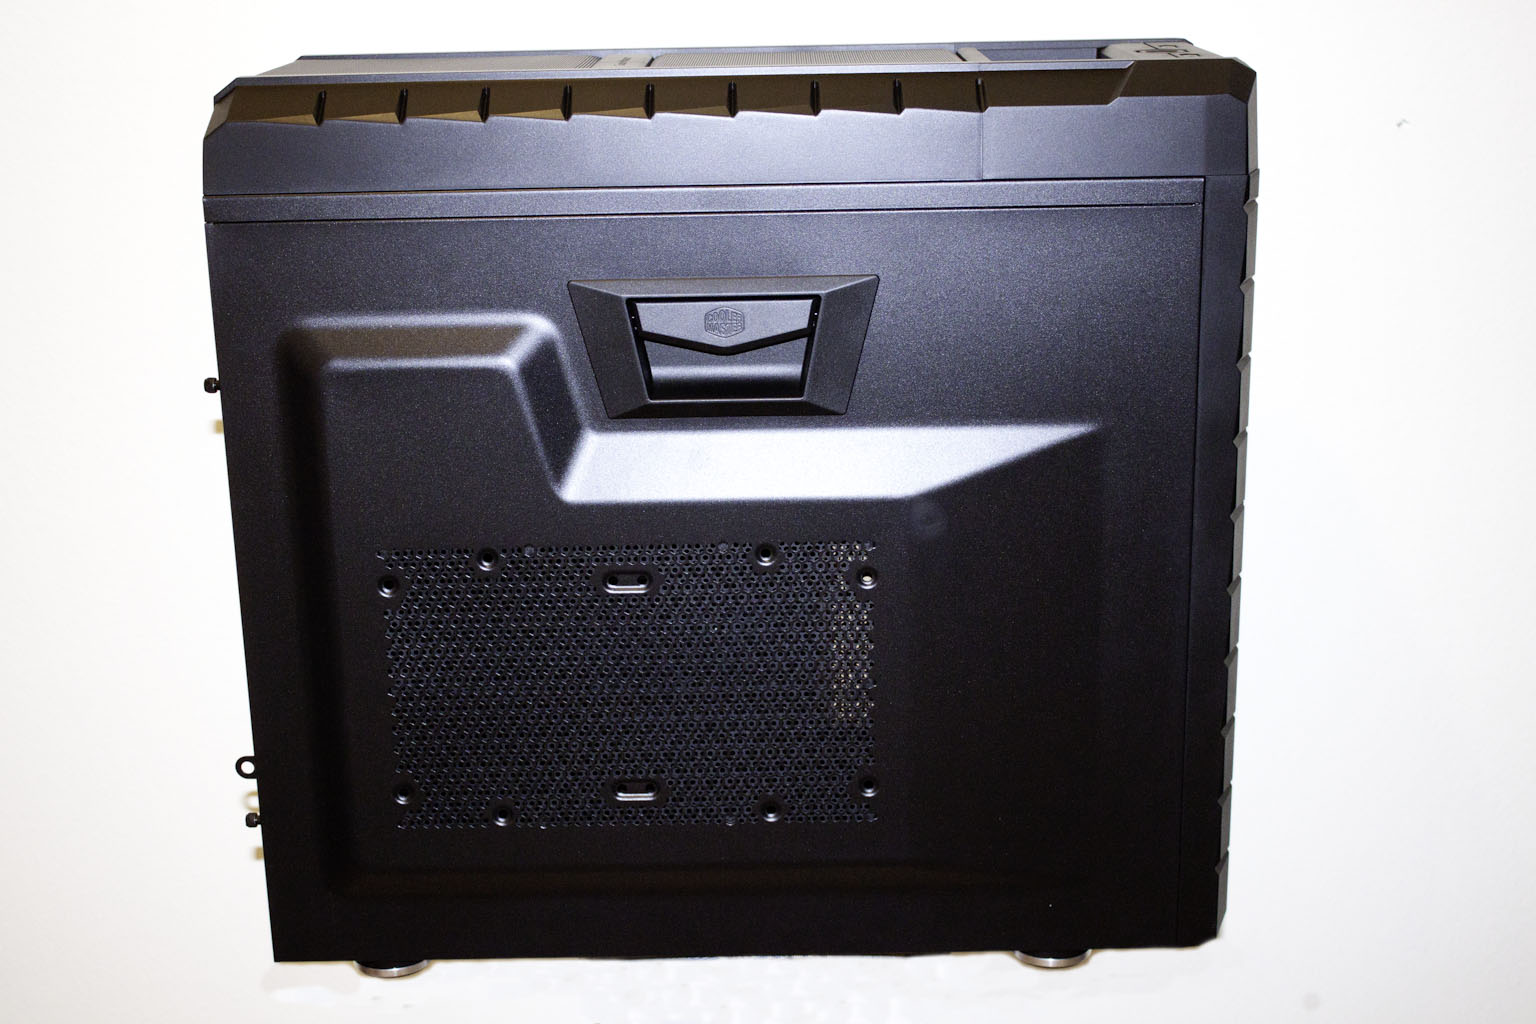
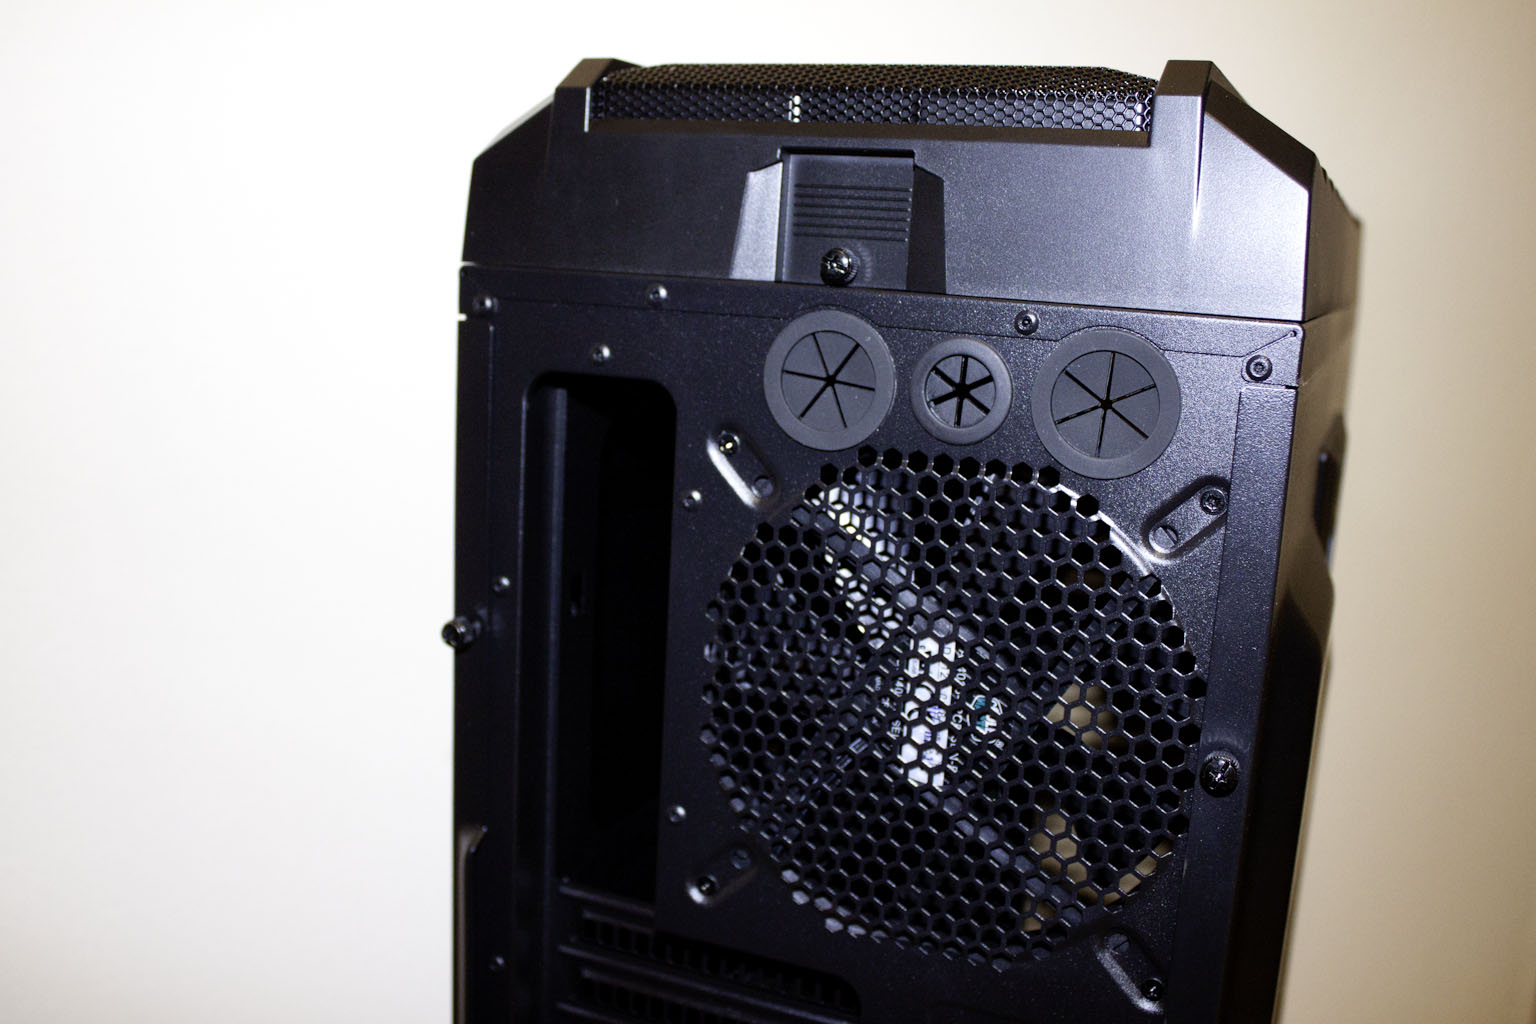
Checking out the HAF XM from the side you see that there is an opening on the side (with a mesh filter). That can support additional fans (as many as two 140mm fans or one 200mm fan). The height of this opening would put this right over your SLI or Crossfire setup forcing cooler air from the outside in (as we are sure you already noted). You do not get a window on the HAF XM and there are actually a couple of reasons for this; the first is simply to keep costs down, but another that might be overlooked by many is that Plexiglas actually retains quite a bit of heat. If you are serious about keeping things cool then a nice large window is not the way to do it. To make removing the working side easier Cooler Master has put in a handle. After you remove the two thumb screws at the back of the case you can quickly remove this panel with one hand. You simply lift the latch and the panel swings down.
 |
 |
 |
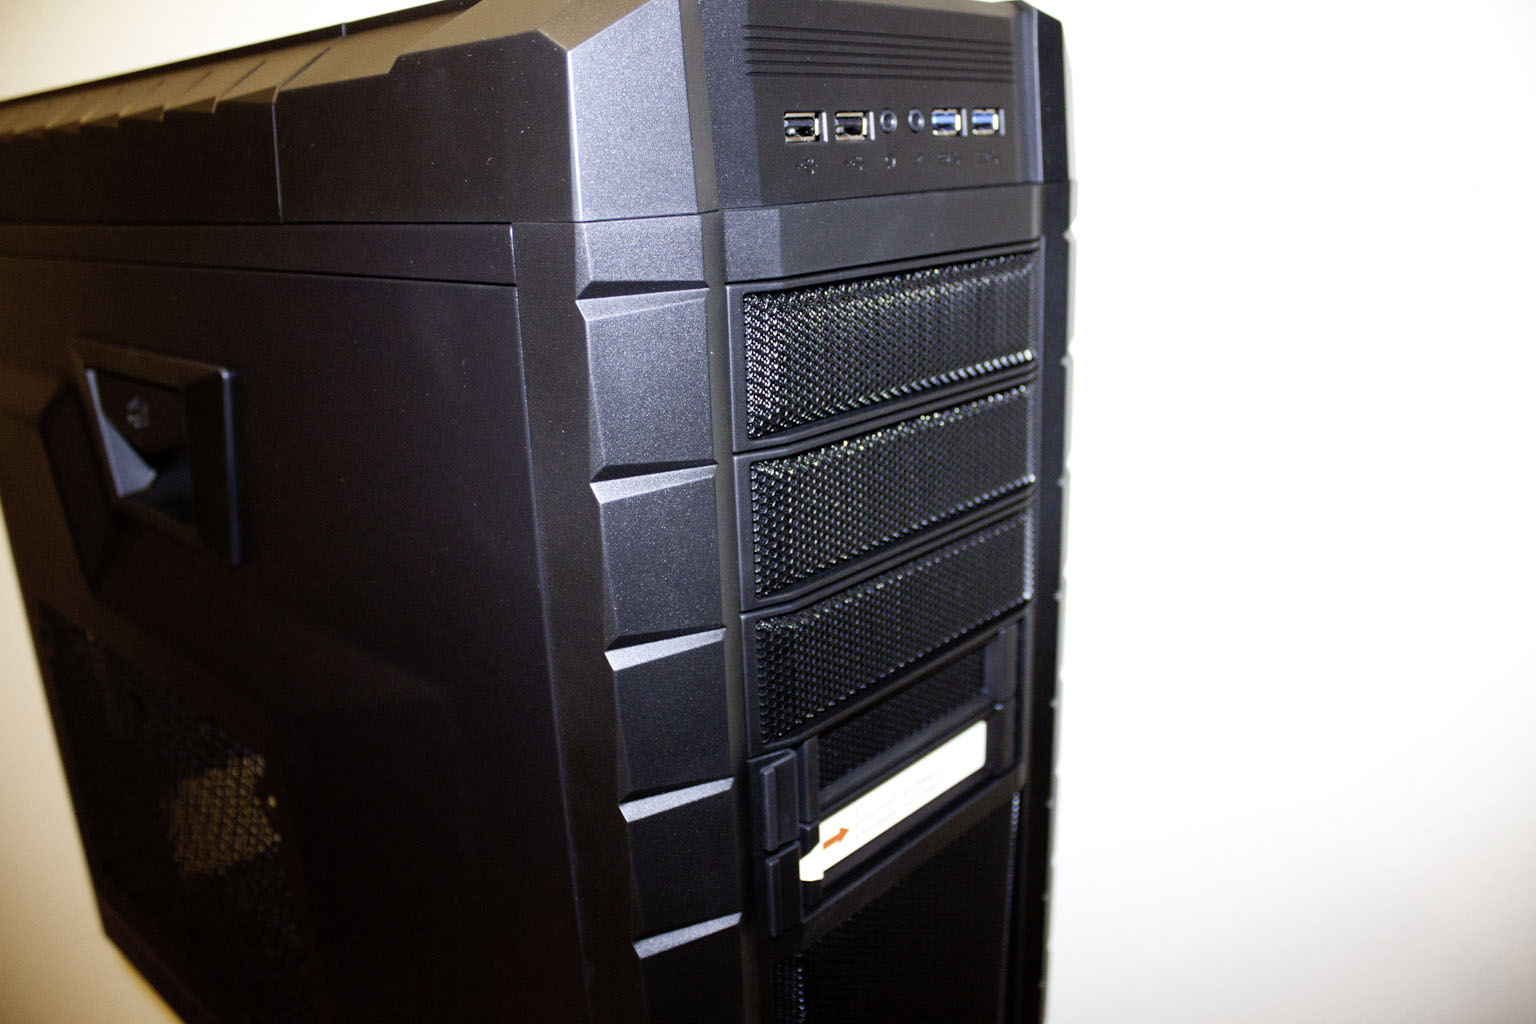
Twisting the HAF XM around a quarter turn we can see the front and all it has to offer. You get another large opening for air flow with a good dust filter and a 200m fan (lit by a red LED) to pull in air. Above that you have two X-Dock bays. These are pre-connected and powered bays that allow you to quickly access your system drives (great for backups). Above your X-Dock bays you have the traditional 5.25-inch bays for optical drives. At the top of the case you have your front panel I/O ports. Cooler Master has put in two USB 2.0 and two USB 3.0 ports here (the USB 3.0 will run off of a motherboard header); these are on either side of the typical headphone and microphone jacks.
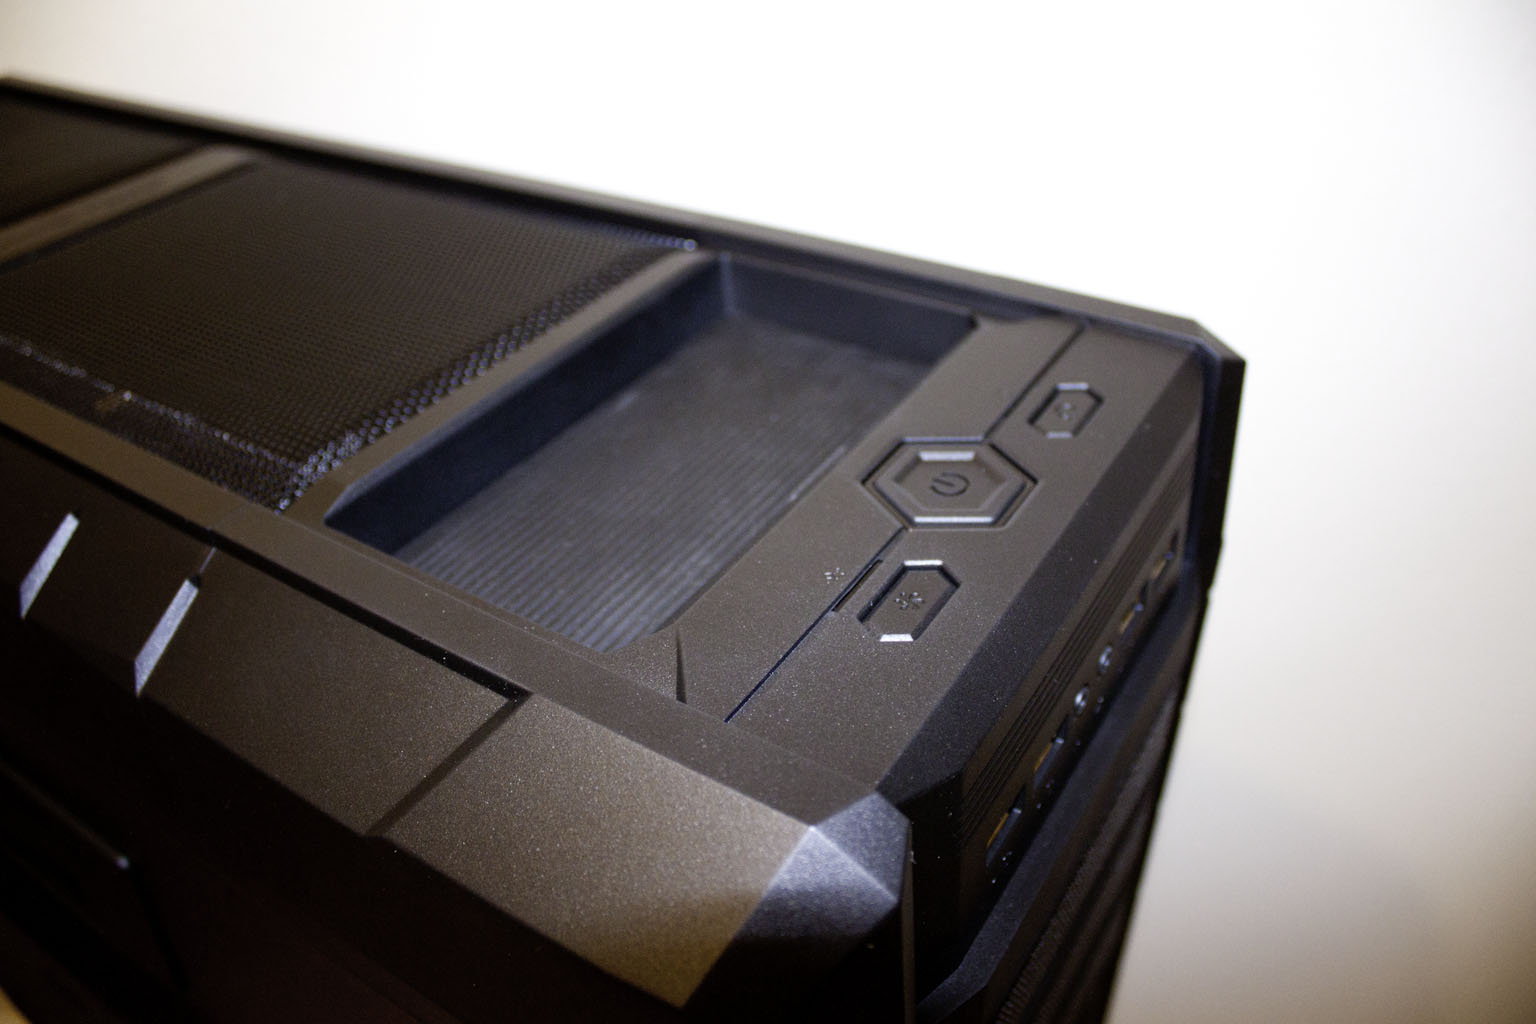
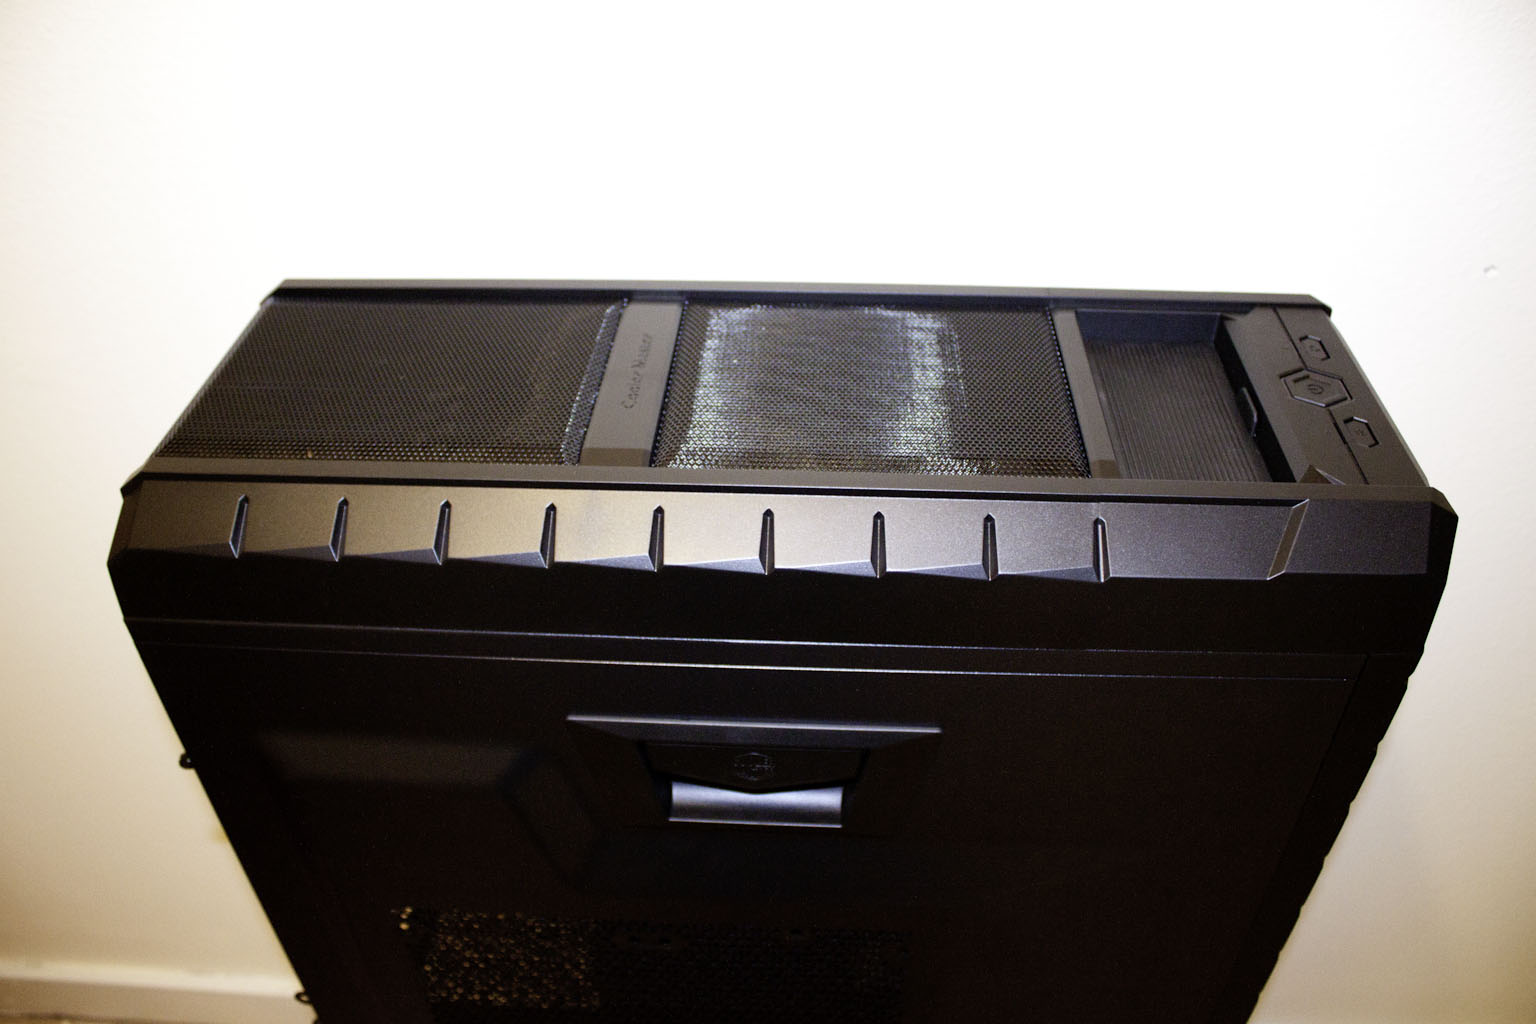
On top of the case you have a large hexagonal power button in the center of two smaller buttons. The one on the left will turn the LEDs on and off while the one on the right will reset your system (if it gets to that). There are also two LEDs embedded in a line right behind these buttons. These are for power and HDD access. There is a tray of sorts behind the control cluster that you can store things in. It is lined with a nice rubber matt that can be removed for cleaning. It is a great place to put USB flash drives or devices that charge via USB.
 |
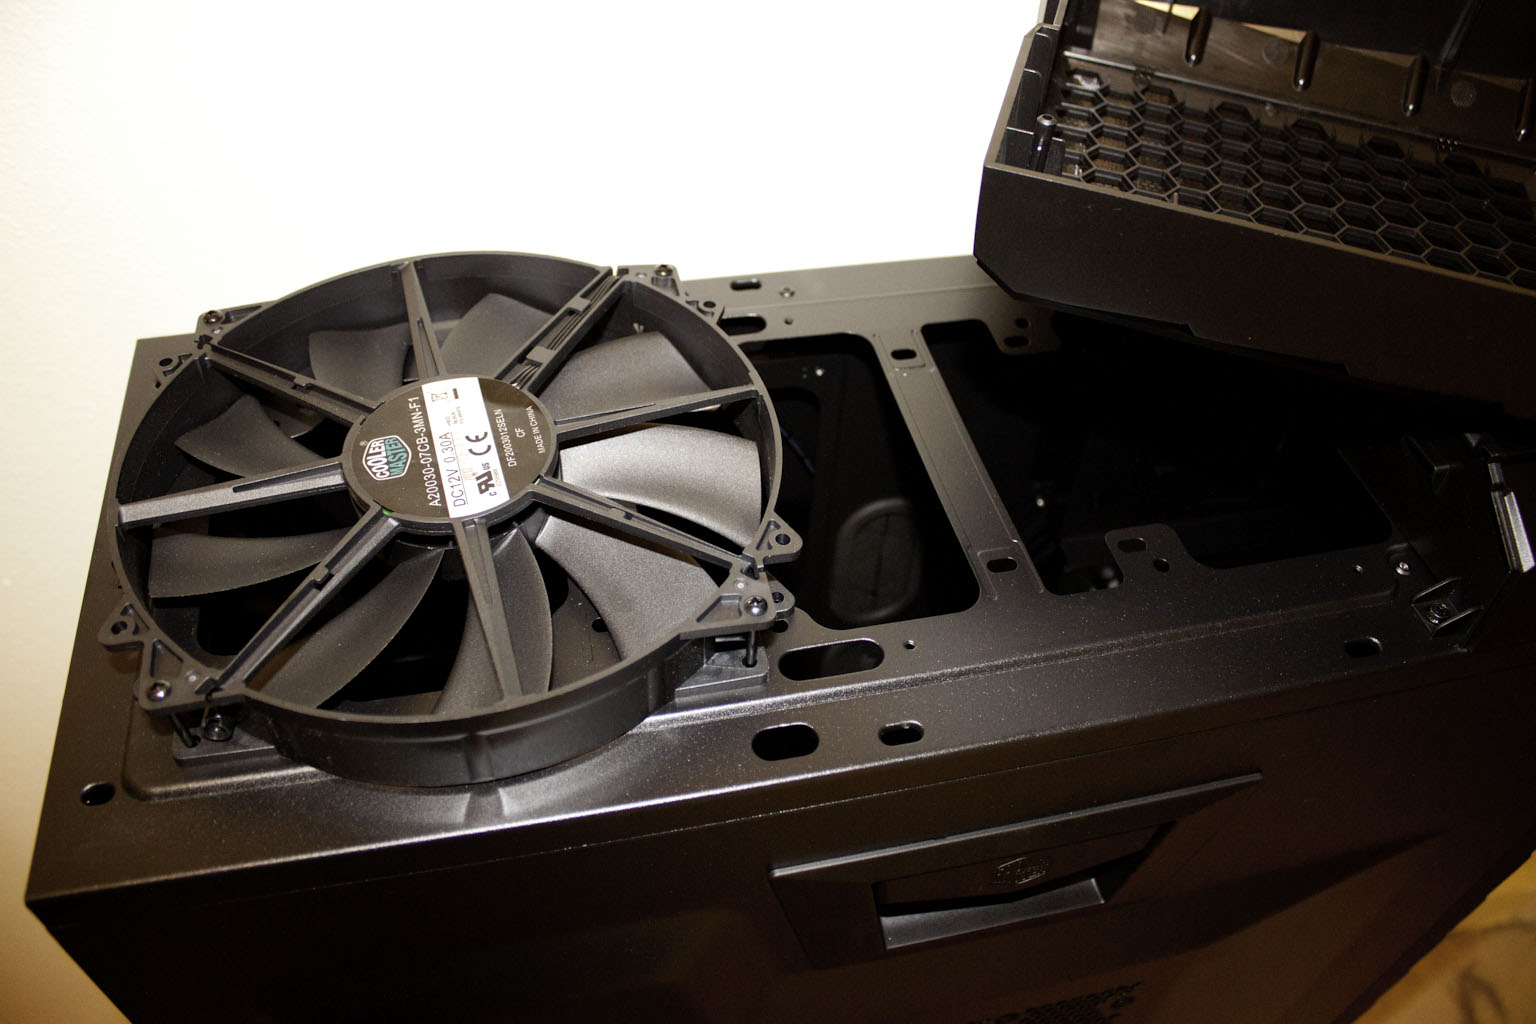 |
Right behind this we find two openings for top mounted fans. Cooler Master gives you one 200mm fan with the HAF XM but you will need to buy the second if you want both running. You could also remove the fans and mount a sizable radiator up here (a 280mm radiator will fit here). The fans are accessible by removing a single thumb screw at the back of the case.
 |
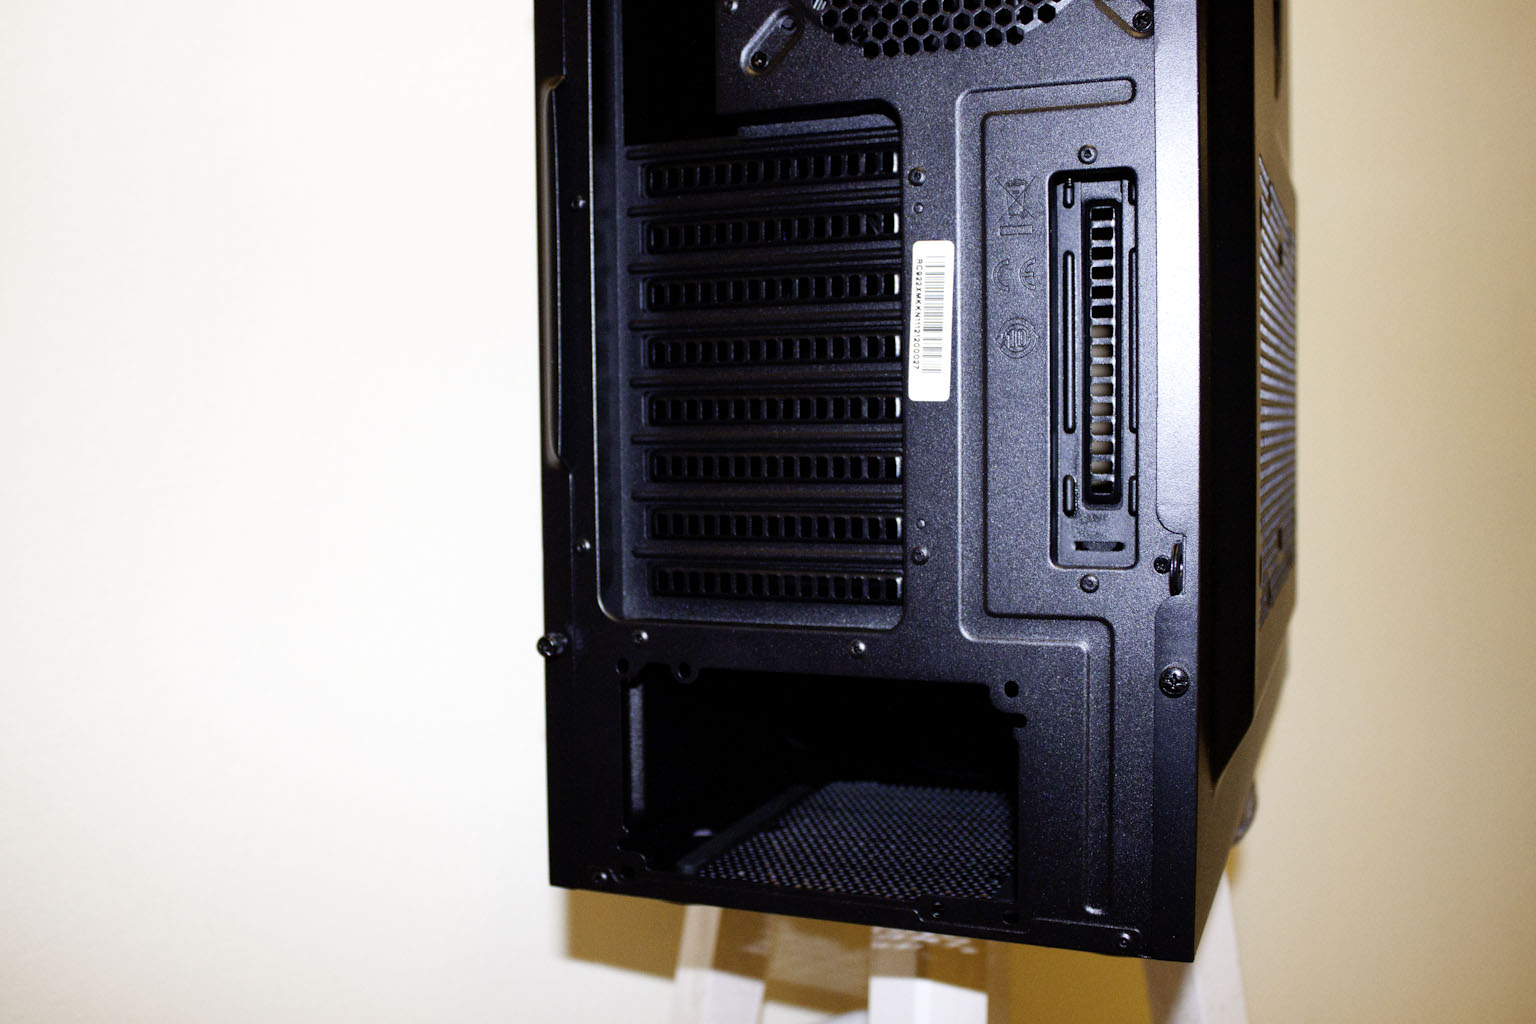 |
Moving around to the back we find what looks like a very typical ATX case with a bottom mounted PSU. That is until you see how wide it is. The HAF XM is thicker than most cases. This gives you extra room for tall heat sinks (while the extended side panel s lets you keep the 200mm fan). For expansion ports you get 8 slots. This is great for that three-way SLI and Crossfire which not all that common in a mid-tower case. Beside the peripheral expansion slots there is an auxiliary slot. This slot is great for things like USB headers or if your audio card has extra components that would normally take up space for real peripherals.
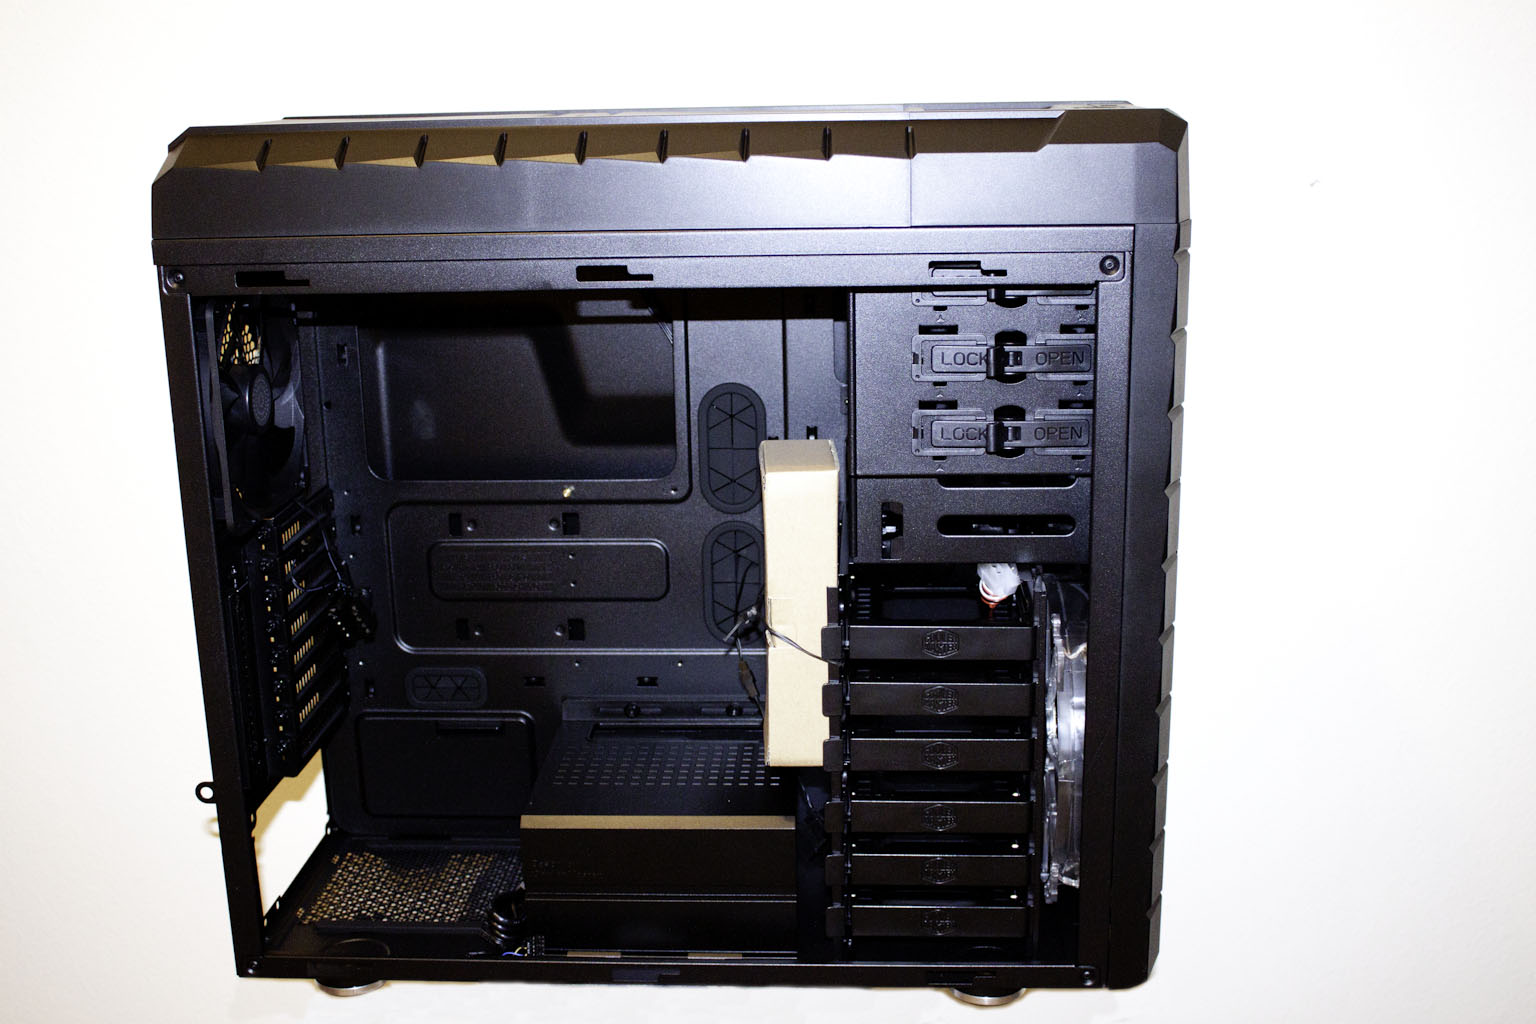
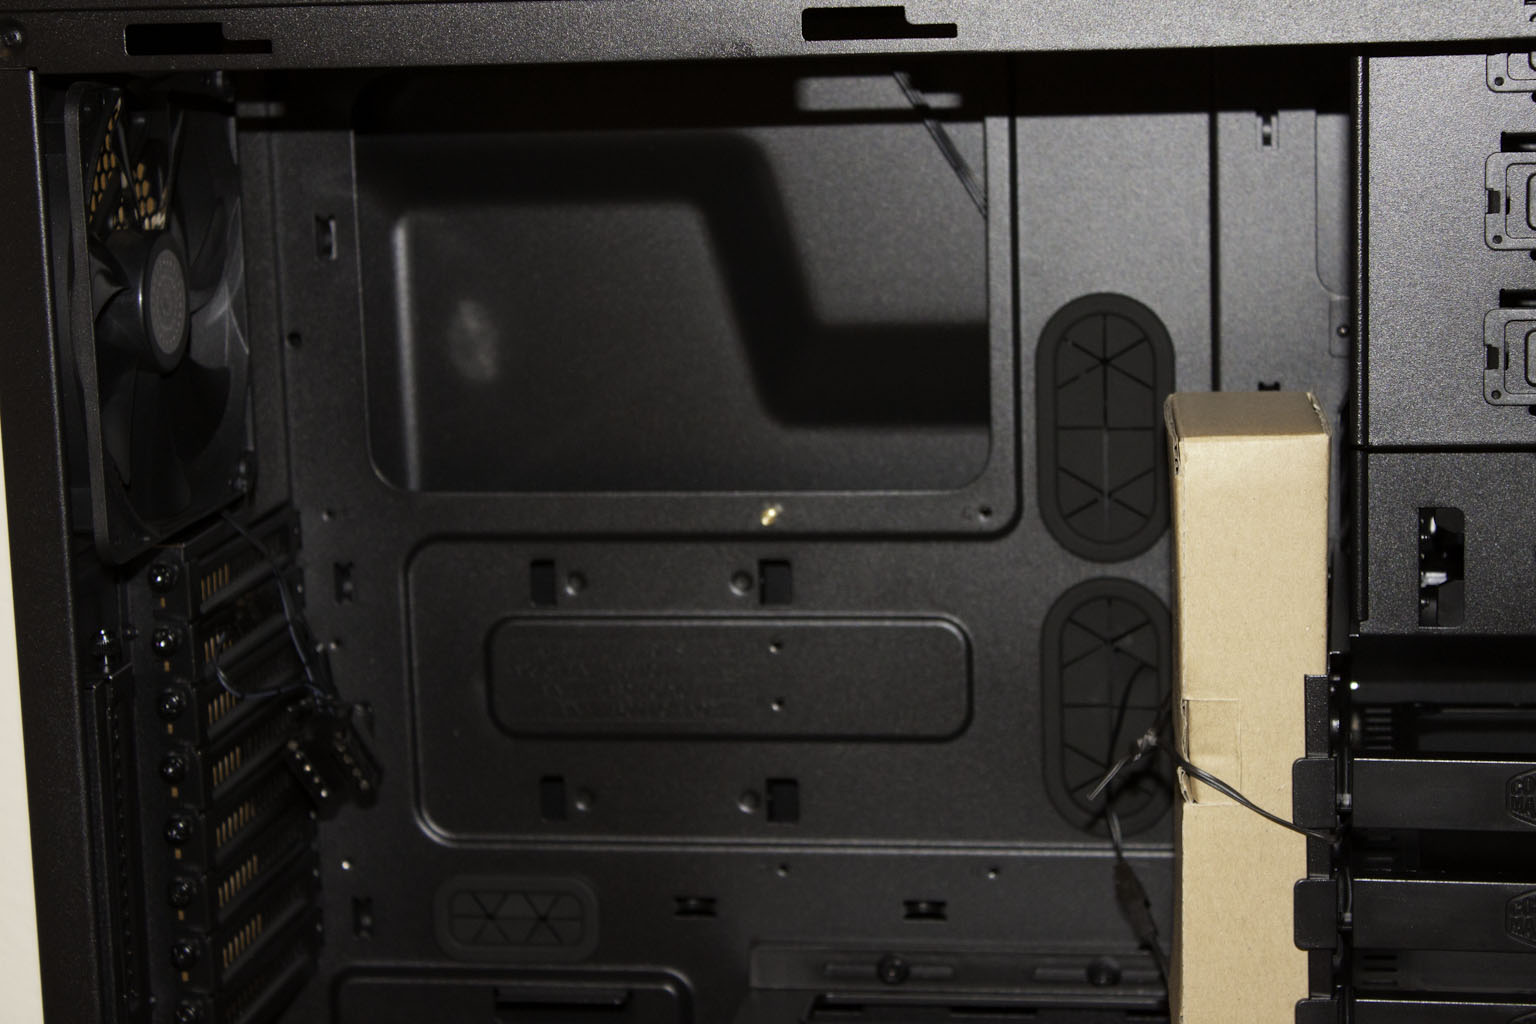
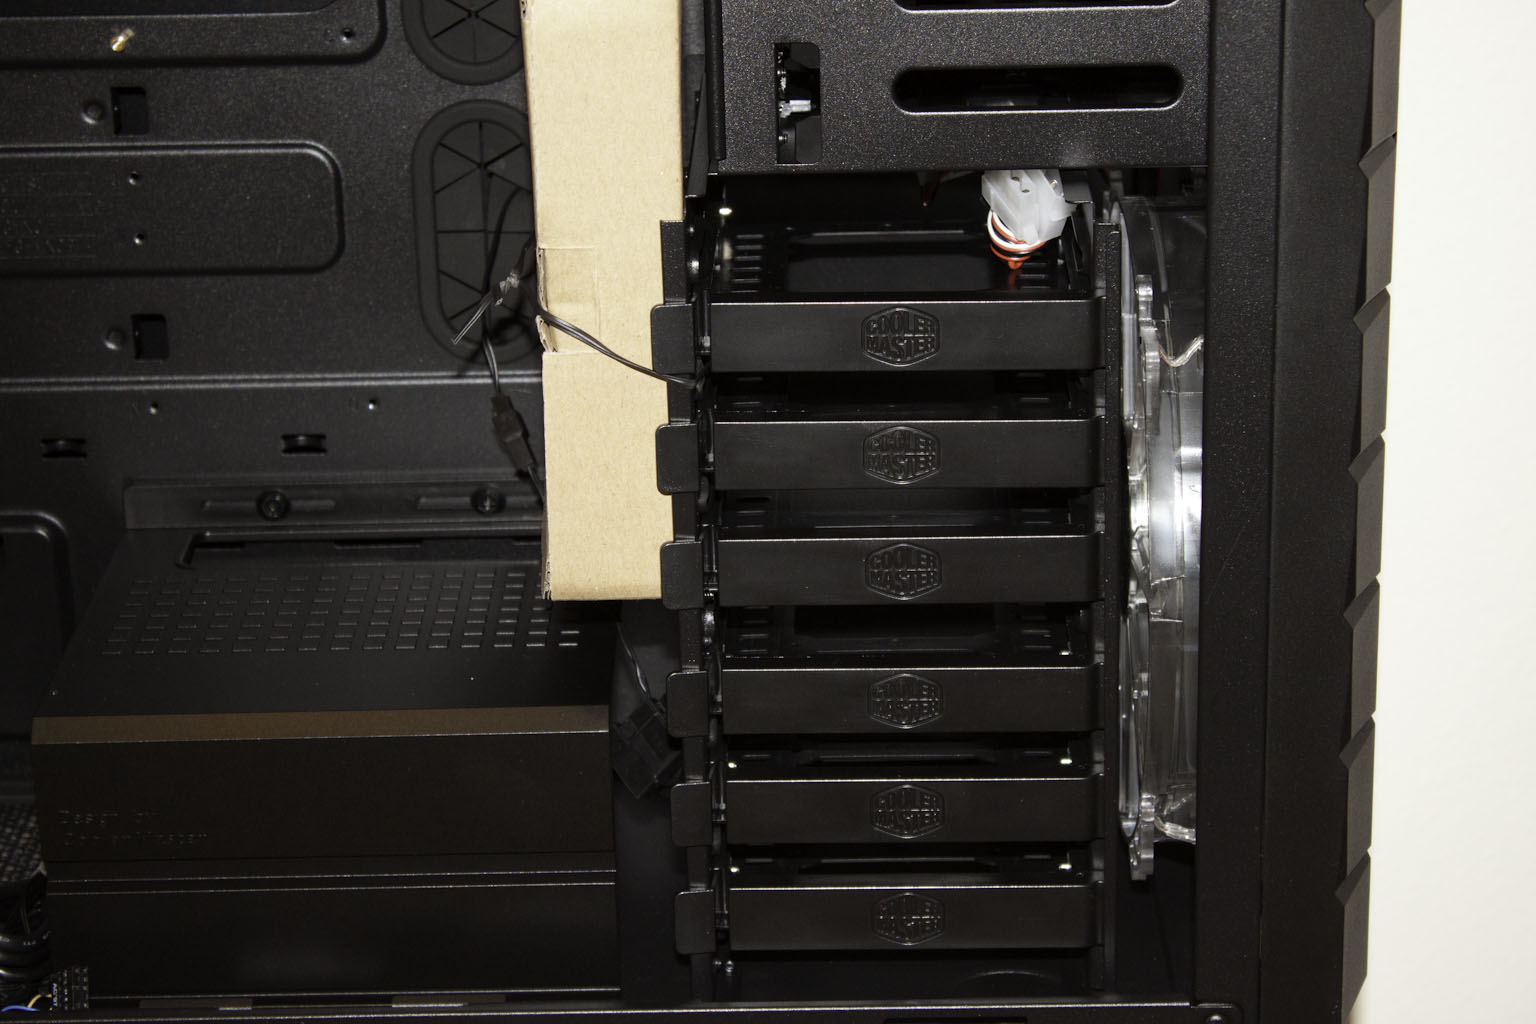
Now that we have covered the outside lets pull off the side panel and see what is inside. Cooler Master has certainly given you a lot of options inside the HAF XM. You have six side mounted 3.5-inch drive bays that are slide-out trays. You can see that 200mm fan we talked about before and the side mounting allows for better cooling than the more traditional front to back mounting (it is also easier to get the drives in and out once the motherboard and other components are in). The 5.25-inch bays are all tool-less. Installation is accomplished with a simple lever. Cooler Master even added in a 2.5-inch SSD bay on the back plane just for good measure.
 |
 |
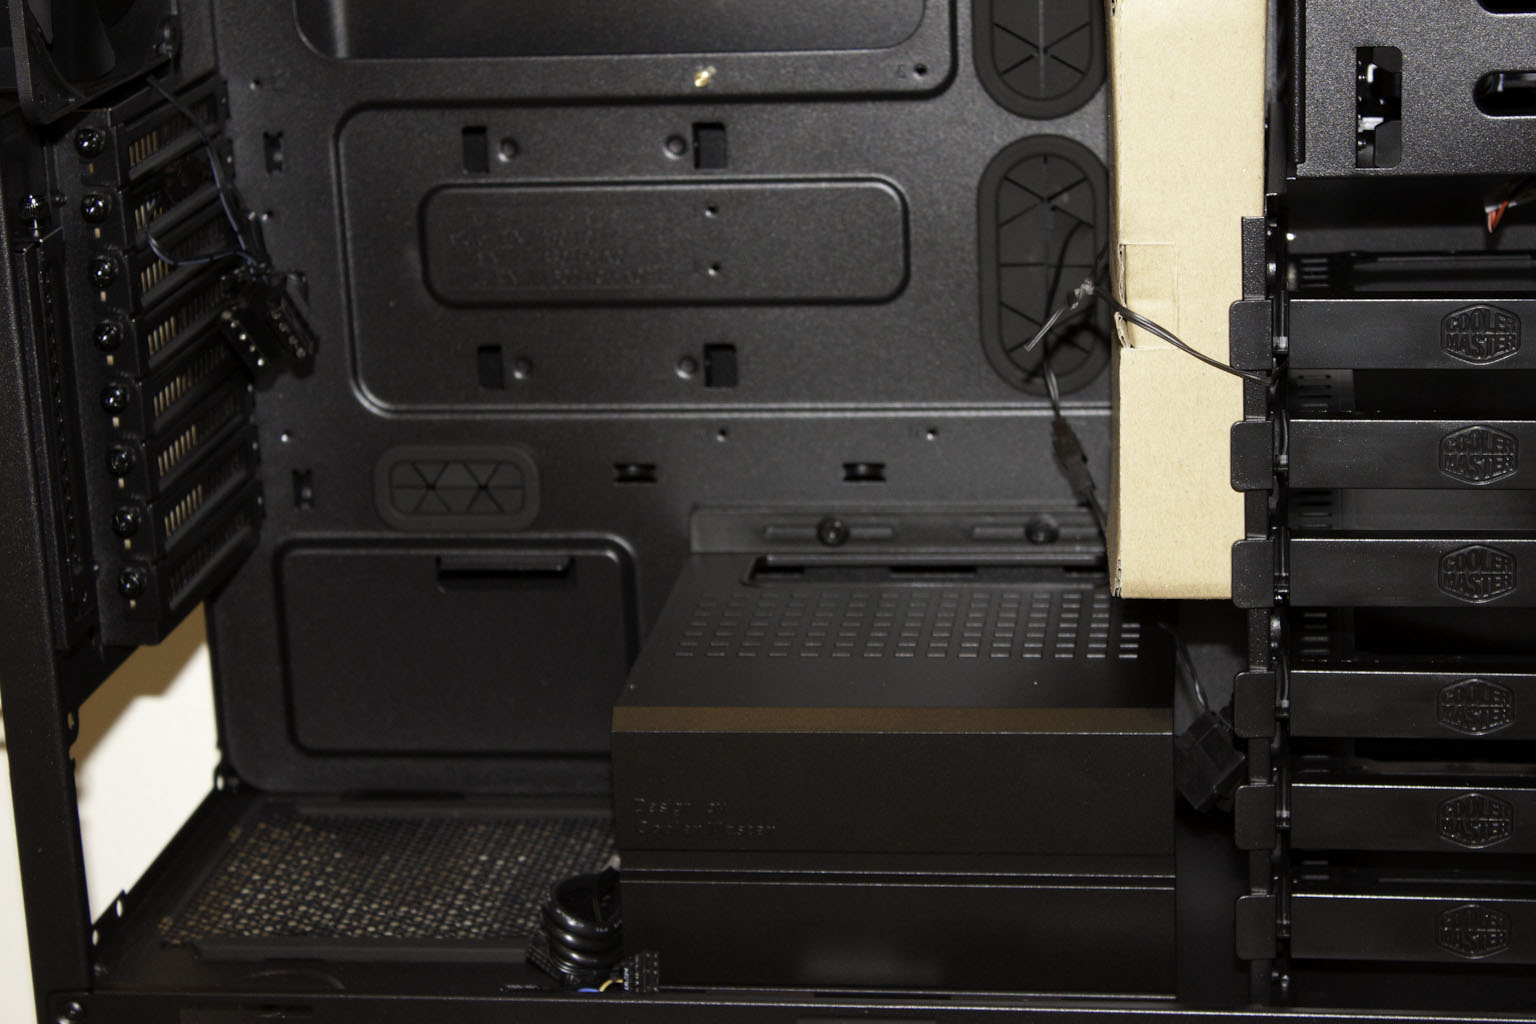 |
The backplane is clean with a large opening for installing heatsinks or water blocks while the motherboard is already mounted. There are multiple cable pass-through areas for solid cable management (even for someone like me). You also get a nice shroud to hid any excess cables if you are not using a modular power supply. This last is a great touch as it does help keep things cleaner and even cooler.
The HAF XM looks to be very well put together so far. Now let’s see how easy it is to build a system into it.
